
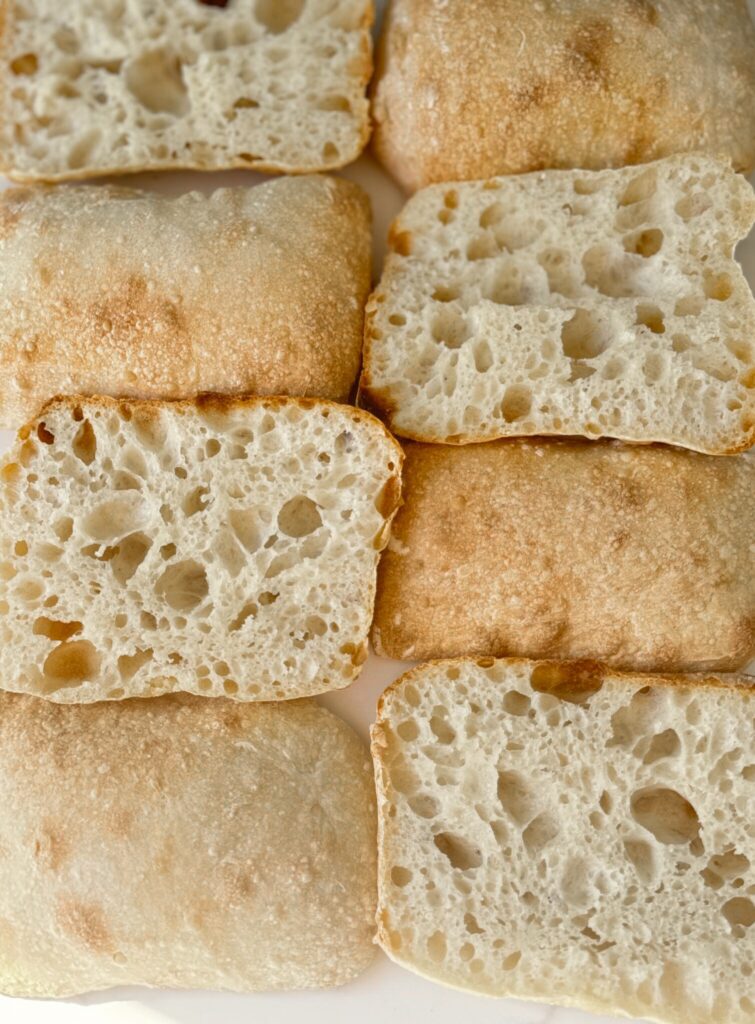
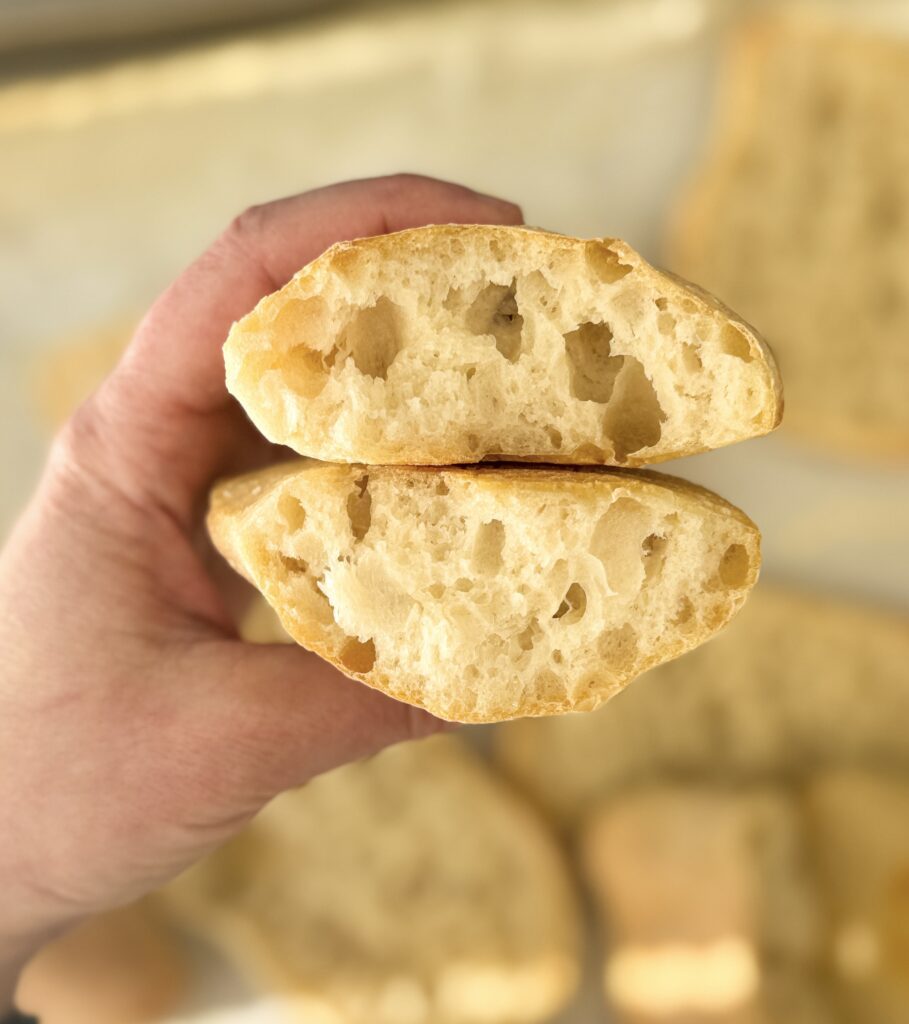
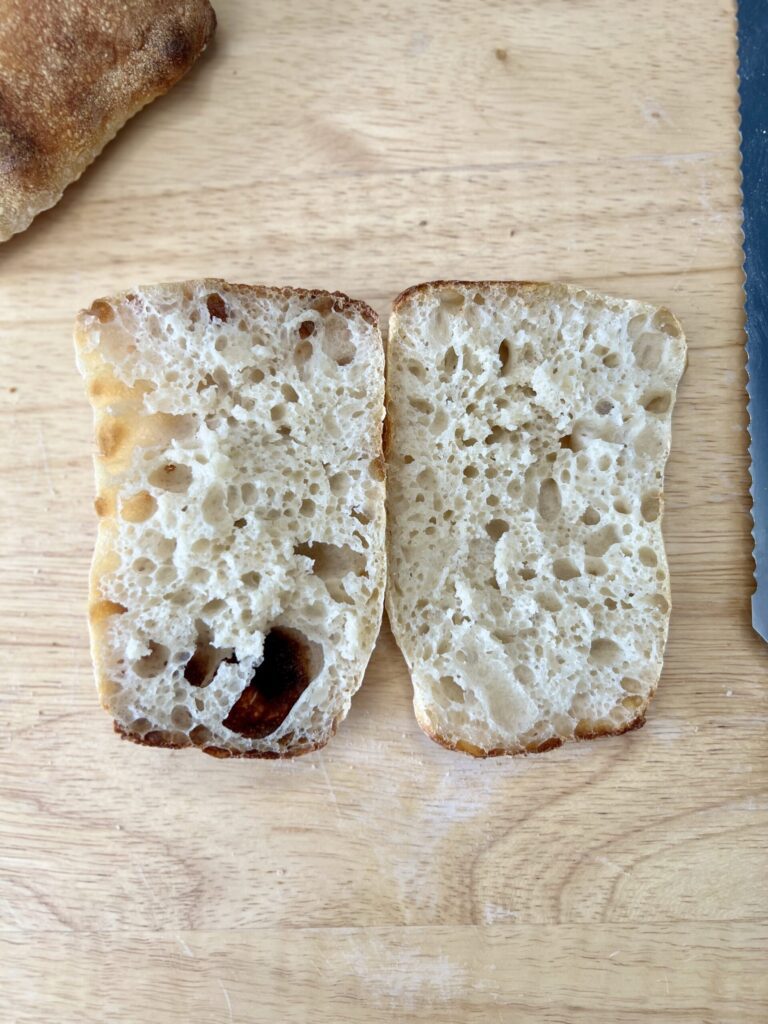
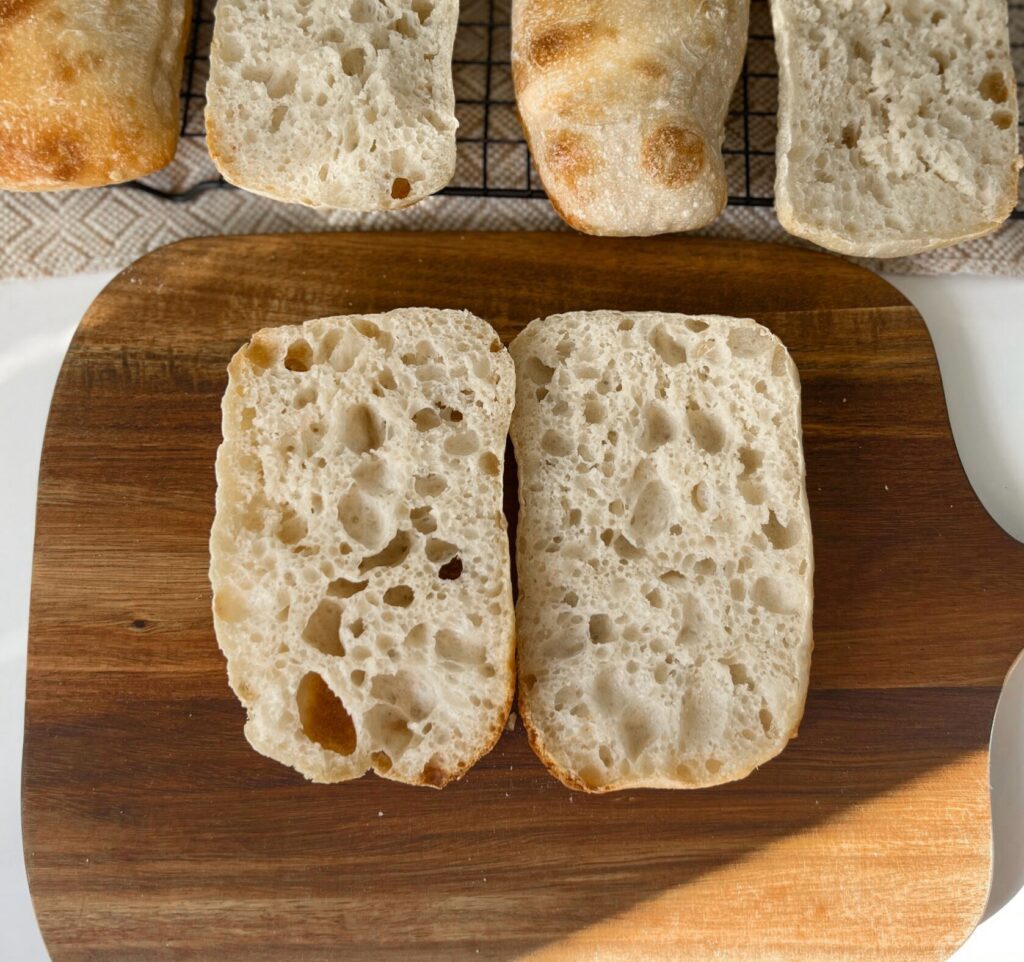
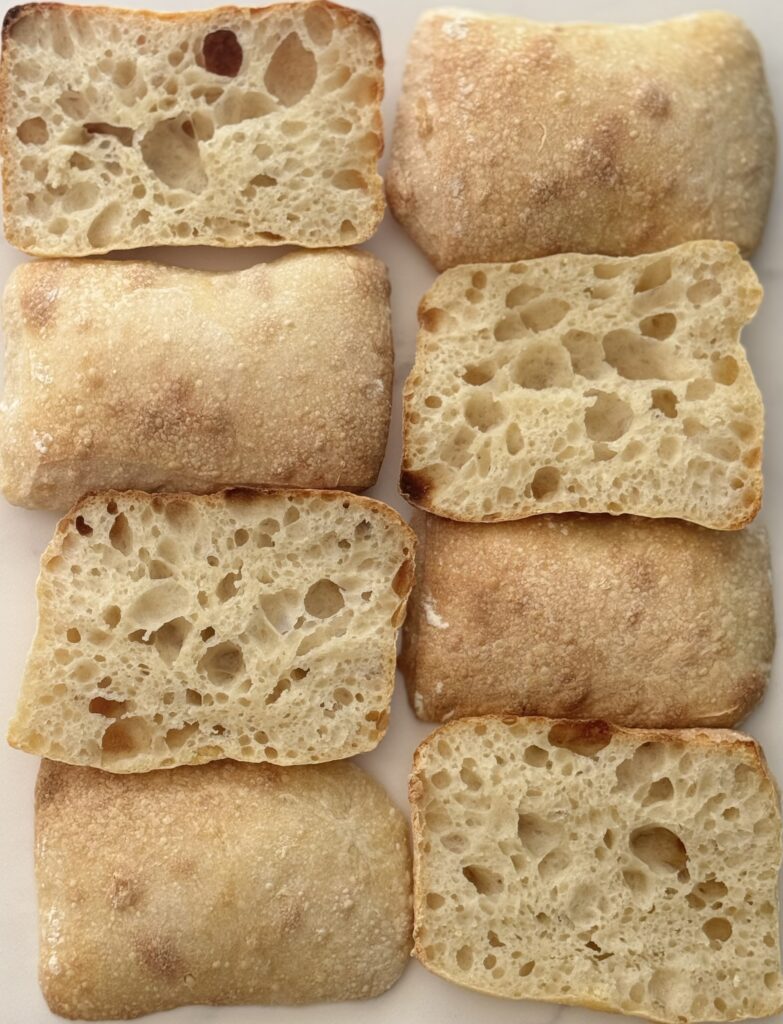
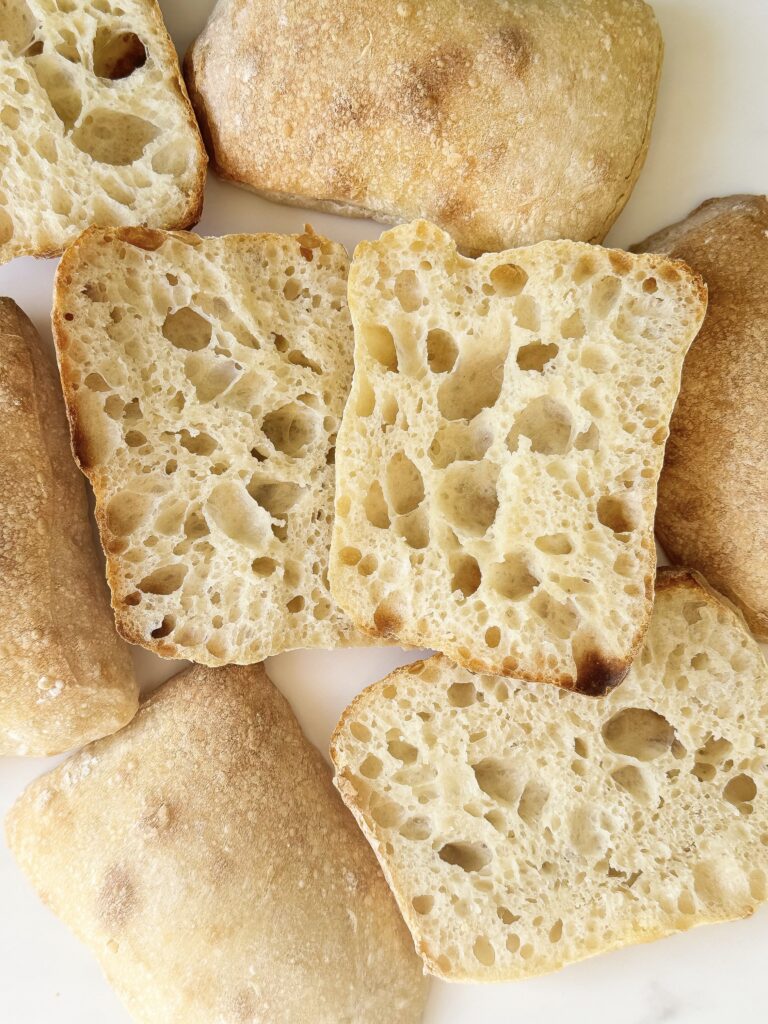
This sourdough ciabatta bread recipe is so easy and delicious, you may never want to eat your sandwich any other way! Ciabatta bread is known for having an airy and porous texture with the slightest crispy crust.
In this recipe, I give you the option to lower the hydration just a bit to make it more approachable, but it does not skimp out on ciabatta’s classic texture and flavor. All you need is 4 simple ingredients (flour, water, sourdough starter, & salt) and you’ve got yourself the best homemade, classic ciabatta bread!
- What is sourdough ciabatta bread?
- Three ways to enjoy your sourdough ciabatta bread
- Why you’ll love this recipe
- Tips before baking:
- FAQ + Troubleshooting
- How to make sourdough ciabatta bread: step-by-step
- Mix the dough
- Strengthen the dough & coil folds
- Coil fold the ciabatta dough
- Coil folding ciabatta dough-video
- Transfer the dough to the proofing container
- Shape the sourdough ciabatta dough
- Shaping sourdough ciabatta bread-video
- Bake the sourdough ciabatta bread
- Storage Instructions
What is sourdough ciabatta bread?
The word “ciabatta” means “slipper” in Italian, referring to the bread’s unique shape. Ciabatta is a type of Italian bread that is characterized by its oval shape and airy, porous texture. It is made with a mixture of flour, yeast, salt, and water, and is typically baked in a hot oven to produce a crisp crust. When baking it with a sourdough starter, it takes the place of the yeast. The long fermentation process gives this bread a deeper flavor profile, making it incredible!
Three ways to enjoy your sourdough ciabatta bread
- Toasted with olive oil and balsamic vinegar: Toast slices of ciabatta bread and brush with olive oil. Sprinkle with salt and black pepper, and then drizzle with balsamic vinegar for a simple and delicious snack or appetizer.
- As a sandwich: Use slices of ciabatta bread as the base for a hearty sandwich filled with your favorite ingredients.
- With dips or spreads: Ciabatta bread makes an excellent addition to any dip or spread platter, as its large surface area provides plenty of room for dipping and its porous texture soaks up flavors beautifully. Serve it with hummus, pesto, or bruschetta topping.

Why you’ll love this recipe
- Optional hydration. Typically, sourdough ciabatta bread recipes use 80% or higher hydration, but this one can be modified between 77% and 80%. This makes the dough easier to work with and less intimidating if desired.
- Minimal prep work. The only prep work comes with mixing the dough and a few stretch and folds. Then place it in the refrigerator until ready to bake. You’ll find the steps straightforward & simple.
- Minimal equipment. The only baking equipment required is a baking sheet and parchment paper. Nothing fancy is required!
Tips before baking:
- Sourdough starter: For a successful rise, I recommend feeding your starter 8-12 hours before you plan to mix the dough. For instance, I feed my starter the evening before (7 PM) I plan to mix the dough. I will mix the dough at 7 AM the following morning. You want to use an active, bubbly starter.
- Proofing container: After the dough has been mixed and 4 stretch and folds have been completed, I recommend placing the dough in a rectangular proofing container. This helps with accurately assessing the rise and also allows for easy shaping. I use this one, but any container around 8.5 cups will do. You want the dough to increase by 50-75% in volume.
- Rise times: For the first bulk rise, it took mine about 6 hours to increase a bit more than 75% at 70 degrees F. You may need a few extra hours if it is cooler than this or you may need less time in a warmer environment. Watch the dough, not the clock.
FAQ + Troubleshooting
Why is my dough so sticky?
That’s normal! Ciabatta is a high-hydration dough, so it will feel much stickier than normal dough.
At first it may seem messy, but after a few stretch and folds, it should become smoother and more elastic — almost silky. Use wet hands and lightly flour your surface. Trust the process.
If it pours like batter, that’s too wet. Sticky and stretchy is perfect.
Why isn’t my ciabatta browning?
Usually it’s one of three things:
- Oven temperature is too low
- It is underproofed
- It simply needs more time
Ciabatta should bake at high heat and turn deeply golden. If it looks pale, give it a few more minutes.
Why is my ciabatta hollow inside?
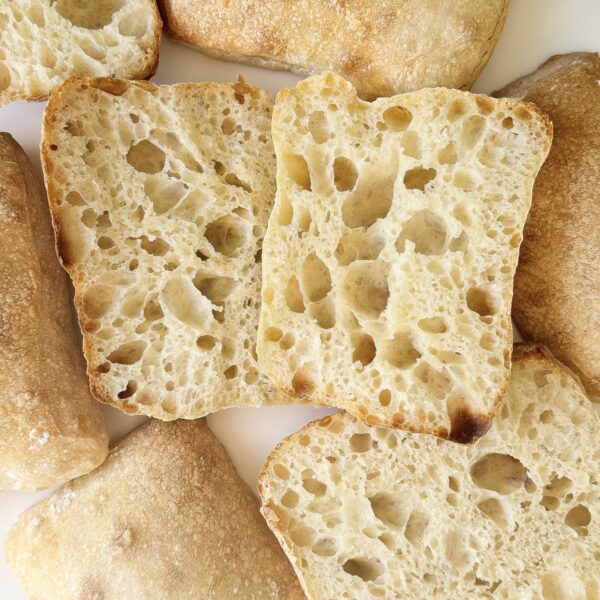
A slightly hollow, airy crumb is normal — that’s classic ciabatta.
If it feels excessively empty or separated, it may be:
- Overproofed
- Overhandled during shaping
- Slightly underbaked
Handle gently and bake until fully set (about 205–210°F internally).
Why didn’t I get big open holes?
Open crumb depends on:
- Proper hydration
- Strong gluten development
- Adequate fermentation
- Gentle handling
If your crumb is tighter, try an extra stretch and fold or slightly longer bulk fermentation next time.
Why did my dough spread out instead of rising up?
Ciabatta naturally spreads, but excessive spreading can mean:
- Not enough gluten development
- Overproofing
- Lower-protein flour
Bread flour helps provide better structure.
How to make sourdough ciabatta bread: step-by-step
Baker’s schedule: feed your sourdough starter the evening before you mix the dough. Mix the dough early in the morning (8 AM) to bake for the following day.
Ingredients
- 100 grams active sourdough starter
- 385-400 grams of water (see notes)
- 500 grams of bread flour
- 10 grams salt
- 5 grams of EVOO (optional)
Equipment
- mixing bowl
- rectangle proofing container
- baking sheet
- parchment paper
- bench scraper
- dough scraper (not required, but handy)
Hydration: This recipe can be done with 385 grams of water or up to 400 grams. You may want to start with 385 and then work your way up. Either way, the result will be lovely.
Mix the dough
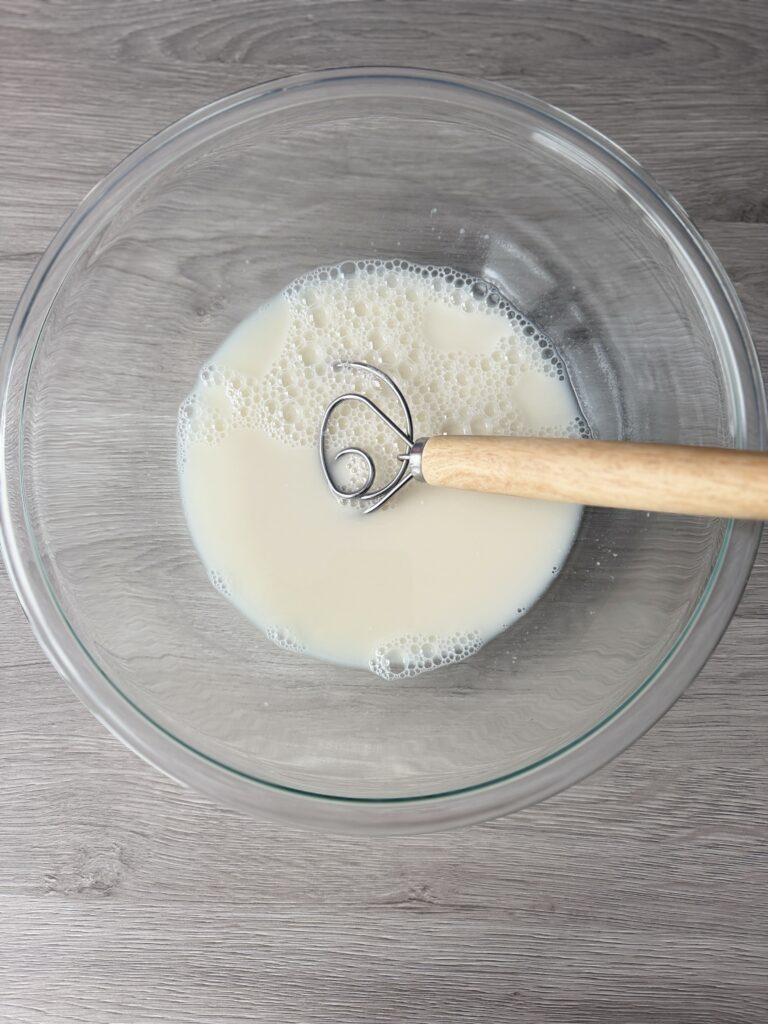
- In a mixing bowl, whisk together the sourdough starter and water until mostly dissolved.
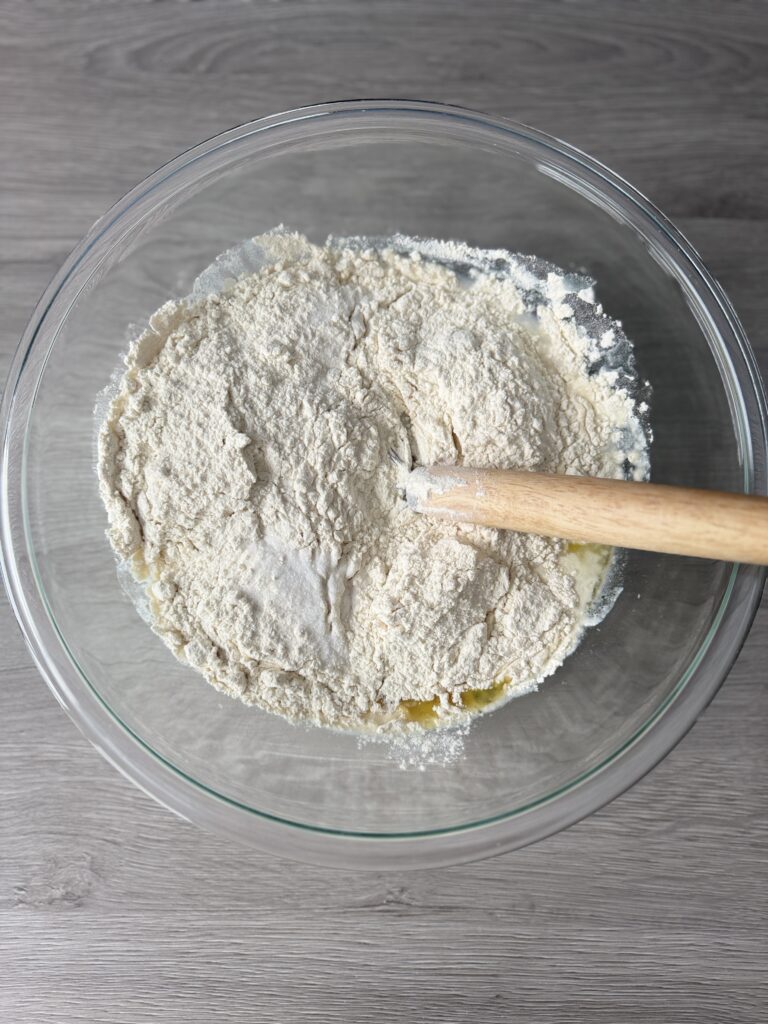
- Then, add the flour, salt, and olive oil (if using), and mix until the flour has absorbed all the water. It will be very sticky (this is normal).
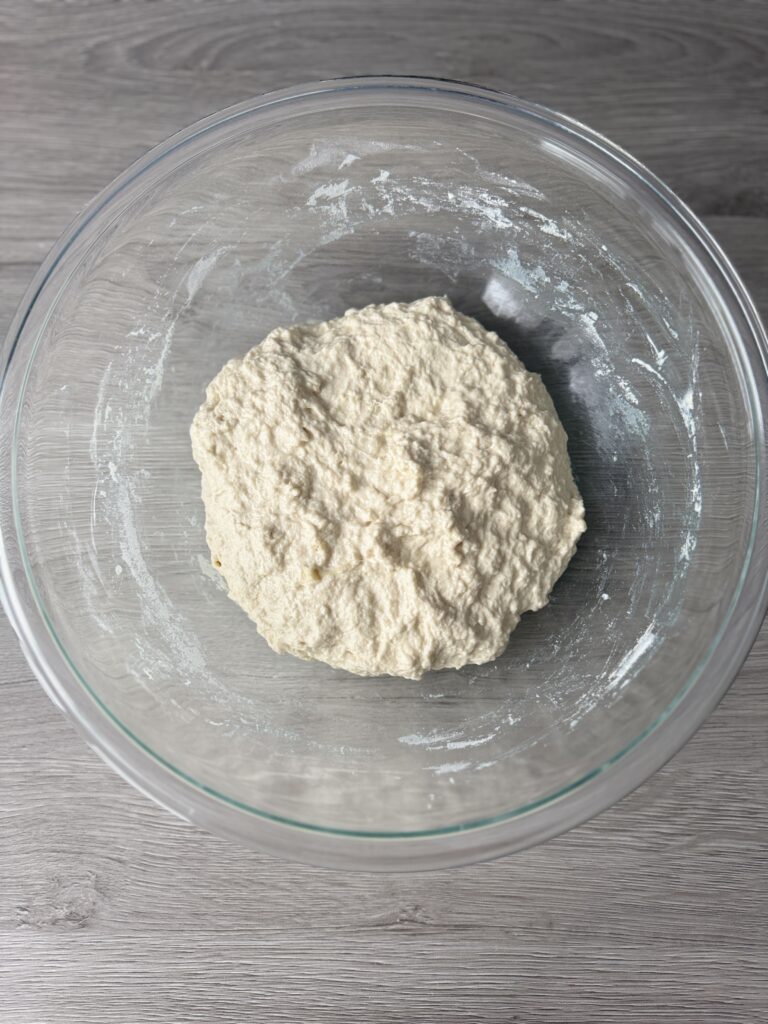
- Cover the bowl with plastic wrap and let it rest for 30 minutes.
Strengthen the dough & coil folds
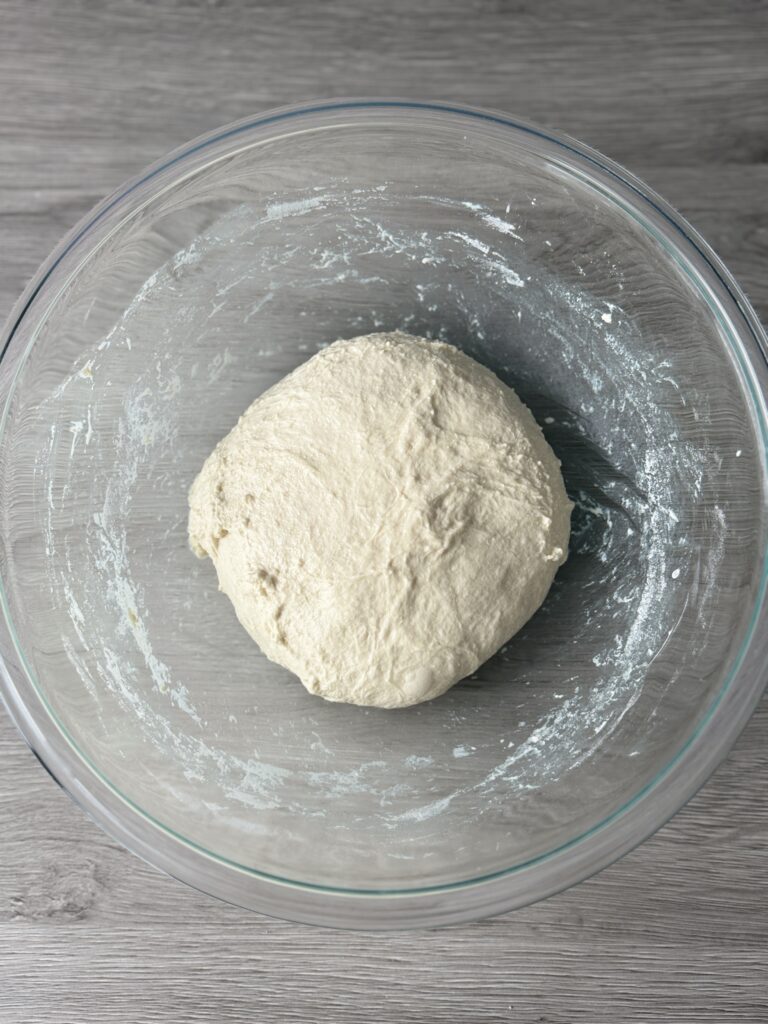
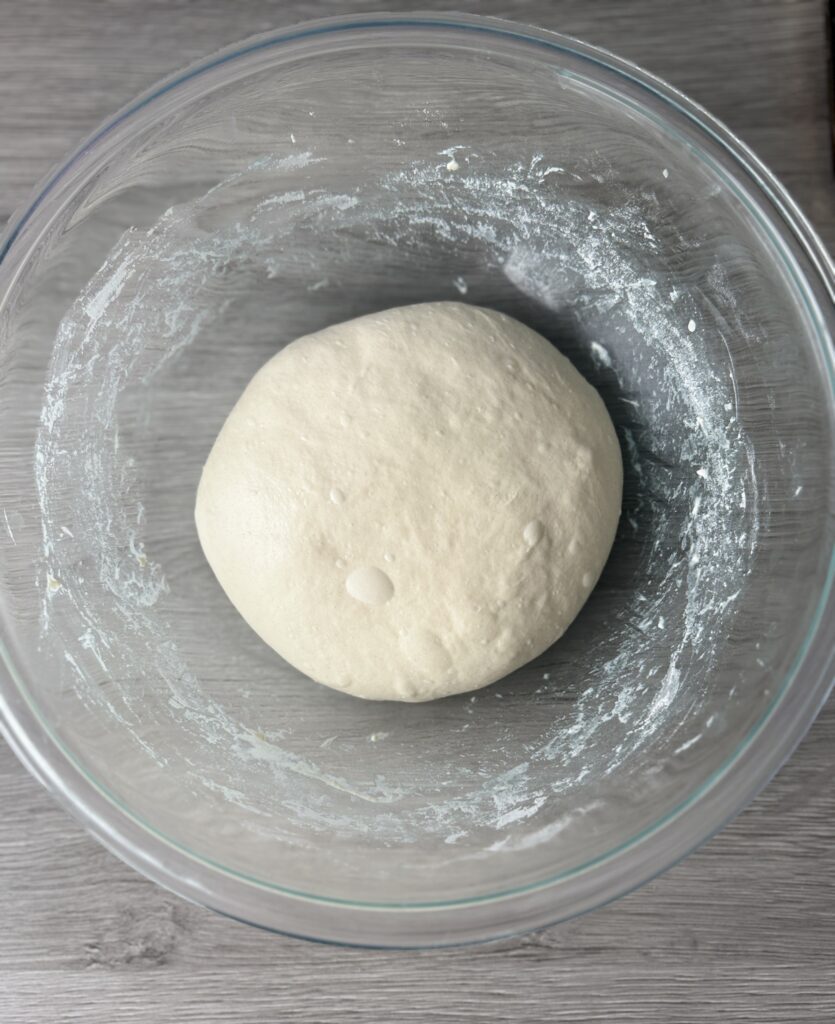
- After the dough has rested, work the dough into a ball by folding it into itself a few times (keep it in the bowl). *Tip: wet your hands to avoid the dough from sticking.
- Allow it to rest for 15 minutes (it will still be very sticky-all normal).
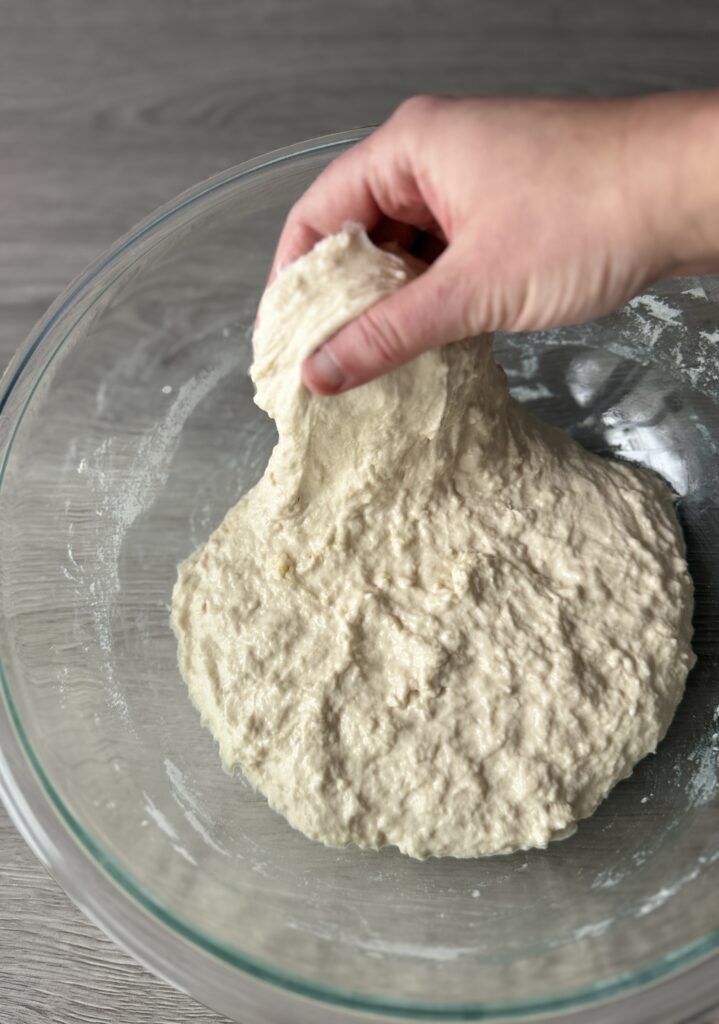
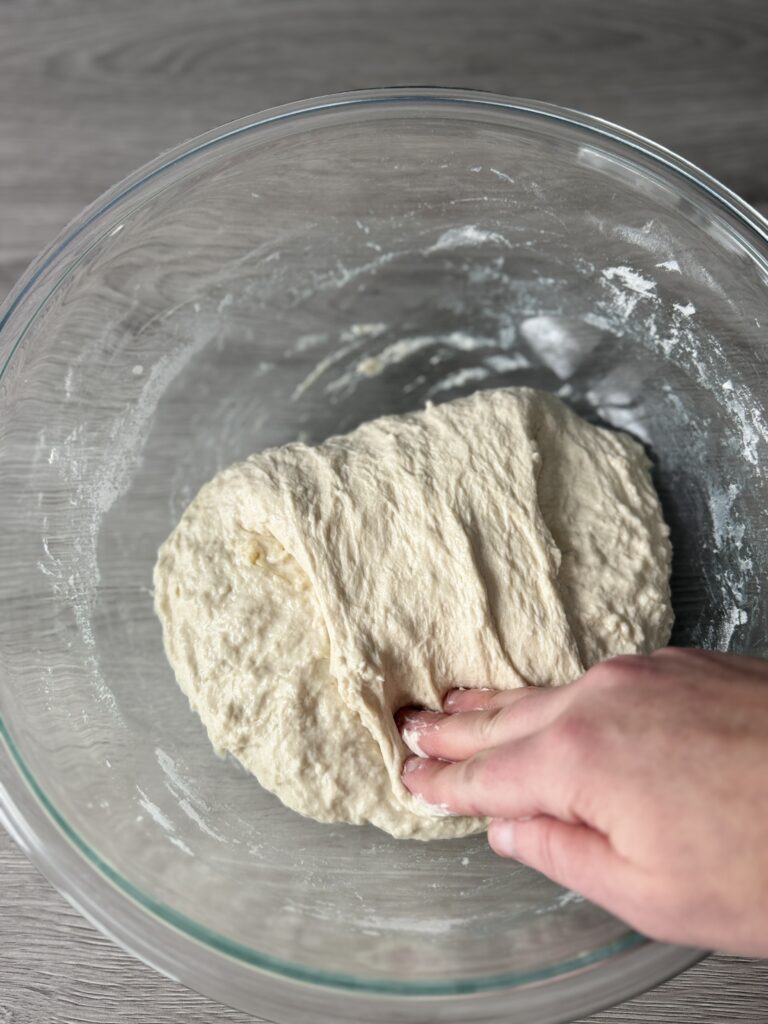
Coil fold the ciabatta dough
Coil folding is a technique used in sourdough bread making to strengthen the dough and improve its structure. I prefer this method for this recipe as it is a softer approach to this delicate dough (see video below for demonstration).
Tip: lightly wet your hands to avoid the dough sticking to them.
- Gently reach under the dough with your wet hands and lift it up.
- Stretch the dough upwards, then fold it under the center of itself.
- Turn the dough 90 degrees and repeat the lifting and stretching process.
- You can continue to turn the dough and fold it a few times, usually 4-5 times in total, to make a complete “coil.”
- Once complete, cover the dough and allow it to rest for 30 minutes.
- Perform 3 more coil folds within 30-minute increments totaling 4 coil folds. This will ensure the dough develops enough strength.
Coil folding ciabatta dough-video
Transfer the dough to the proofing container
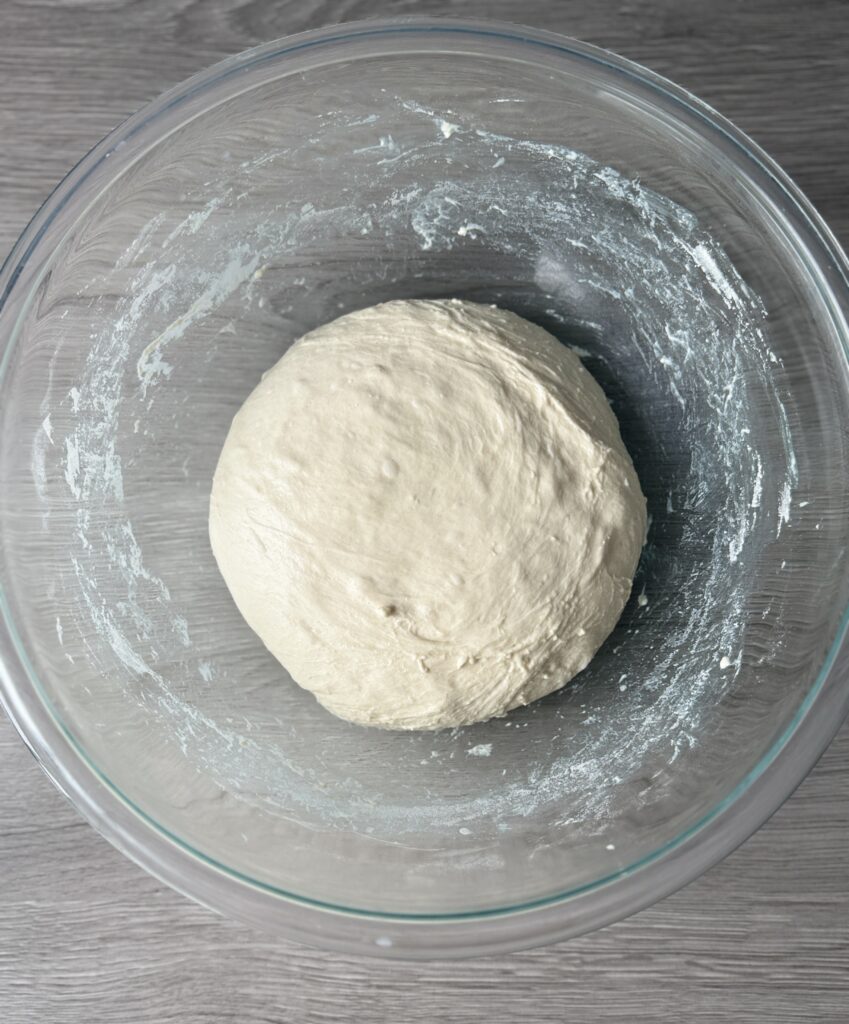
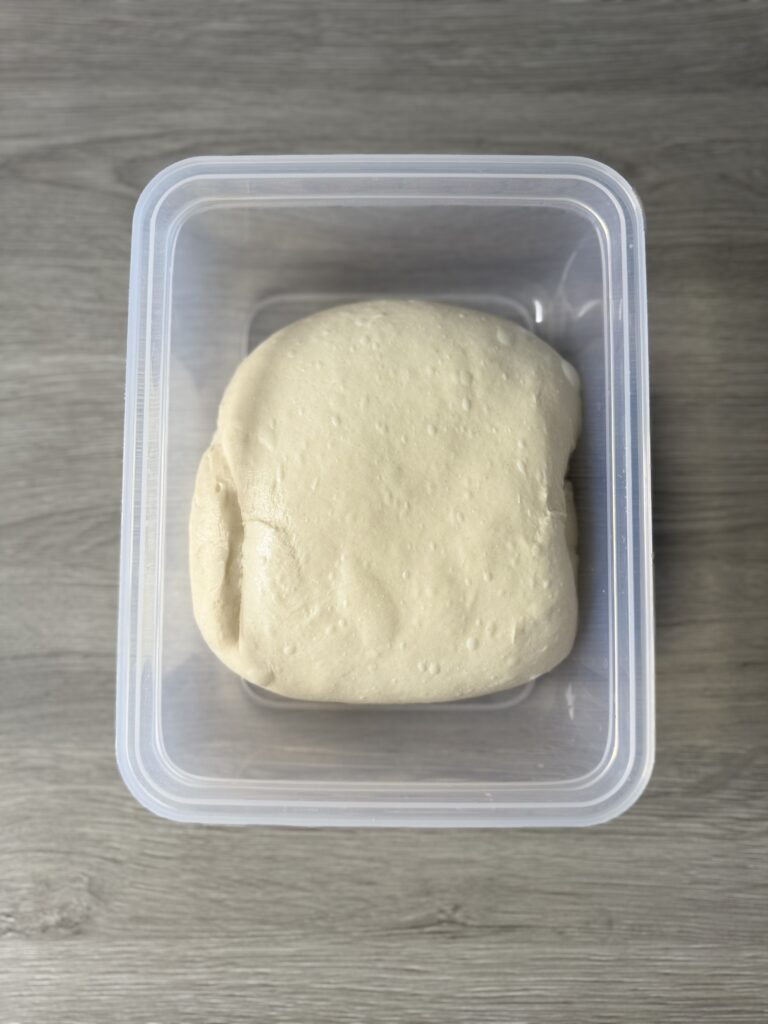
- After all 4 coil folds have been completed, transfer the dough to your rectangular proofing container. Anything around 8.5 cups will work.
- Mark where the dough sits and cover the dough with plastic wrap.
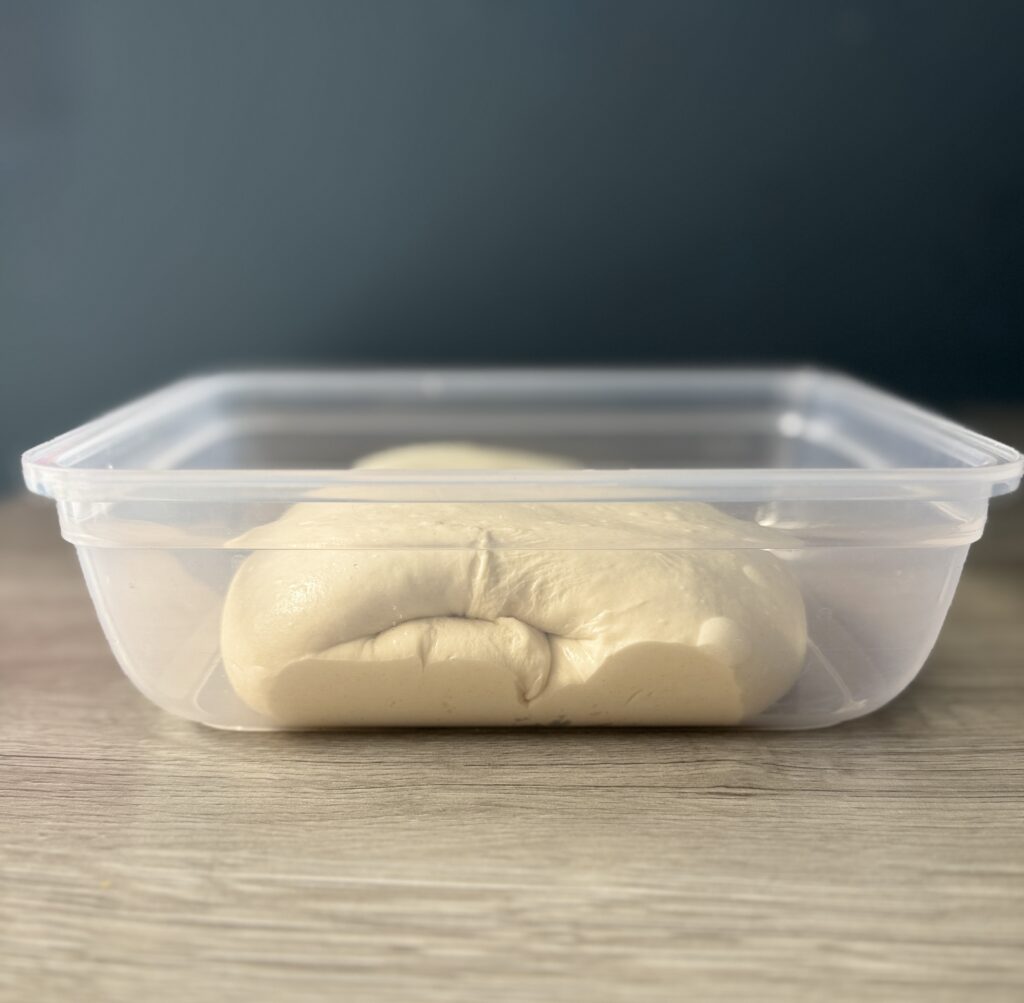
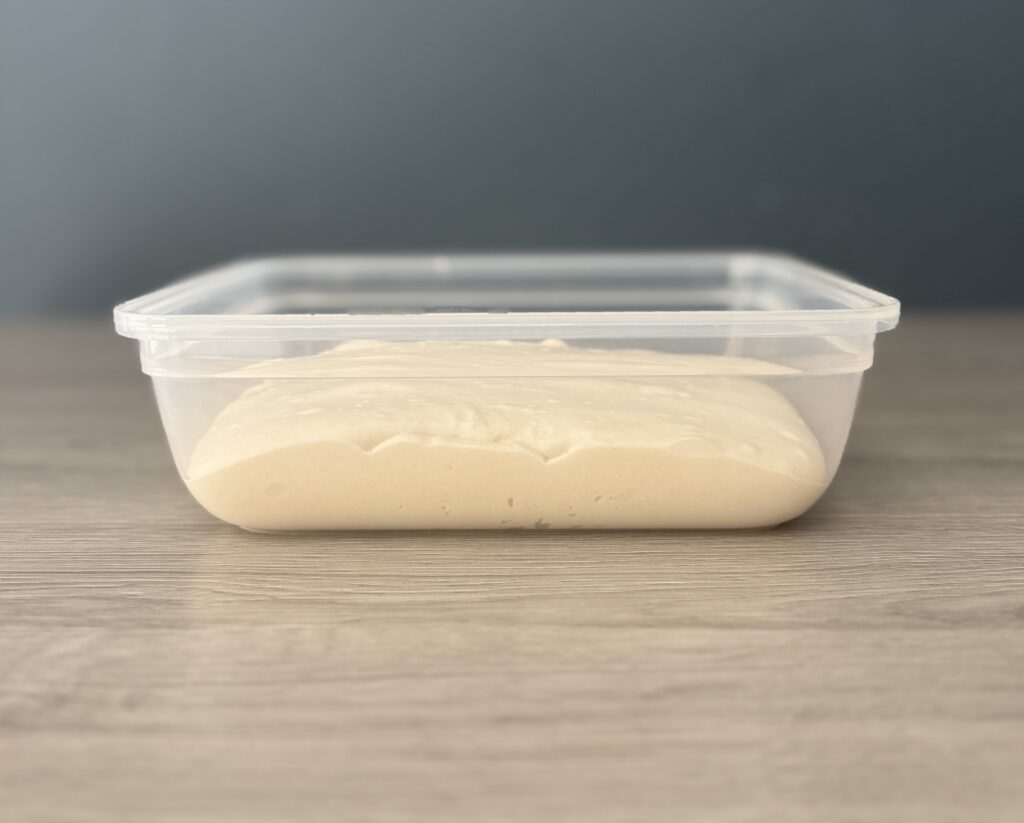
- Once the dough has increased by 50-75%, cover it and transfer it to the refrigerator for 8-36 hours.
For the dough to increase by 50-75%, it can take anywhere from 5-8 hours depending on the temperature in your home.
Shape the sourdough ciabatta dough
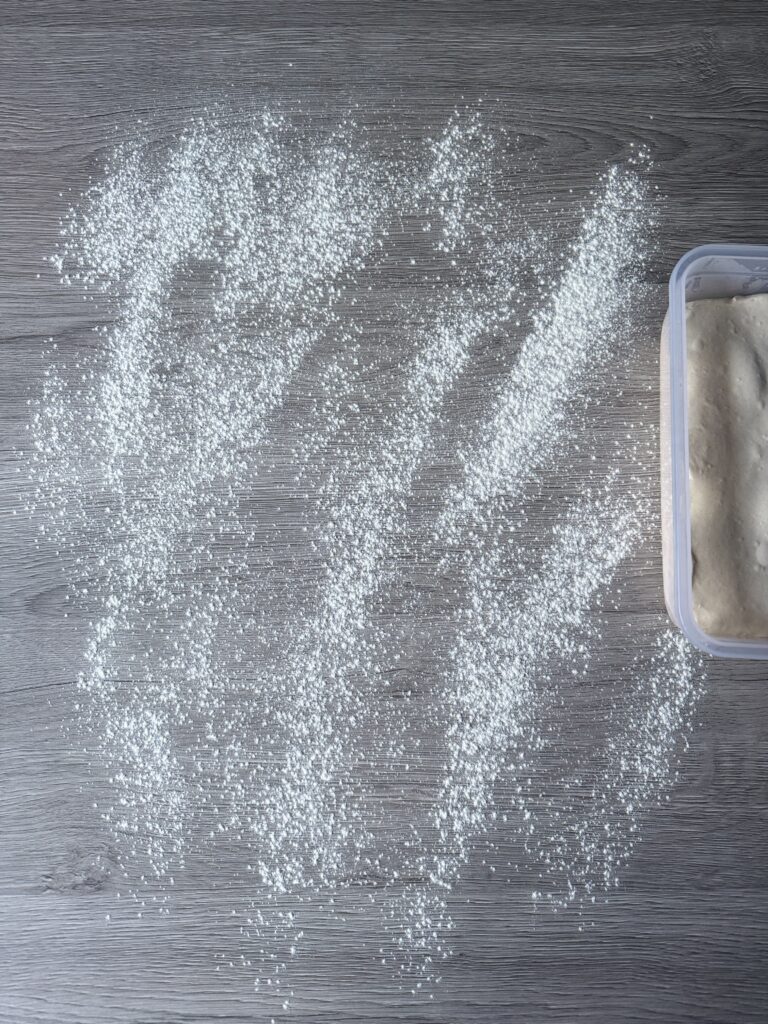
- The following morning, remove the dough from the refrigerator and line a baking sheet with parchment paper. Additionally, spray a little non-stick oil on the parchment paper.
- Liberally flour your work surface and the top of the dough. It is a sticky dough, so don’t be shy about using enough flour.
- Using a silicone scraper tool or silicone spatula gently loosen the sides of the dough from the container.
- Then, invert the container onto the work surface and allow the dough to naturally fall out.
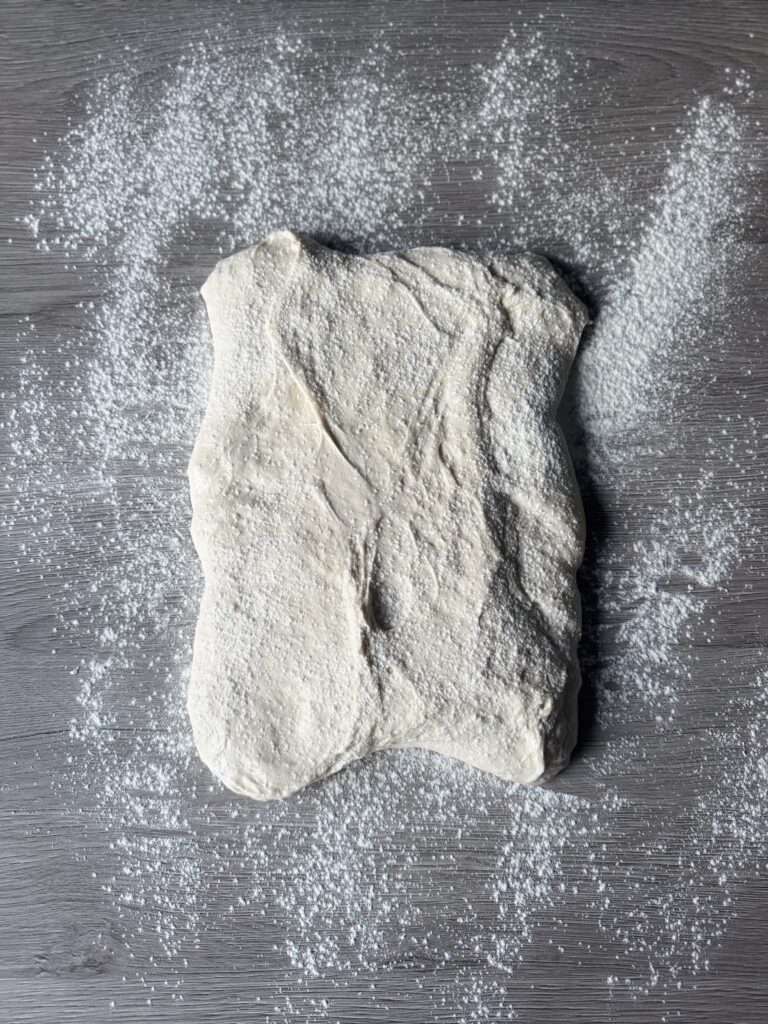
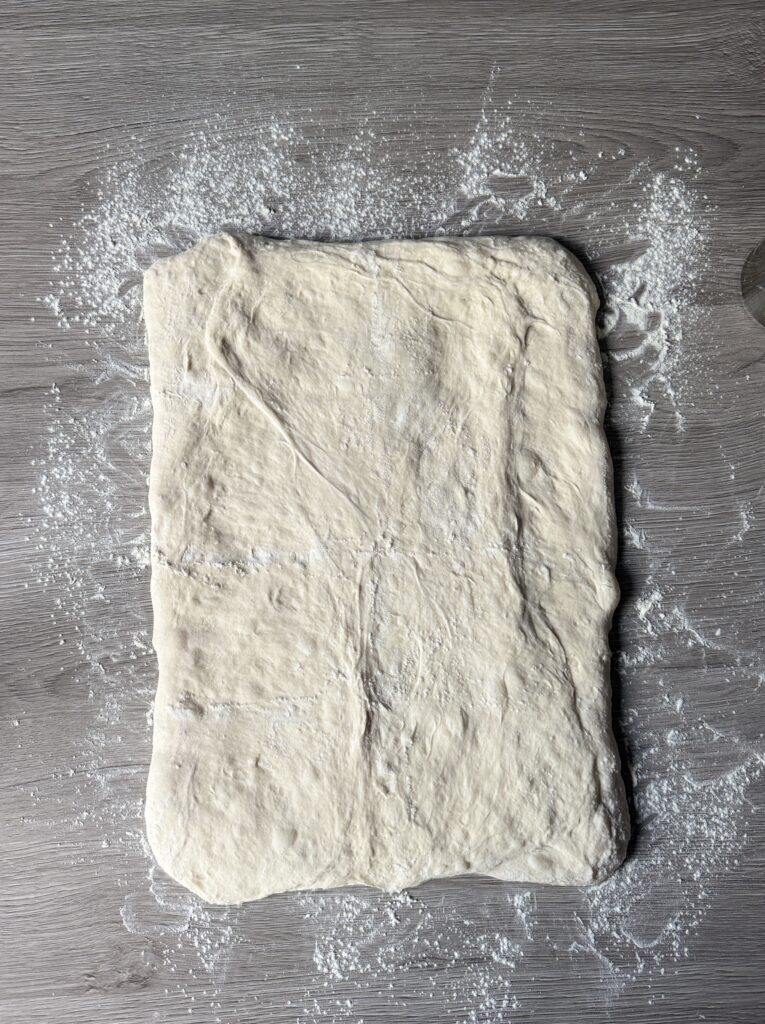
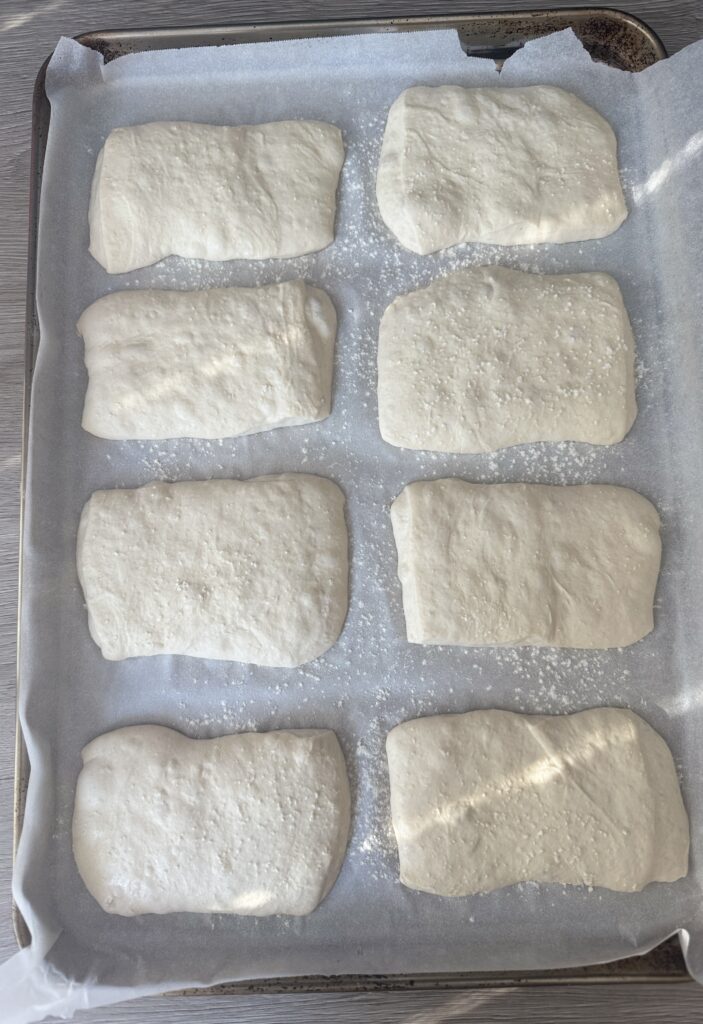
- Sprinkle flour over the entire surface of the dough and gently pat the dough into a 9×14 inch rectangle.
- Then, using a bench scraper cut the dough into 8 pieces. I draw lines down the dough using flour to help guide me on where to cut (see video below for demonstration).
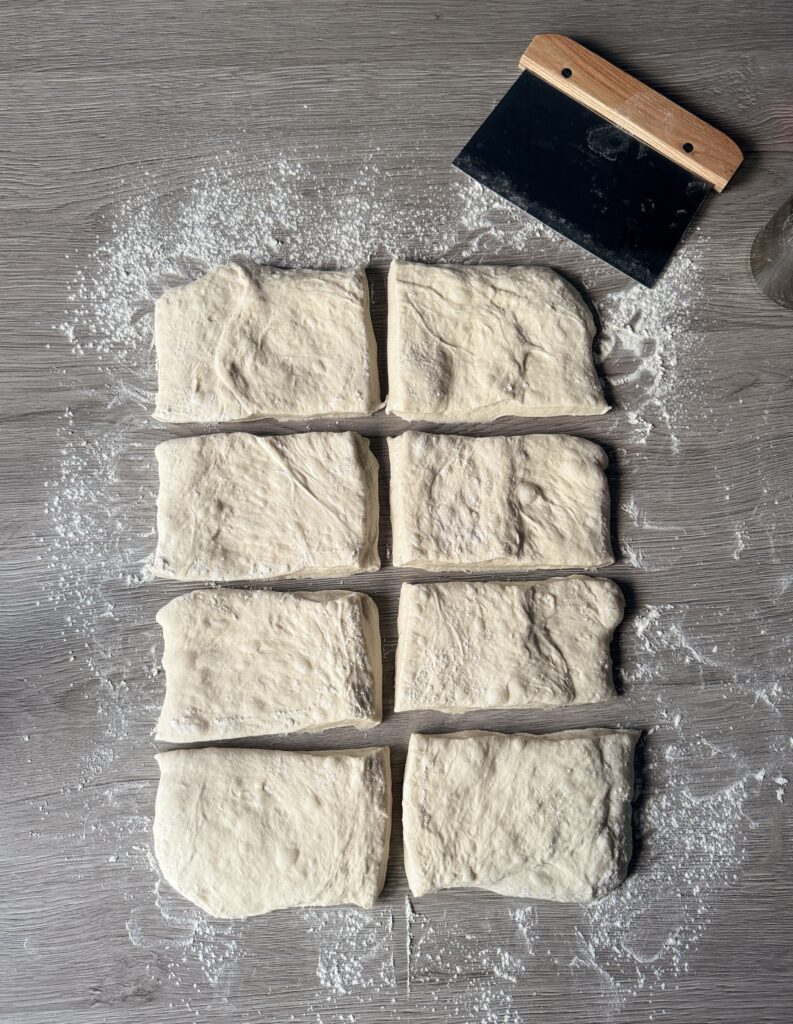
- Place each piece of dough onto the baking sheet about an inch apart, sprinkle with a little flour, & cover it with oiled plastic wrap or a large proofing bag. Let them rest for 1-2 hours or until they puff up a bit.

Shaping sourdough ciabatta bread-video
Bake the sourdough ciabatta bread
- When ready to bake, preheat your oven to 475 degrees F and bake for 10 minutes. Reduce the temperature to 450 degrees F and bake for 8-10 minutes more or until the bread starts to brown.
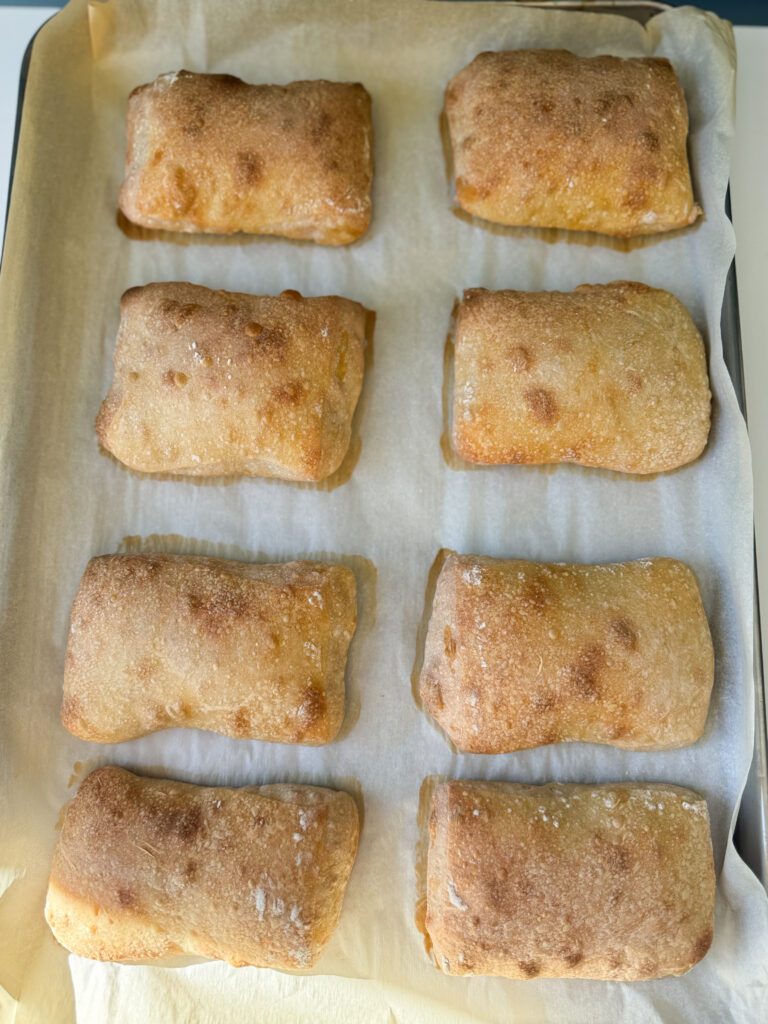
- Remove from the oven and allow the bread to cool for 1 hour before cutting into it & enjoy!
Storage Instructions
- Room Temperature: Store ciabatta in a paper bag or loosely wrapped in a clean kitchen towel at room temperature for up to 2 days. Avoid airtight containers, as they can soften the crust.
- Freezing: For longer storage, slice or leave whole and wrap tightly in plastic wrap, then place in a freezer-safe bag. Freeze for up to 2 months. To reheat, warm in a 350°F oven for 8–10 minutes to refresh the crust.
More sourdough recipes to try:
- Soft Sourdough Sandwich Bread (not too tangy!)
- Easy Sourdough Focaccia Bread
- Sourdough Fougasse
- Sourdough French Bread
Sourdough Ciabatta Bread (simple and delicious!)
This sourdough ciabatta bread recipe is made with traditional techniques and simple ingredients. Perfect for dipping or filling with your favorite ingredients.
Equipment
- Mixing bowl
- Baking sheet
- Parchment paper
- Bench scraper/dough scraper
- rectangle proofing container
- Food scale
Ingredients
- 100 grams active sourdough starter
- 385-400 grams water (see notes)
- 500 grams bread flour
- 10 grams salt
- 5 grams olive oil ((optional))
Instructions
Mix the dough
-
In a mixing bowl, whisk together the sourdough starter and water until mostly dissolved.
-
Then, add the flour, salt, and olive oil (if using), and mix until the flour has absorbed all the water. It will be very sticky (this is normal).
-
Cover the bowl with plastic wrap and let it rest for 30 minutes.
Strengthen the dough
-
After the dough has rested, work the dough into a ball by folding it into itself a few times (keep it in the bowl). *Tip: wet your hands to avoid the dough from sticking.
-
Allow it to rest for 15 minutes (it will still be very sticky-all normal).
Coil fold the ciabatta dough
-
Coil folding is a technique used in sourdough bread making to strengthen the dough and improve its structure. I prefer this method for this recipe as it is a softer approach to this delicate dough (see video above for demonstration).
Tip: lightly wet your hands to avoid the dough sticking to them.
-
Gently reach under the dough with your wet hands and lift it up. Stretch the dough upwards, then fold it under the center of itself. Turn the dough 90 degrees and repeat the lifting and stretching process.
-
You can continue to turn the dough and fold it a few times, usually 4-5 times in total, to make a complete “coil.”
-
Once complete, cover the dough and allow it to rest for 30 minutes.
-
Perform 3 more coil folds within 30-minute increments of each other totaling 4 coil folds. This will ensure the dough develops enough strength.
Transfer the dough to the proofing container
-
After all 4 coil folds have been completed, transfer the dough to your rectangular proofing container. Anything around 8.5 cups will work.
-
Mark where the dough sits and cover the dough with plastic wrap.
-
Once the dough has increased in volume by 50-75%, cover it and transfer it to the refrigerator for 8-36 hours.
-
For the dough to increase by 50-75%, it can take anywhere from 5-8 hours depending on the temperature in your home. Mine took 6 hours @ 70 degrees F.
Shape the sourdough ciabatta dough
-
The following morning, remove the dough from the refrigerator and line a baking sheet with parchment paper. Additionally, spray a little non-stick oil on the parchment paper.
-
Liberally flour your work surface and the top of the dough. It is a sticky dough, so don't be shy about using enough flour.
-
Using a silicone scraper tool or silicone spatula gently loosen the sides of the dough from the container.
-
Then, invert the container onto the work surface and allow the dough to naturally fall out.
-
Sprinkle flour over the entire surface of the dough and gently pat the dough into a 9x14 inch rectangle.
-
Then, using a bench scraper cut the dough into 8 pieces. I draw lines down the dough using flour to help guide me on where to cut (see video above for demonstration).
-
Place each piece of dough onto the baking sheet about an inch apart, sprinkle with a little flour, & cover it with oiled plastic wrap or a large proofing bag. Let them rest for 1-2 hours or until they puff up a bit.
Bake the sourdough ciabatta bread
-
When ready to bake, preheat your oven to 475 degrees F and bake for 10 minutes. Reduce the temperature to 450 degrees F and bake for 8-10 minutes more or until the bread starts to brown.
-
Remove from the oven and allow the bread to cool for 1 hour before cutting into it & enjoy!
Storage Instructions
-
Room Temperature: Store ciabatta in a paper bag or loosely wrapped in a clean kitchen towel at room temperature for up to 2 days. Avoid airtight containers, as they can soften the crust.
-
Freezing: For longer storage, slice or leave whole and wrap tightly in plastic wrap, then place in a freezer-safe bag. Freeze for up to 2 months. To reheat, warm in a 350°F oven for 8–10 minutes to refresh the crust.
Notes
Baker's schedule: feed your sourdough starter the evening before you mix the dough. Mix the dough early in the morning (8 AM), allow it to increase in size by 50-75%, then place into the refrigerator overnight to bake for the following day.
Hydration: This recipe can be done with 385 grams of water or up to 400 grams. You may want to start with 385 and then work your way up. Either way, the result will be lovely.
Have a question? Make sure to check out the FAQ troubleshooting section in this blog post.
Comments