
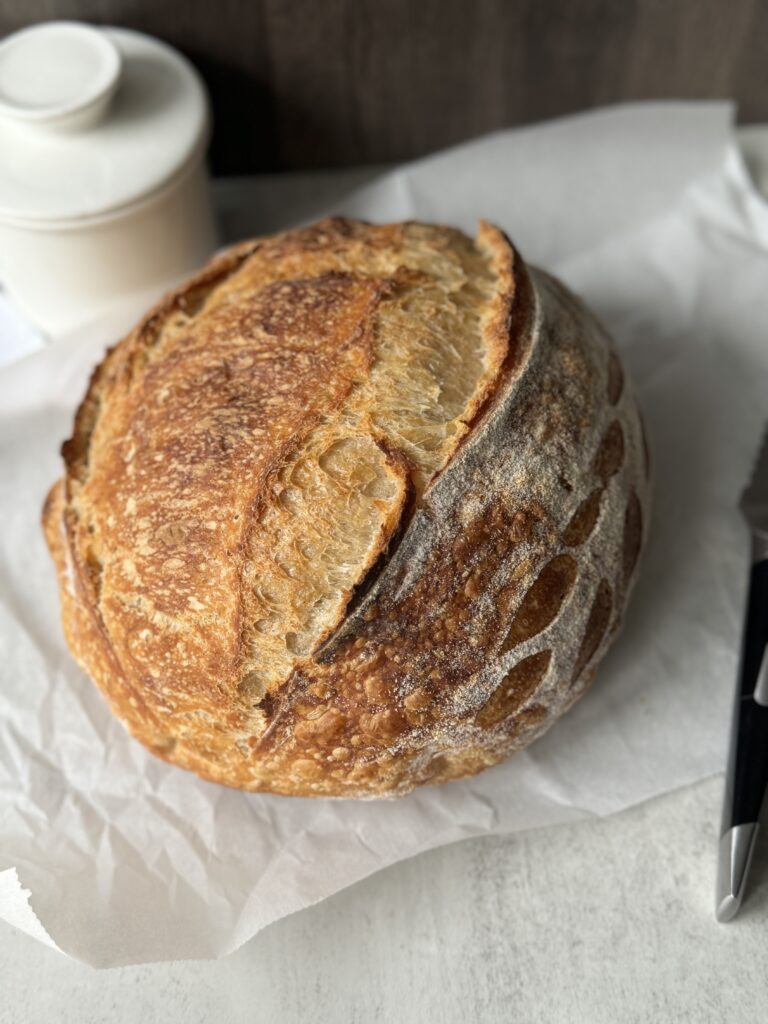
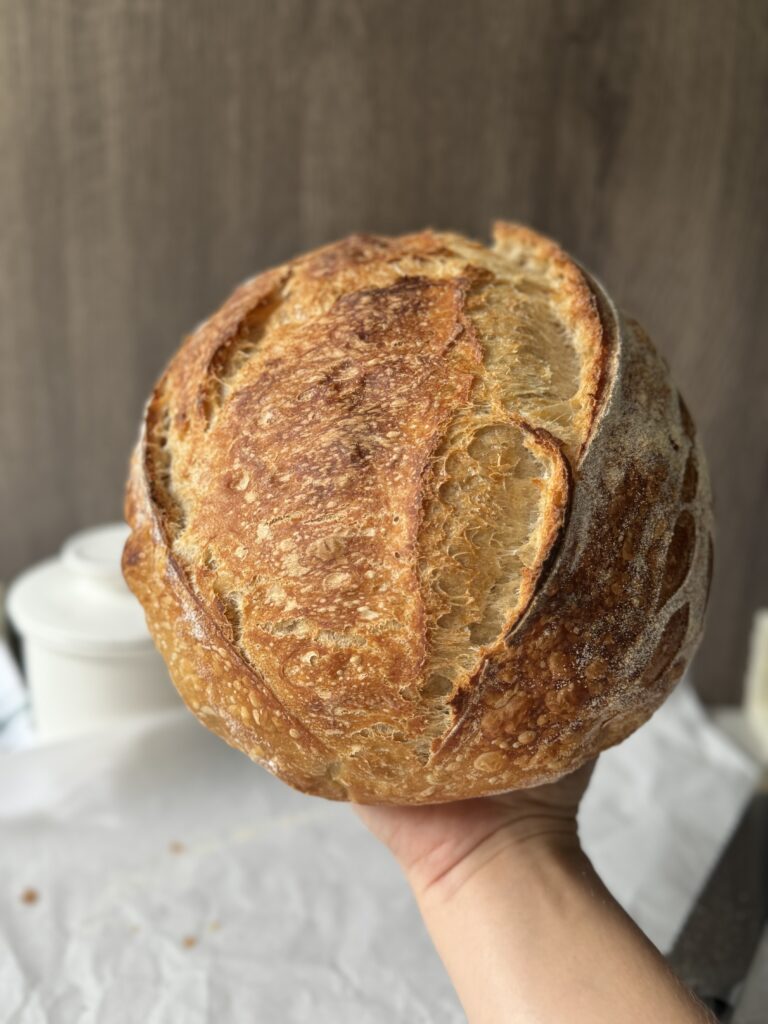
This artisan sourdough bread recipe produces a consistently flavorful, crusty, and perfectly risen loaf. The secret lies in using a healthy sourdough starter, following the method precisely, and allowing proper fermentation time.
What sets this recipe apart from my original simple sourdough is the addition of whole wheat flour and a slightly different technique. Each step includes pictures, tips, and tricks to ensure your success.
If you want to try a different approach to baking sourdough, this artisan sourdough bread recipe is perfect for you!
What is artisan sourdough bread?
Artisan sourdough bread is a handcrafted loaf known for its rich flavor, crusty exterior, and chewy crumb. Made using traditional techniques, it relies on a natural fermentation process with a sourdough starter consisting of wild yeast and bacteria.
The primary ingredients for artisan sourdough bread include flour, water, salt, and the sourdough starter. Some variations incorporate whole wheat flour for added texture and flavor. The slow fermentation process develops the bread’s complex taste and improves its nutritional profile and digestibility.
What makes this recipe different?
- The method: This recipe follows a few different steps than my simple sourdough recipe.
- Flour: The addition of whole wheat flour encompasses just 10% of the recipe but adds a rich depth of flavor.
- Hydration: The hydration level of this artisan bread recipe is 72%.
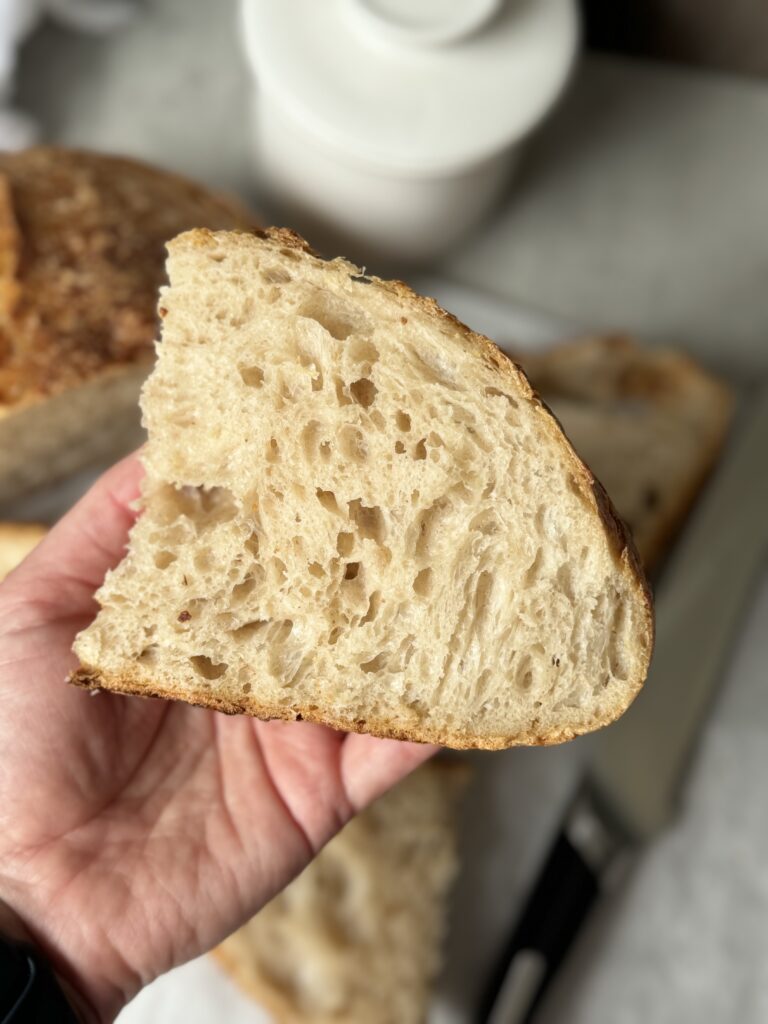
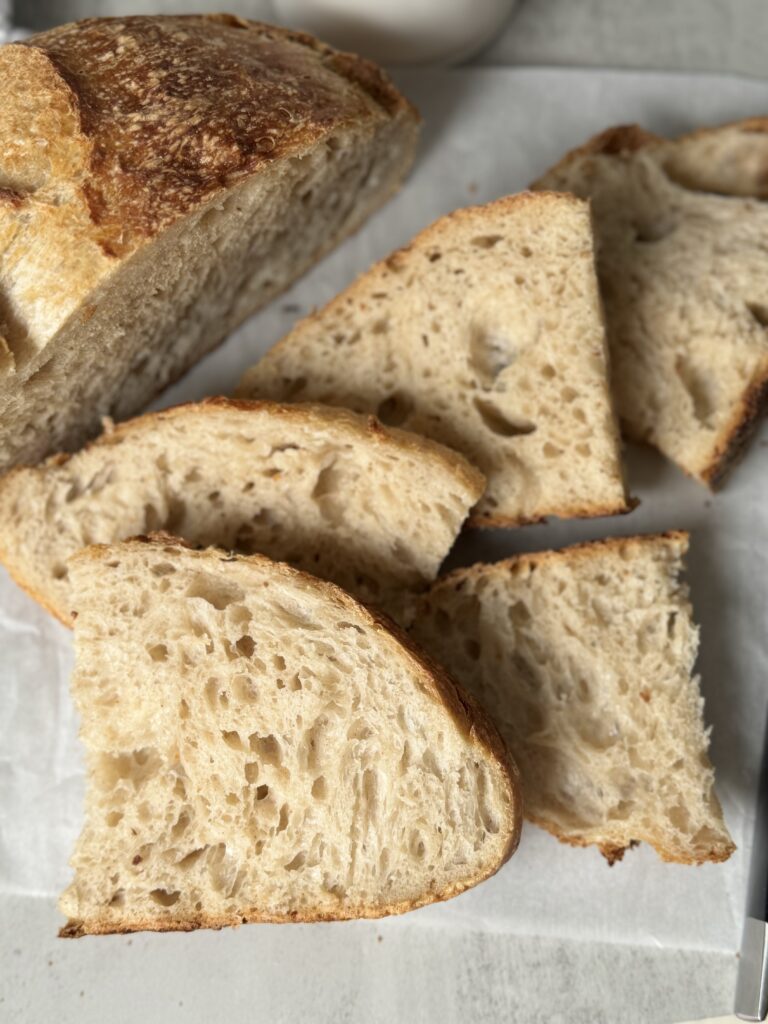
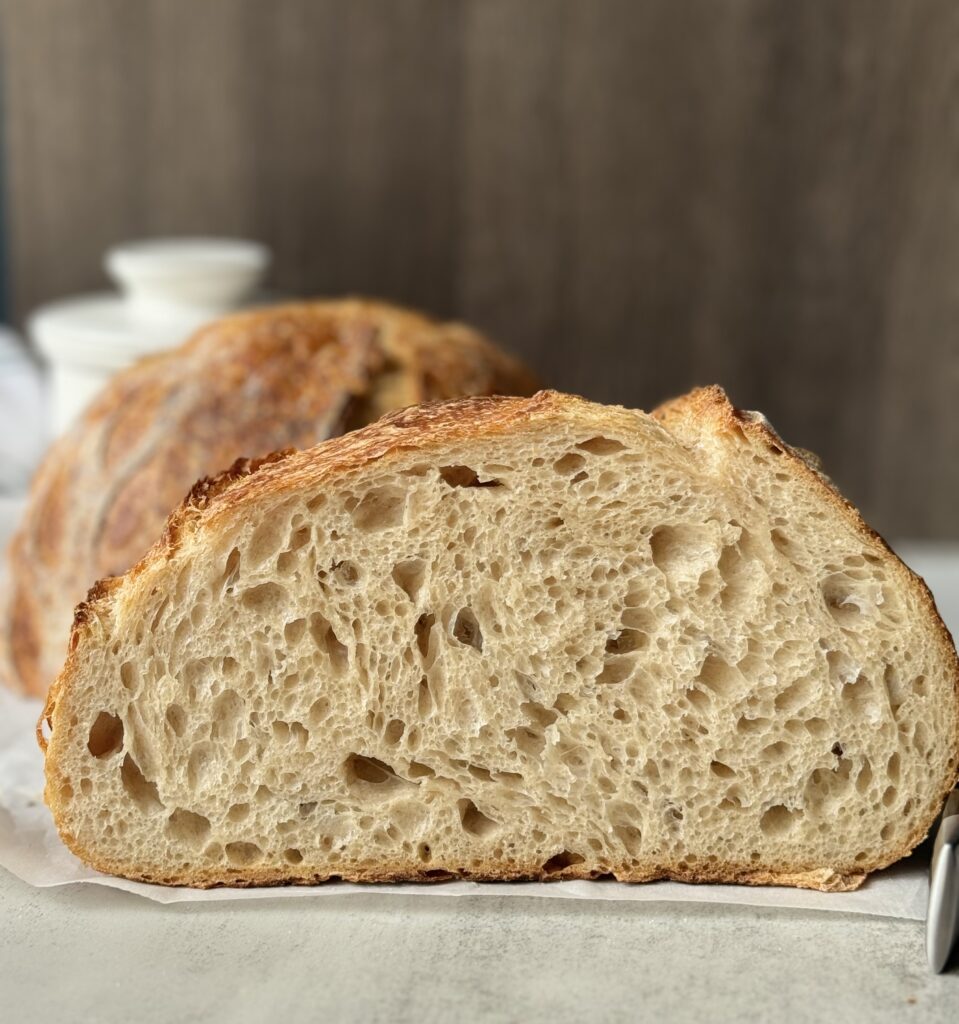
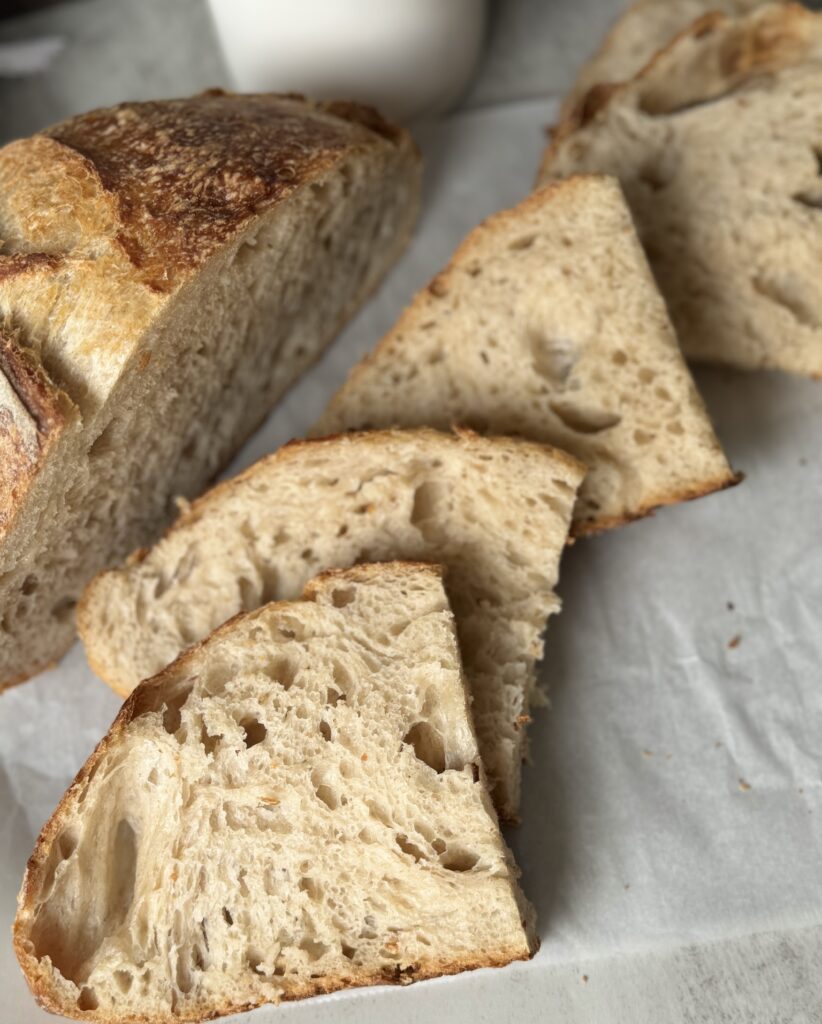
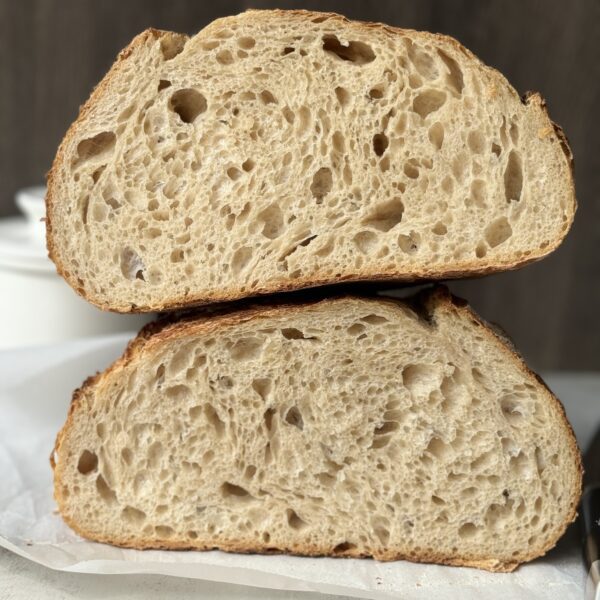
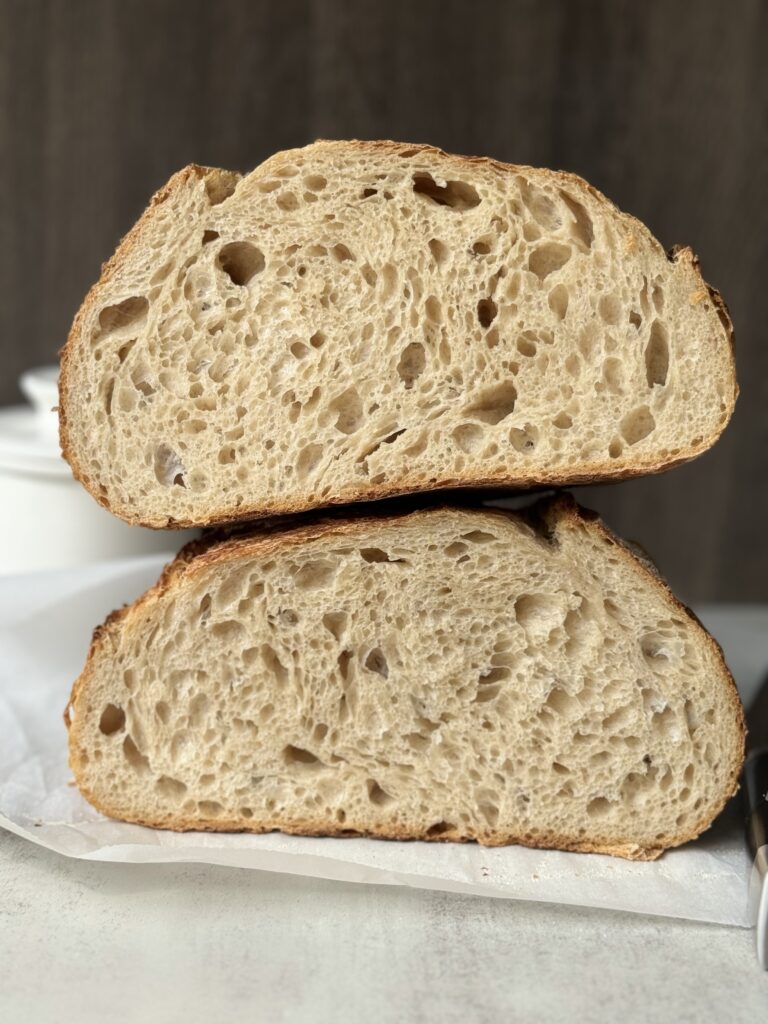
- Crumb: The dough will be gently handled throughout the fermentation process resulting in a lovely, properly proofed crumb. It will be quite mesmerizing and perfect for your favorite spreads or a sandwich 🙂
How to make artisan sourdough bread (step-by-step)
Baker’s schedule: Feed your starter within 12 hours of mixing the dough. Mix the dough in the morning, and allow it to ferment until it has increased in size by at least 75%. Then, place it in the refrigerator overnight to bake for the following morning.
Fermentation: Fermentation times can vary due to sourdough being highly dependent on the temperature in its environment. My dough requires 7 hours of fermentation at around 72 degrees F. Watch the dough, not the clock.
Sourdough starter: Ensure your sourdough starter is at its peak, it should be active and bubbly.
Ingredients
- 450 grams of bread flour
- 50 grams of whole wheat flour
- 360 grams of water
- 70 grams of sourdough starter (active & bubbly)
- 10 grams salt
Equipment
- Dutch oven or cast iron
- Mixing bowl
- Bench scraper
- Scoring tool or sharp knife
- Food scale
- Parchment paper
- Banneton proofing basket
Mix the dough
- To your mixing bowl add the water and sourdough starter. Whisk using a fork until the starter has dissolved.
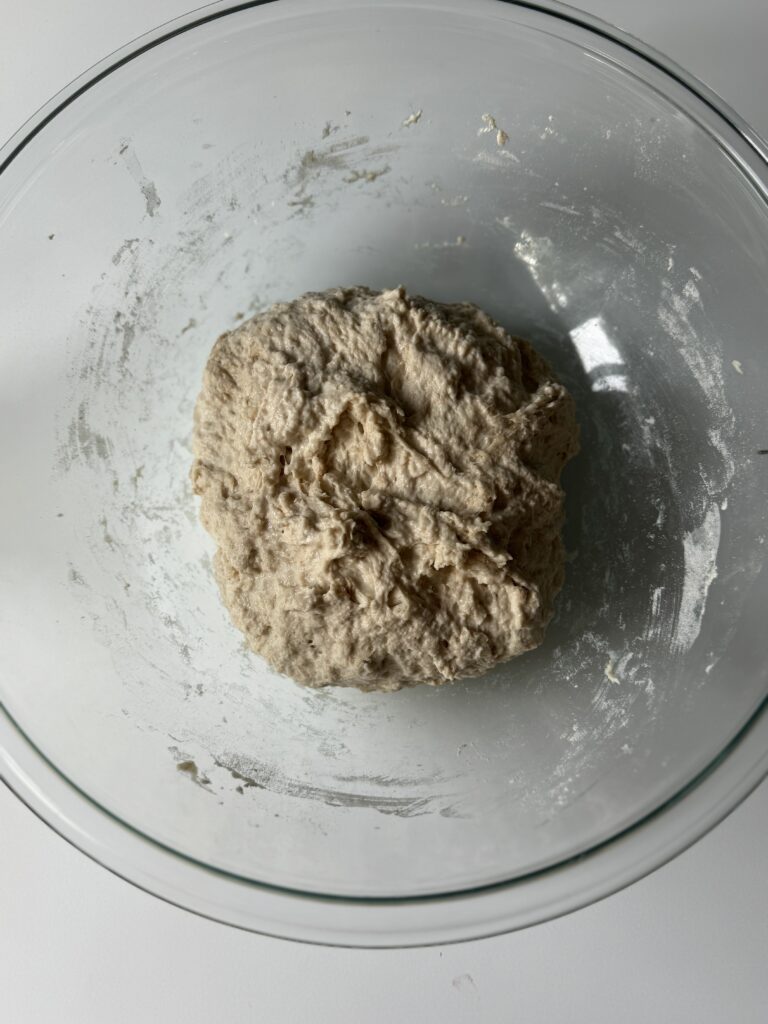
- Next, add the bread flour and whole wheat flour and mix until the flour has absorbed the water. I find using my hands achieves the best mixing.
- The dough will be shaggy and wet. Cover it with plastic wrap and allow it to rest for 30-45 minutes.
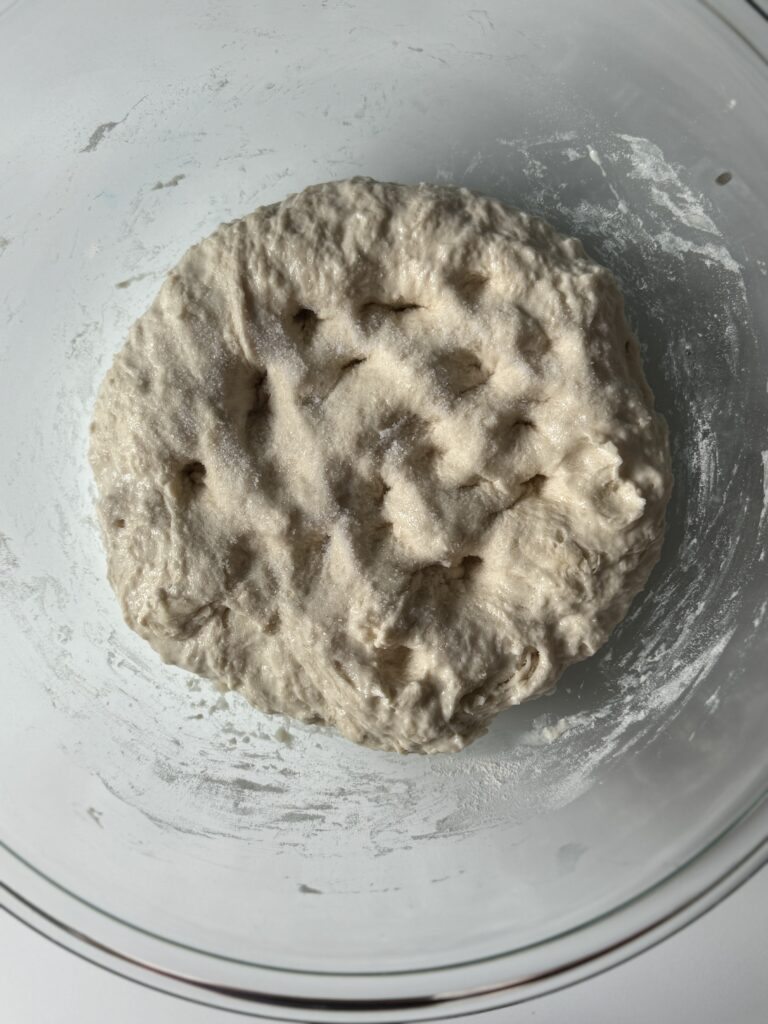
Add the salt & strengthen the dough
- After the dough has rested, add a splash of water and the salt. Dimple it into the dough and mix it well using your hands.
- To build some strength to the dough, use the scoop and slap method where you scoop your hand under the dough and slap it against the bowl for a few minutes. If the dough begins to tear, stop mixing and allow it to rest. Return to it during the coil fold process.
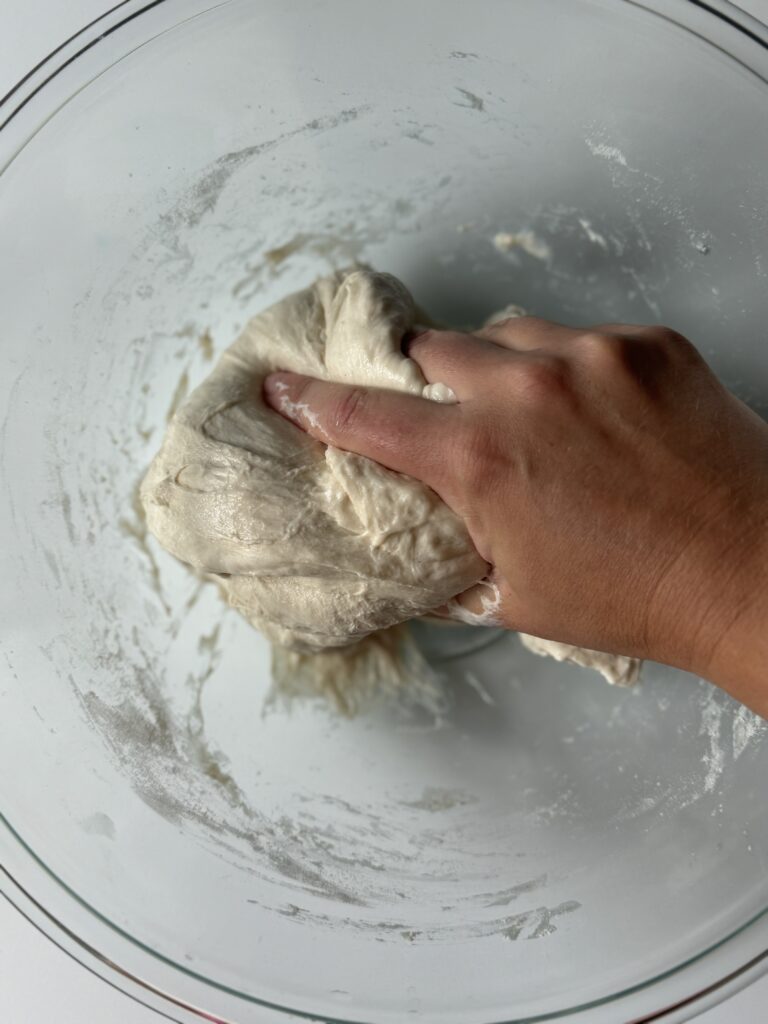
- The dough should appear smoother after this. Cover it and let it rest for 30 minutes.
Coil folds
Coil folding is a technique used in sourdough bread making to strengthen the dough and improve its structure. I prefer this method for this recipe as it is a softer approach to this delicate bread.
Tip: lightly wet your hands to avoid the dough sticking to them.
- Gently reach under the dough with your wet hands and lift it up.
- Stretch the dough upwards, then fold it under the center of itself.
- Turn the dough 90 degrees and repeat the lifting and stretching process.
- You can continue to turn the dough and fold it a few times, usually 4-5 times in total, to make a complete “coil.”
- Once complete, cover the dough and allow it to rest for 30 minutes.
- Perform 3 more coil folds within 30-minute increments totaling 4 coil folds. This will ensure the dough develops enough structure.
- Once all coil folds have been completed, cover the dough and allow it to rest for the remaining bulk rise.

How to coil fold dough
Preshape the dough
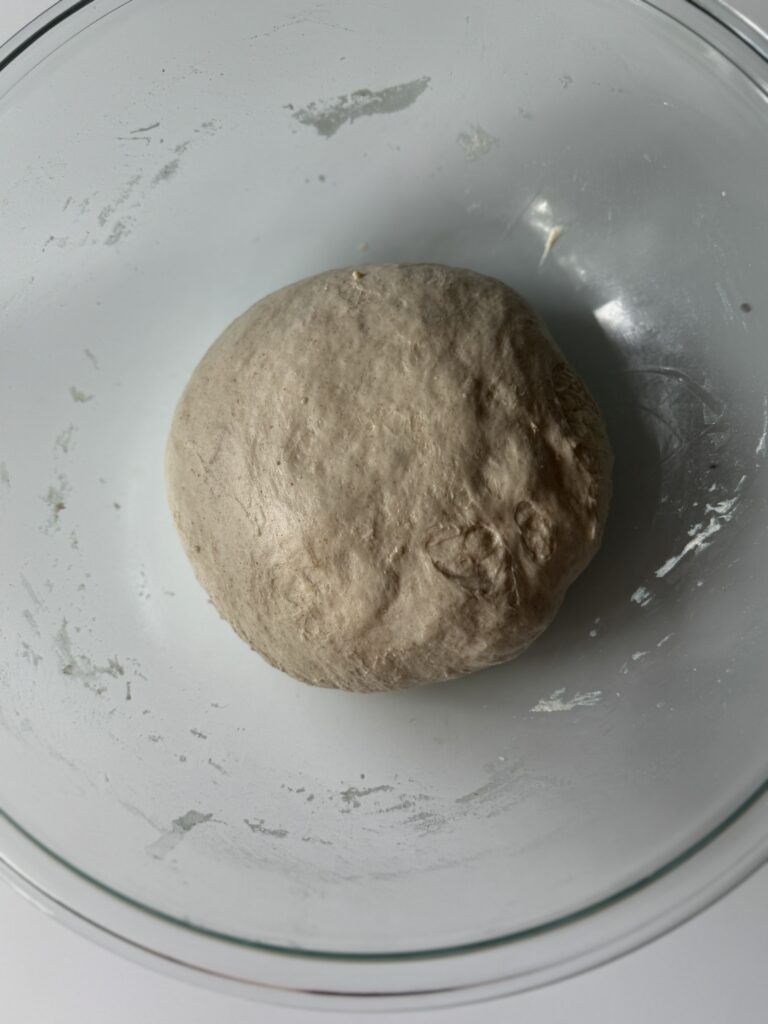
- After the dough has finished its first bulk fermentation, place it on a lightly floured surface and create a round shape using your bench scraper.
- To create a round shape place the bench scraper under the bottom part of the dough and use a circular motion. Do this repetitively until you get the desired shape. The tension will naturally settle in the middle of the dough, giving it a better oven spring when baked. You can also do this motion using your hands.
- After the desired shape has been achieved, cover the dough with a towel or bowl and let it rest for 15 minutes.

Final shaping
- When it comes to final shaping, you can shape a round boule or an oval batard.
- Find my instructional videos on how to shape your sourdough here.
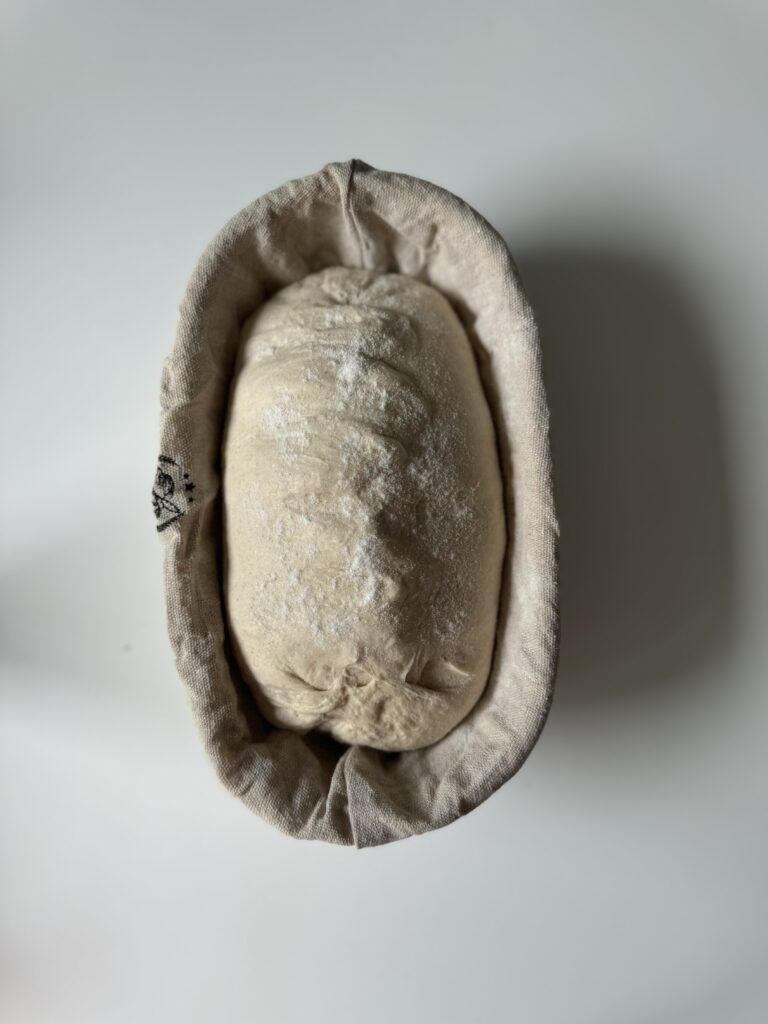
- After shaping, position the dough in the banneton basket with the seam facing upwards. If necessary, you can gently stitch or tighten the seams while in the basket.
- Lastly, cover the dough either with a cloth or by placing it inside a 2.5-gallon bag. Then, transfer it to the refrigerator and let it rest for 12-18 hours.
Score & Bake
- For an optimal rise, I recommend preheating the oven to 500 degrees F for 30 minutes with the Dutch oven in there.
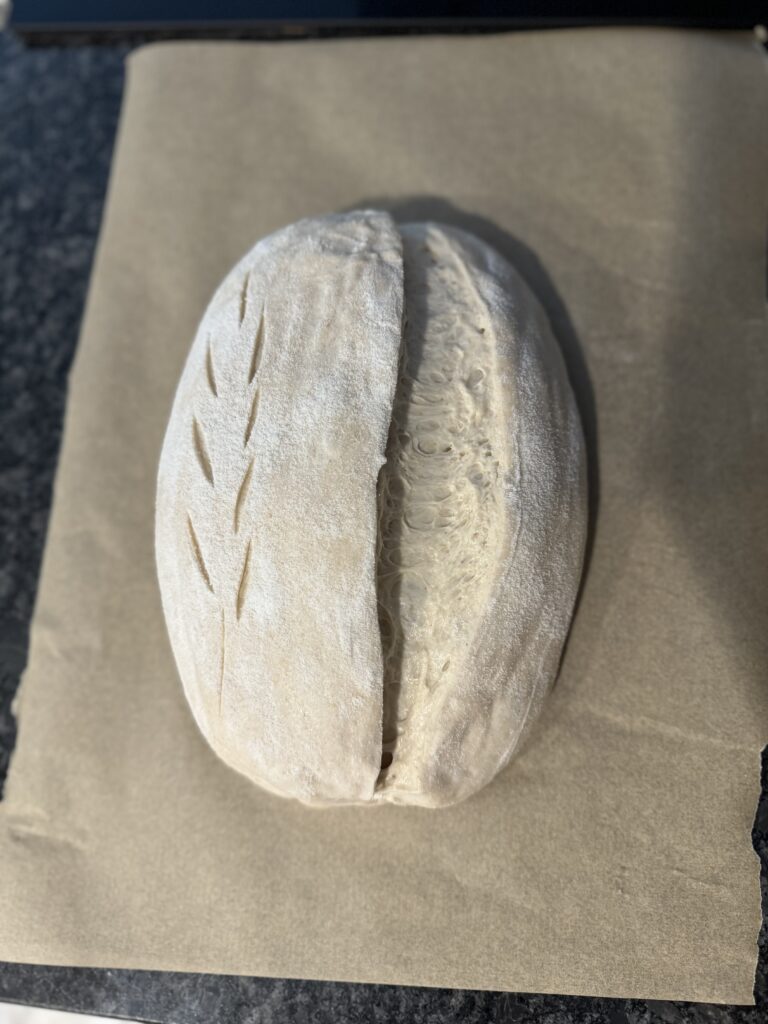
- When ready to bake, remove the dough from the fridge and invert it onto parchment paper.
- With a sharp knife or bread lame score 1 line down the middle of the bread at a 45-degree angle. Optional: you can sift some rice flour over the surface of the dough for the scoring to pop.
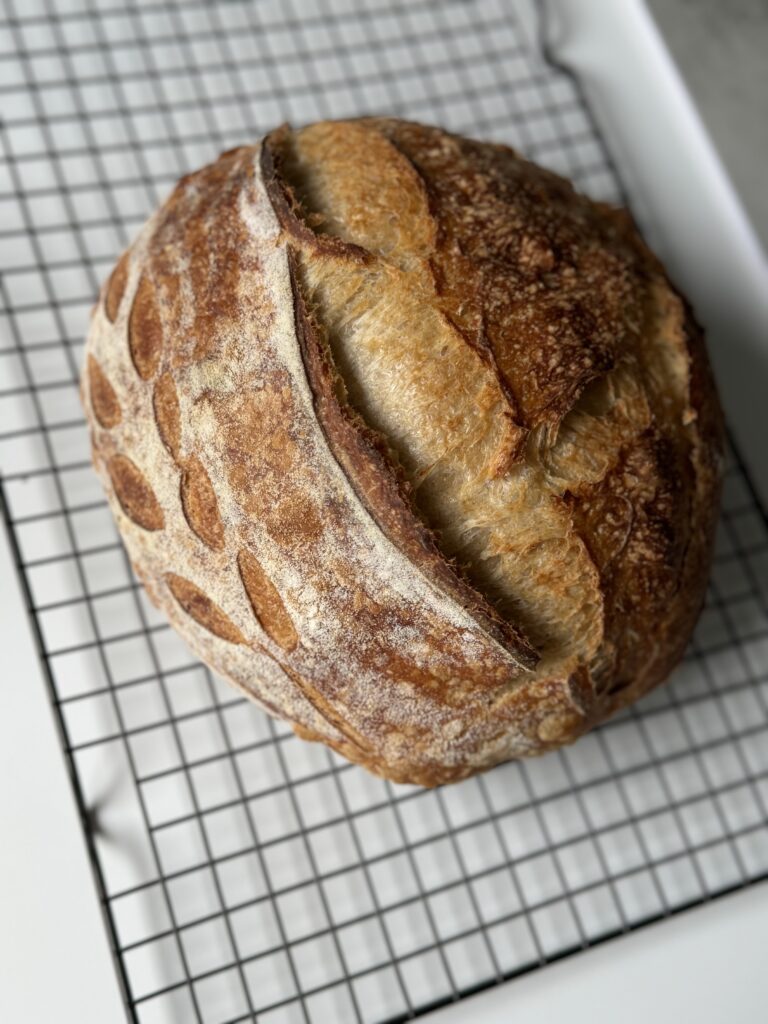
- Bake the bread for 20 minutes covered at 500 degrees F, then lower the temperature to 450 degrees F and bake for an additional 17-20 minutes uncovered.
- Allow the bread to completely cool before slicing and enjoying (1-2 hours).
Storing Artisan Sourdough Bread
- Allow the bread to cool completely before slicing and storing it.
- Sourdough artisan bread lasts 2-3 days at room temperature and stores well in a paper or plastic bag.
- Additionally, you can freeze a loaf for up to 3 months. Slice it before freezing so you can take out individual slices as needed. Wrap the slices tightly in plastic wrap or aluminum foil and place them in a freezer bag.
More sourdough bread recipes
- Sourdough Italian Bread
- Chocolate Chip Sourdough Bread (with honey!)
- Country Sourdough Bread
- Rustic Sourdough Bread
Artisan Sourdough Bread (step-by-step)
Craft the perfect artisan sourdough bread with this detailed, step-by-step recipe. Yielding a flavorful, crusty, and perfectly risen loaf, it's ideal for both beginners and seasoned bakers!
Equipment
- Dutch oven or cast iron
- Mixing bowl
- Bench scraper
- Scoring lame
- Food scale
- Parchment paper
- Banneton Proofing Basket
Ingredients
- 450 grams bread flour
- 50 grams whole wheat flour
- 70 grams sourdough starter (active & bubbly)
- 360 grams water
- 10 grams salt
Instructions
Mix the dough
-
To your mixing bowl add the water and sourdough starter. Whisk using a fork until the starter has dissolved.
-
Next, add the bread flour and whole wheat flour and mix until the flour has absorbed the water. I find using my hands achieves the best mixing.
-
The dough will be shaggy and wet. Cover it with plastic wrap and allow it to rest for 30-45 minutes.
Add the salt & strengthen the dough
-
After the dough has rested, add a splash of water and the salt. Dimple it into the dough and mix it well using your hands.
-
To build some strength to the dough, use the scoop and slap method where you scoop your hand under the dough and slap it against the bowl for a few minutes. If the dough begins to tear, stop mixing and allow it to rest. Return to it during the coil fold process.
-
The dough should appear smoother after this. Cover it and let it rest for 30 minutes.
Coil Folds
-
Coil folding is a technique used in sourdough bread making to strengthen the dough and improve its structure. I prefer this method for this recipe as it is a softer approach to this delicate bread.
-
Perform 4 coil folds within 30-minute increments. This will ensure the dough develops enough structure.
-
Once all coil folds have been completed, cover the dough and allow it to rest for the remaining bulk rise.
Preshape the dough
-
After the dough has finished its first bulk fermentation, place it on a lightly floured surface and create a round shape by using your bench scraper.
-
To create a round shape place the bench scraper under the bottom part of the dough and use a circular motion. Do this repetitively until you get the desired shape. The tension will naturally settle in the middle of the dough, giving it a better oven spring when baked. You can also do this motion using your hands.
-
After the desired shape has been achieved, cover the dough with a towel or bowl and let it rest for 15 minutes.
Final Shaping
-
When it comes to final shaping, you can shape a round boule or an oval batard. Find my instructional videos on how to shape your sourdough here.
-
After shaping, position the dough in the banneton basket with the seam facing upwards. If necessary, you can gently stitch or tighten the seams while in the basket.
-
Lastly, cover the dough either with a cloth or by placing it inside a 2.5-gallon bag. Then, transfer it to the refrigerator and let it rest for 12-18 hours.
Score & Bake
-
For an optimal rise, I recommend preheating the oven to 500 degrees F for 30 minutes with the Dutch oven in there.
-
When ready to bake, remove the dough from the fridge and invert it onto a piece of parchment paper.
-
With a sharp knife or bread lame score 1 line down the middle of the bread at a 45-degree angle. Optional: you can sift some rice flour over the surface of the dough for the scoring to pop.
-
Bake the bread for 20 minutes covered at 500 degrees F, then lower the temperature to 450 degrees F and bake for an additional 17-20 minutes uncovered.
-
Allow the bread to completely cool before slicing and enjoying (1-2 hours).
Storing Artisan Sourdough Bread
-
Allow the bread to cool completely before slicing and storing it.
-
Sourdough artisan bread lasts 2-3 days at room temperature and stores well in a paper or plastic bag.
-
Additionally, you can freeze a loaf for up to 3 months. Slice it before freezing so you can take out individual slices as needed. Wrap the slices tightly in plastic wrap or aluminum foil and place them in a freezer bag.
Notes
Baker's schedule: Feed your starter within 12 hours of mixing the dough. Mix the dough in the morning, and allow it to ferment until it has increased in size by at least 75%. Then, place it in the refrigerator overnight to bake for the following morning.
Fermentation: Fermentation times can vary due to sourdough being highly dependent on the temperature in its environment. My dough requires 7 hours of fermentation at around 72 degrees F. Watch the dough, not the clock.
Sourdough starter: Ensure your sourdough starter is at its peak, it should be active and bubbly.
Comments