
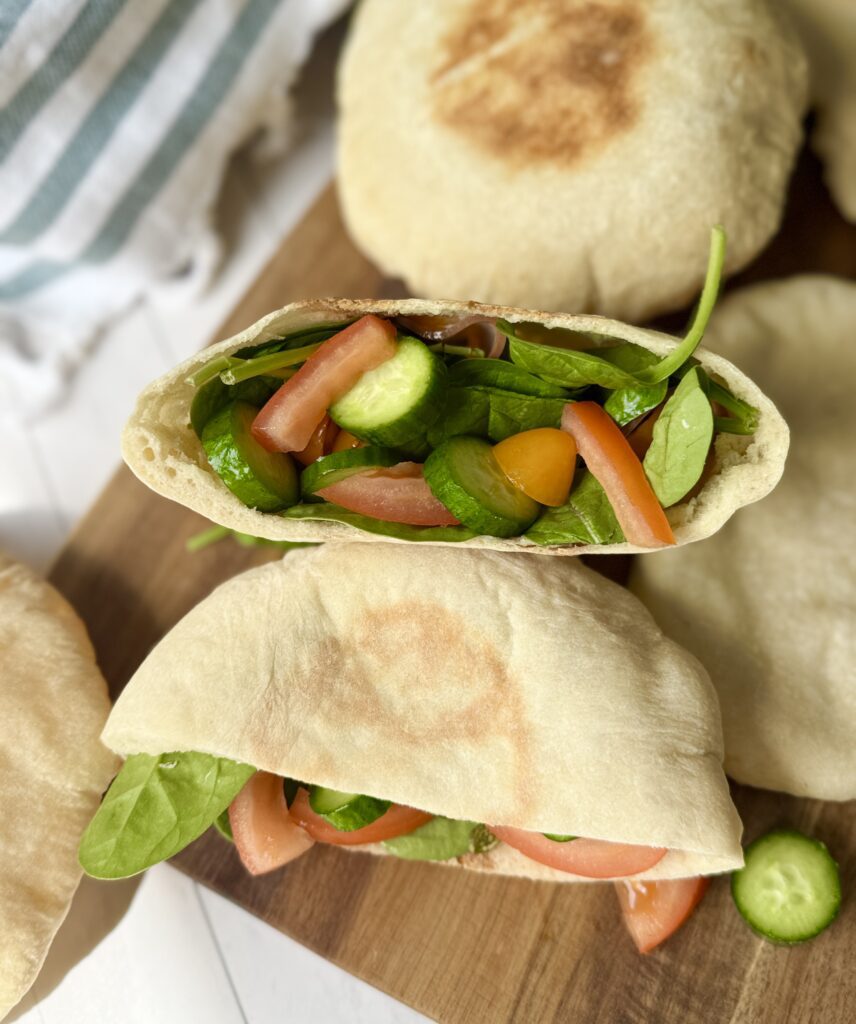
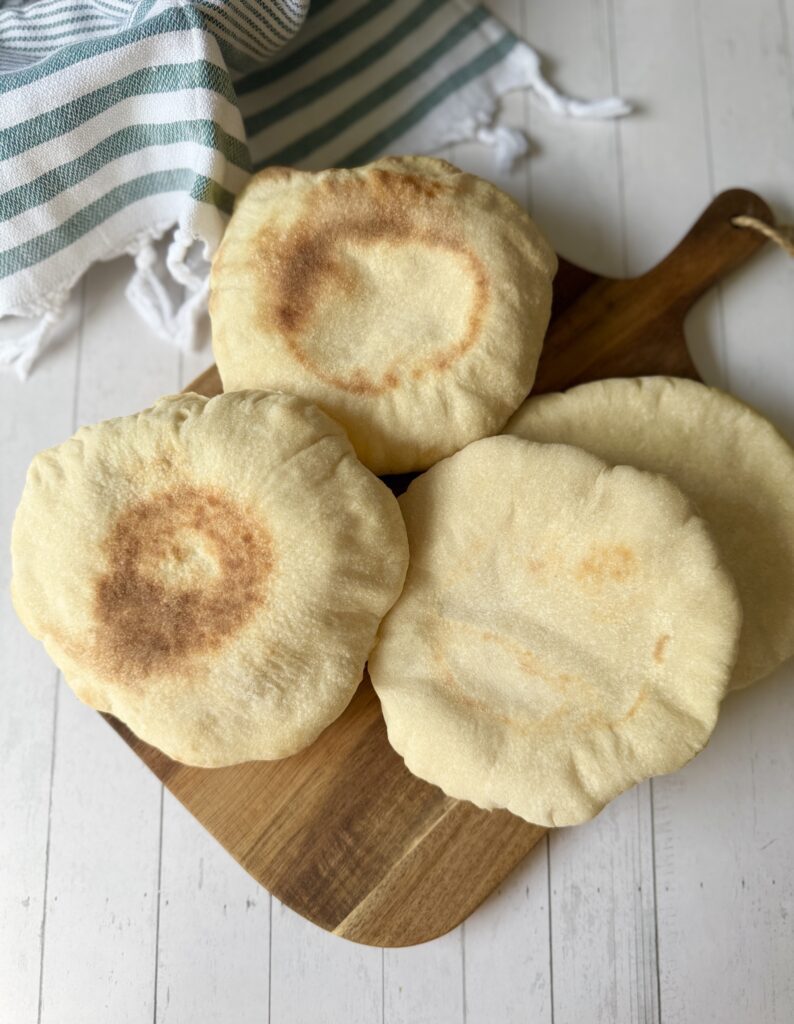
This easy sourdough pita bread is made with just a handful of simple ingredients and comes together with minimal effort. The dough is straightforward to work with, and the results are nothing short of amazing, soft, puffed pockets with that unmistakable sourdough flavor. Whether you’re filling them, dipping them, or enjoying them warm from the oven, these pitas are sure to become a go-to favorite.
If you need this recipe done fast, make sure to check out my discard version Sourdough Discard Pita Bread (same day recipe)!
What is sourdough pita bread?
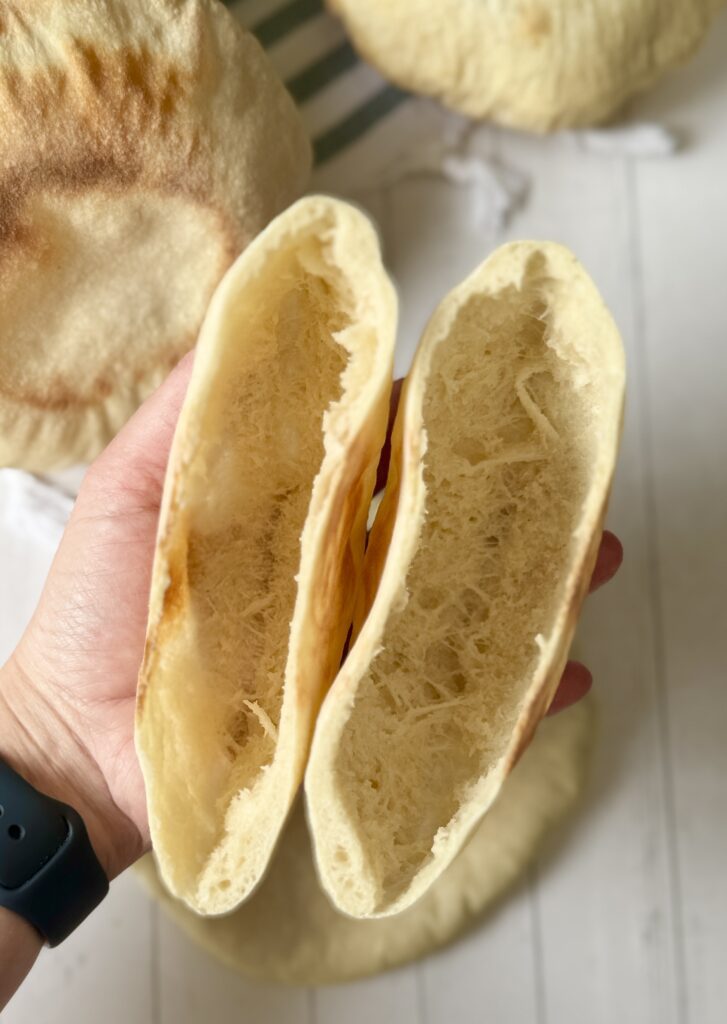
Pita bread is a soft, round flatbread that bakes up with a magical pocket inside, perfect for stuffing with your favorite fillings, scooping up dips, or even using as a quick pizza base. It’s a classic in many Mediterranean and Middle Eastern kitchens and a total staple in ours.
What Makes It Sourdough?
Instead of using commercial yeast, this pita is naturally leavened with sourdough starter. That means it rises thanks to wild yeast and beneficial bacteria from the starter, giving it a subtle tang, a richer flavor, and the added bonus of being easier to digest.
Why I love this recipe
- 100% sourdough: These pitas are naturally leavened with sourdough starter only—no commercial yeast—making them easier to digest and more gut-friendly.
- Simple ingredients: Just flour, water, salt, olive oil, a little honey, and starter, nothing complicated or hard to find.
- Super versatile: Perfect for sandwiches, pita pockets, dipping into hummus, or even as a base for quick pizzas.
- Minimal hands-on time: Most of the work happens while the dough rests and ferments, so your actual effort is low.
How to make sourdough pita bread: step-by-step
Baker’s schedule: Mix the dough in the AM and allow to rest until doubled in size (4-6 hours depending on the temperature in your home), place in the refrigerator for 8-24 hours and bake the following day.
Ingredients
- 100 grams active sourdough starter
- 220 grams water
- 10 grams honey
- 14 grams olive oil
- 400 grams bread flour
- 10 grams salt
Equipment
- Mixing bowl
- Food scale
- Rolling pin
- Parchment paper
- Baking steel or stone
Instructions
Mix the dough
*Ensure your sourdough starter is active and bubbly before mixing the dough. I feed my starter the evening before I plan to mix the pita bread dough.
Can I use all-purpose flour instead of bread flour? Yes, but I recommend using a high protein all-purpose flour (11.7% or higher) for the best structure. You may also need to add an extra 10–20 grams of flour while kneading, depending on the dough’s feel.
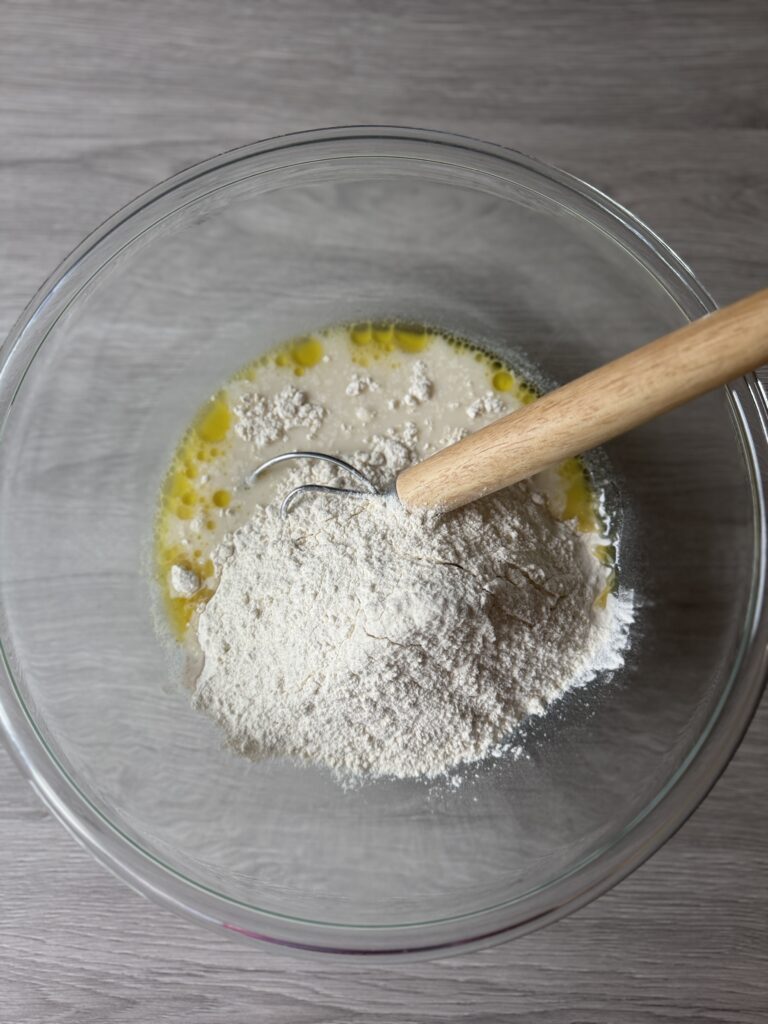
- In a mixing bowl, stir together the active sourdough starter, water, honey, and olive oil.
- Next add the bread flour and salt and mix until a shaggy dough is formed. Cover the dough and let it rest for 30 minutes.
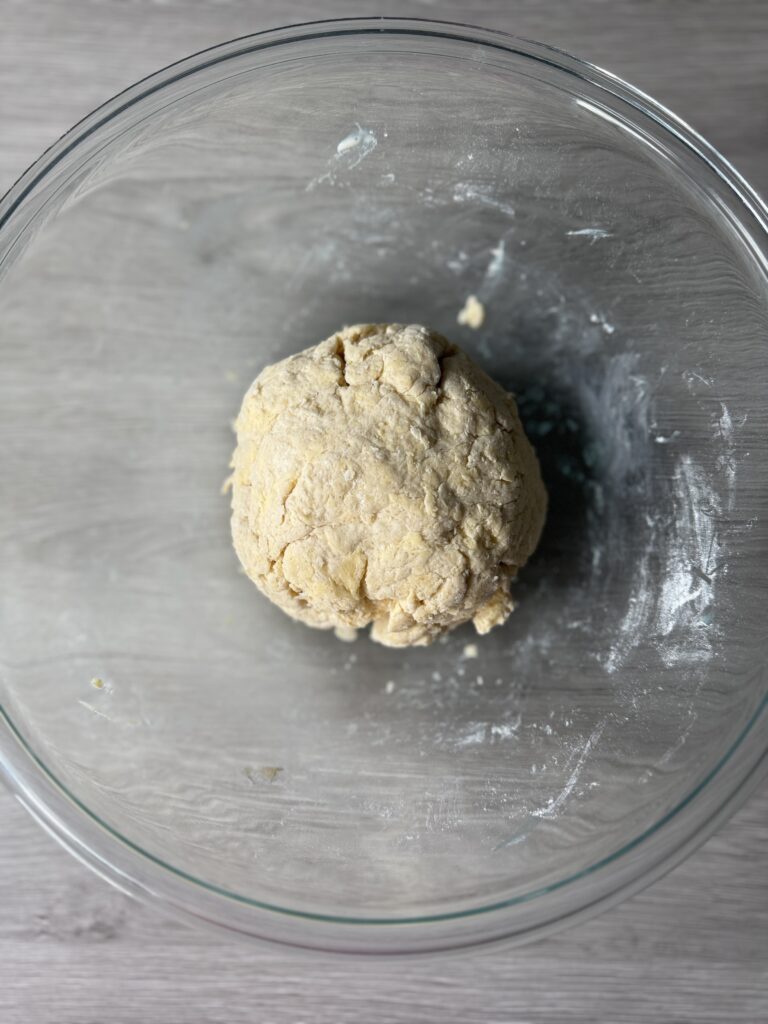
Knead the dough
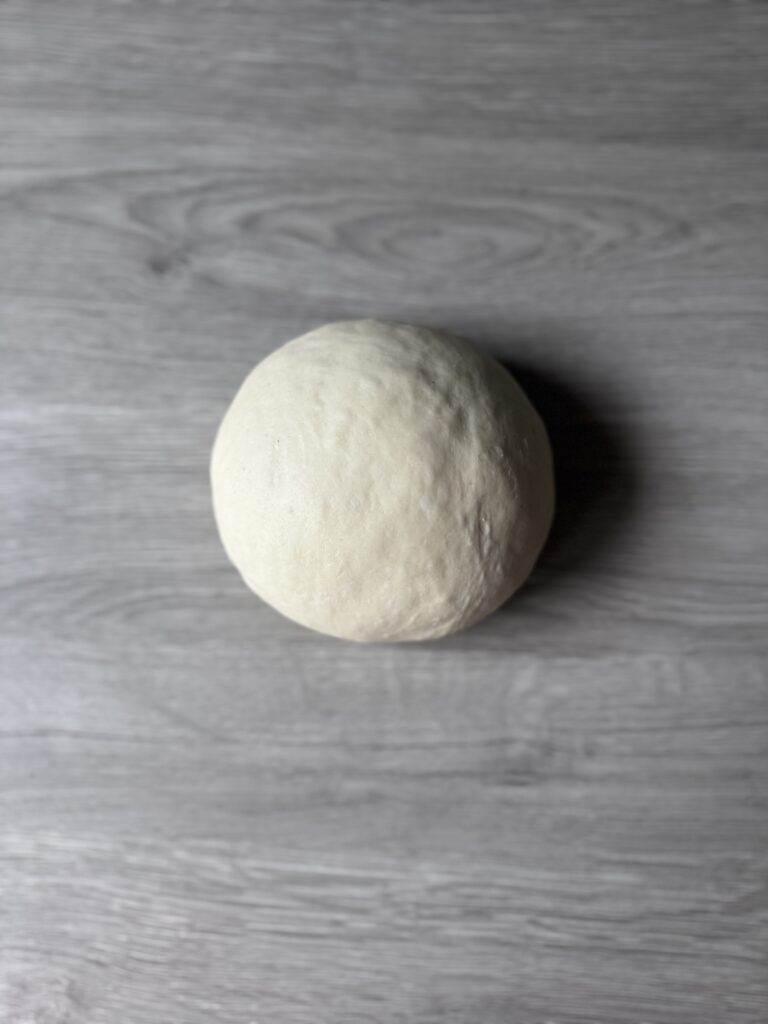
- Knead the dough until smooth and elastic (about 5-8 minutes) by hand or using a stand mixer. The dough is stiffer, so additional flour should not be needed.
- After kneading the dough place it in an oiled bowl, cover it, and let it rest until doubled in size (approximately 4-6 hours).
Fermentation times may vary depending on the temperature in your home. The dough will rise faster in a warmer spot (75-77 degrees F).
Cold fermentation
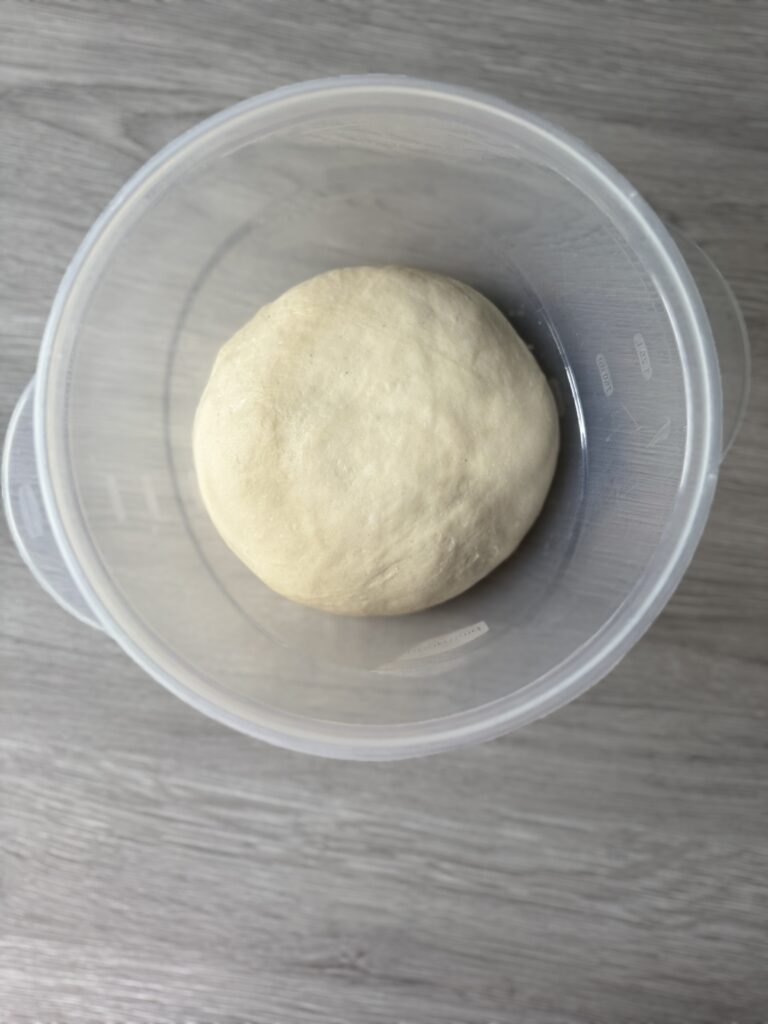
- Once the dough has doubled in size, keep it covered and refrigerate it for 8-24 hours for improved flavor and easier shaping.
Divide & shape the sourdough pita bread
- The following morning remove the dough from the fridge and let it rest for 30 minutes to take the chill off.
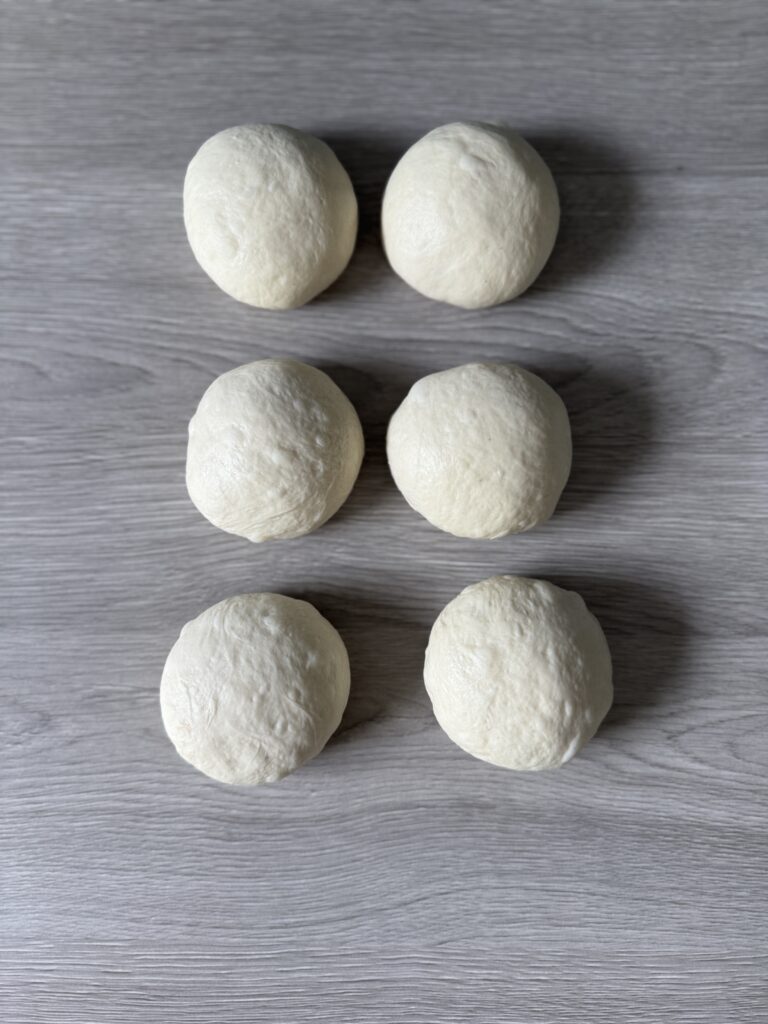
- Using a food scale divide the dough into 6 equal portions (about 125-130 grams each), shape into balls, cover with a tea towel, and let them rest for 20-30 minutes.
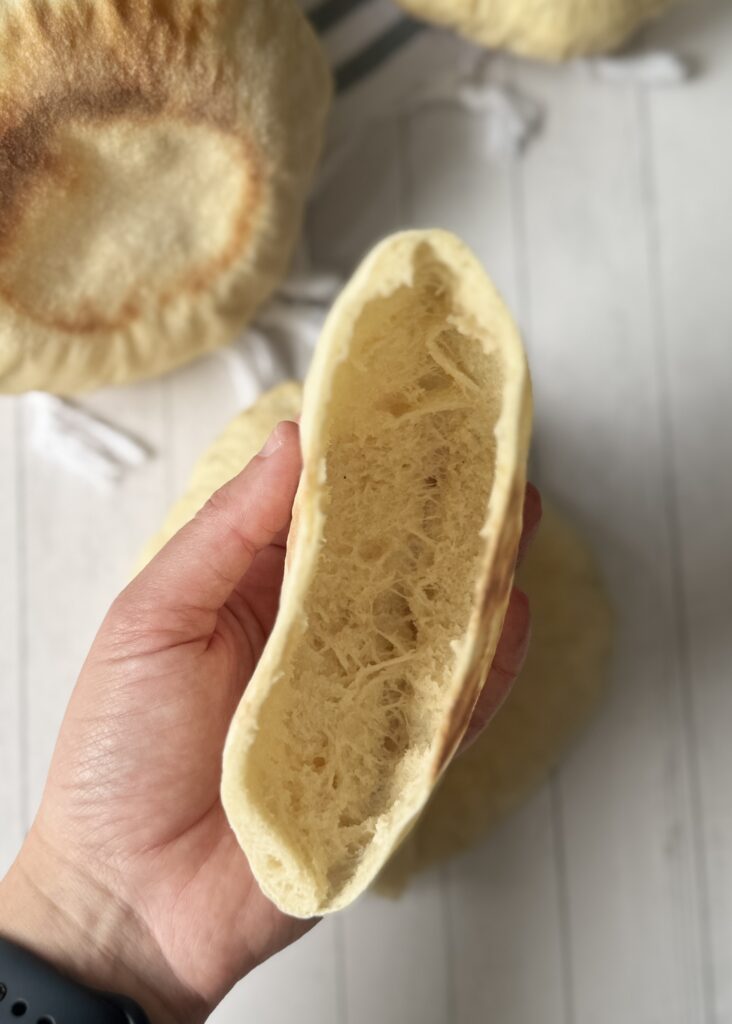
*Don’t skip this step, it’s what creates the signature pockets in pita bread as the dough transitions from a ball to a thin, even round.
Roll the dough out & bake
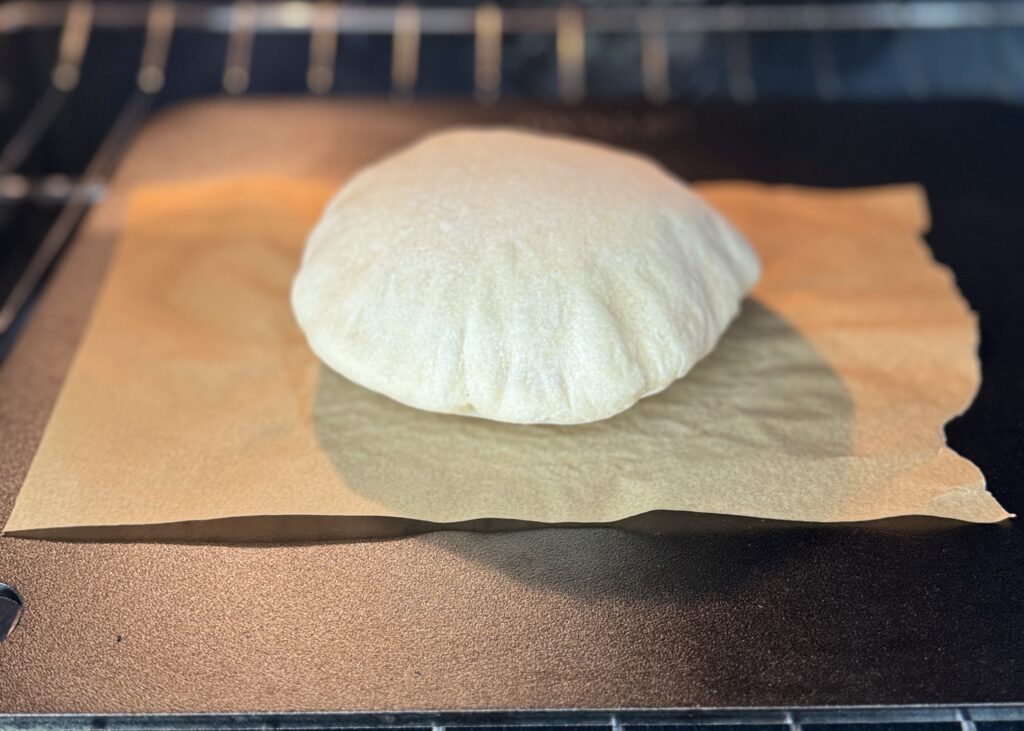
- Preheat the oven to 500 degrees F with the baking steel or stone in the oven for at least 45 minutes. The extremely high temperature is what makes the pitas get their signature pockets.
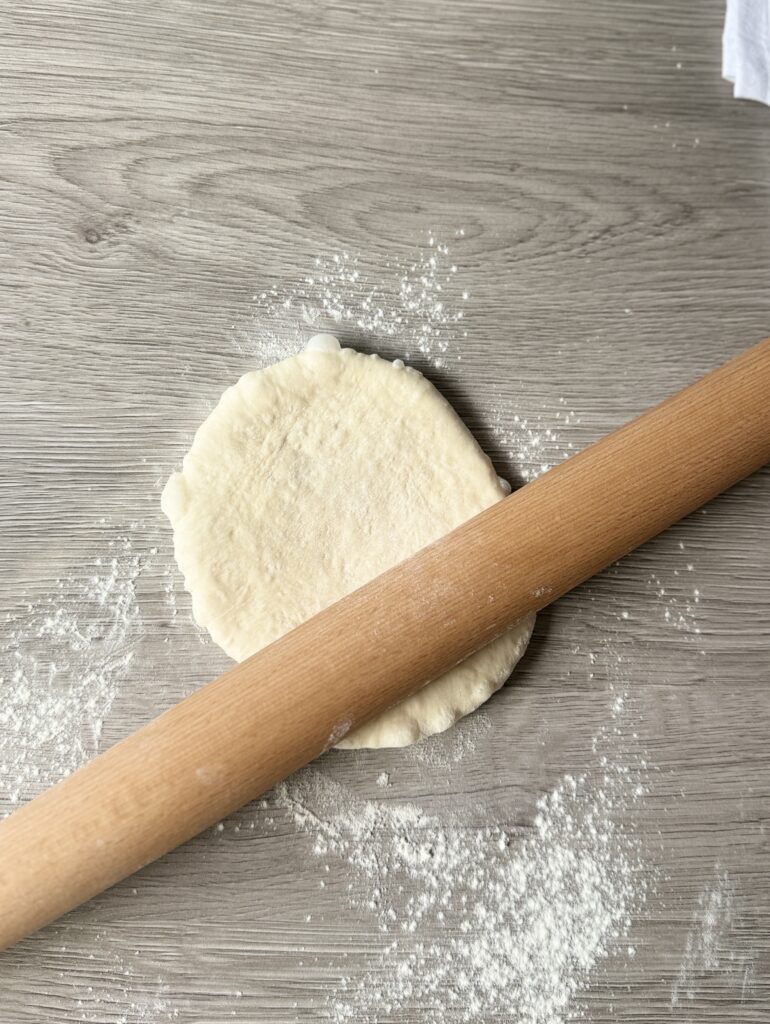
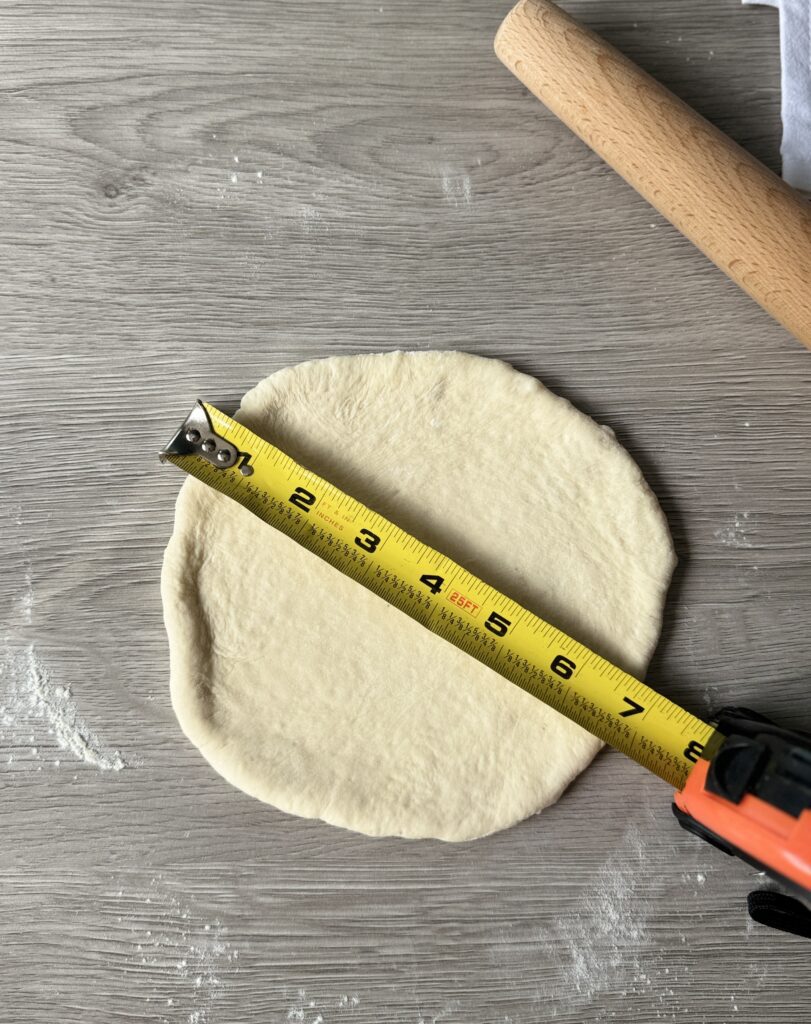
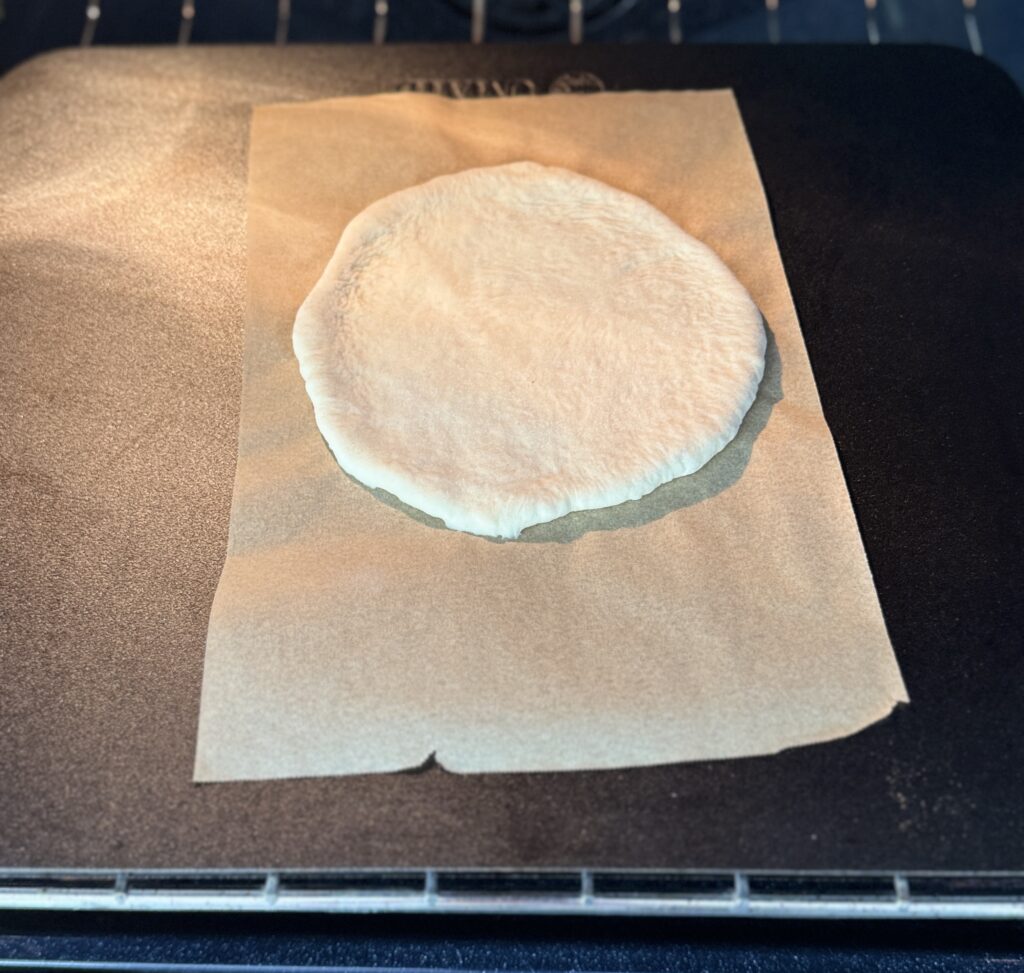
- Roll each dough ball into a 6–7 inch round, dusting with flour as needed to prevent sticking. Place each round on its own piece of parchment paper, this makes transferring them to the oven much easier and keeps their shape intact.
- Using a pizza peel or cutting board slide 1-2 pitas on the baking steel at a time for 3-5 minutes or until puffed and lightly golden.
Tip: If you want a crispier top and bottom simply remove the parchment paper with tongs and bake for an additional minute on each side. They’re easy to flip!
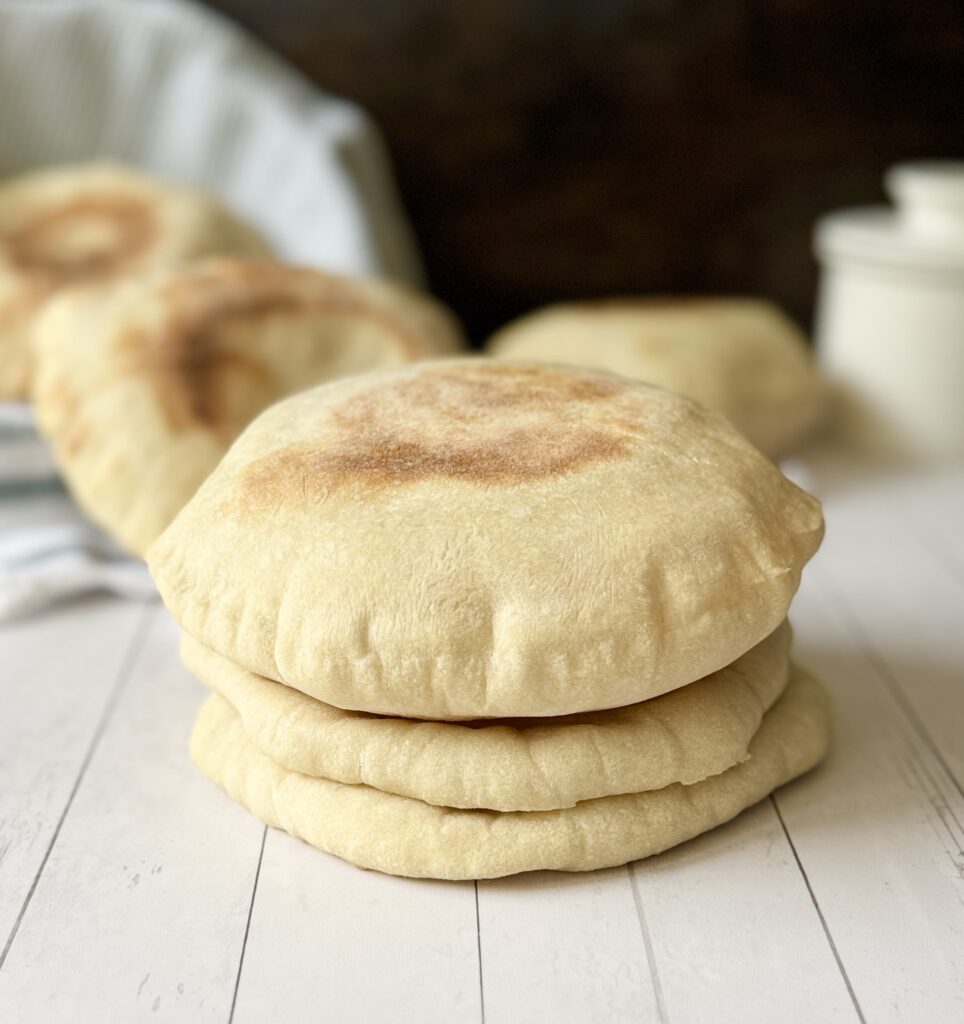
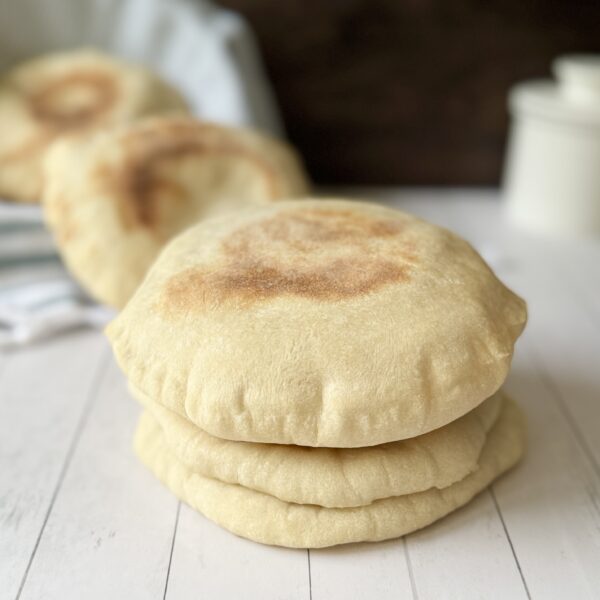
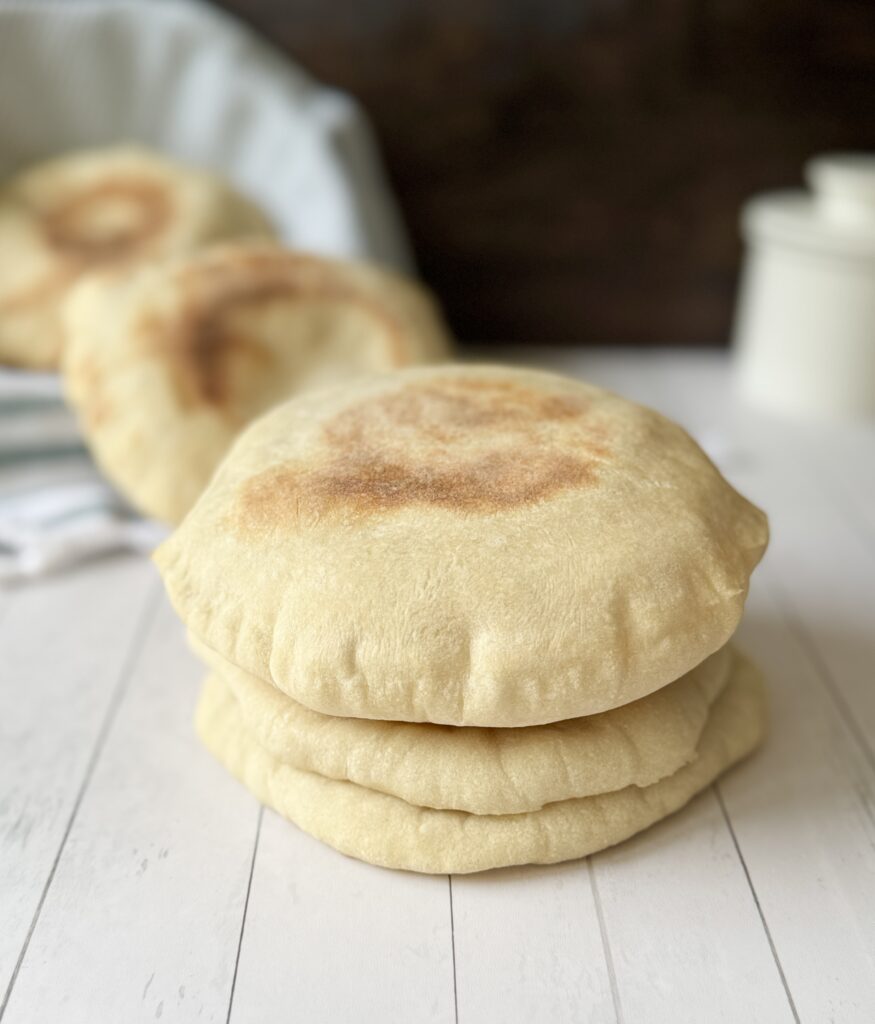
- Stack pitas on a towel lined plate and cover with another towel to keep them soft.

Stove top Instructions
**Sourdough pita bread can be cooked on the stove-top, but some extra attention to detail is needed to ensure a proper puff.
- Preheat a cast iron skillet over medium-high heat until very hot (no oil needed).
- Roll your dough into 6–7 inch rounds about ¼ inch thick. Make sure the dough is well-rested and rolled evenly—thin edges won’t puff as well.
Cook one pita at a time
- Place the round in the dry skillet.
- After 30–45 seconds, bubbles should form—flip it.
- Cook the second side for about 1 minute, then flip it again.
- On this third pass, it should puff up! Press gently with a spatula if needed.
**Optional tip: Cover the skillet with a lid or domed pan lid during the last flip to trap heat and steam, this can help encourage a full puff.
Remove when both sides are golden with some nice spots, and wrap in a clean towel to keep soft.
Pro Tips if the pita bread is not puffing on the stove
- Don’t skip the rest time after rolling—10–15 minutes helps the gluten relax.
- A hot pan is crucial; too cool and it won’t puff.
- Covering the pan during cooking can help trap steam, boosting the chances of a perfect pocket.
- Slight moisture helps, so don’t let your rolled dough dry out before cooking.
Storing sourdough pita bread
- Sourdough pita bread is best on the day of but can be stored in an airtight container or bag at room temperature for up to 3 days or freeze them for longer storage.
More sourdough bread recipes
- Sourdough Ciabatta Bread
- Sourdough French Bread
- Sourdough Italian Bread
- Soft Sourdough Sandwich Bread (not too tangy!)
Easy Sourdough Pita Bread
Easy sourdough pita bread made with simple ingredients-soft, chewy, and perfect for stuffing or dipping.
Equipment
- Mixing bowl
- Food scale
- Rolling Pin
- Parchment paper
- Baking steel or stone
Ingredients
- 100 grams active sourdough starter (at peak and bubbly)
- 220 grams water
- 10 grams honey
- 14 grams olive oil
- 400 grams bread flour
- 10 grams salt
Instructions
Mix the dough
-
*Ensure your sourdough starter is active and bubbly before mixing the dough. I feed my starter the evening before I plan to mix the pita bread dough.
-
In a mixing bowl, stir together the active sourdough starter, water, honey, and olive oil.
-
Next add the bread flour and salt and mix until a shaggy dough is formed. Cover the dough and let it rest for 30 minutes.
Knead the dough
-
Knead the dough until smooth and elastic (about 5-8 minutes) by hand or using a stand mixer. The dough is stiffer so additional flour should not be needed.
-
After kneading the dough place it in an oiled bowl, cover it, and let it rest until doubled in size (approximately 4-6 hours).
Fermentation times may vary depending on the temperature in your home. The dough will rise faster in a warmer spot (75-77 degrees F).
Cold fermentation
-
Once the dough has doubled in size, keep it covered and refrigerate it for 8-24 hours for improved flavor and easier shaping.
Divide & shape the sourdough pita bread
-
The following morning remove the dough from the fridge and let it rest for 30 minutes to take the chill off.
-
Using a food scale divide the dough into 6 equal portions (about 125-130 grams each), shape into balls, cover with a tea towel, and let them rest for 20-30 minutes.
*Don’t skip this step, it’s what creates the signature pockets in pita bread as the dough transitions from a ball to a thin, even round.
Roll the dough out & bake
-
Preheat the oven to 500 degrees F with the baking steel or stone in the oven for at least 45 minutes. The extremely high temperature is what makes the pitas get their signature pockets.
-
Roll each dough ball into a 6–7 inch round, dusting with flour as needed to prevent sticking. Place each round on its own piece of parchment paper, this makes transferring them to the oven much easier and keeps their shape intact.
-
Using a pizza peel or cutting board slide 1-2 pitas on the baking steel at a time for 3-5 minutes or until puffed and lightly golden.
Tip: If you want a crispier top and bottom simply remove the parchment paper with tongs and bake for an additional minute on each side. They're easy to flip!
-
Stack pitas on a towel lined plate and cover with another towel to keep them soft.
Stove-top instructions
-
**Sourdough pita bread can be cooked on the stove-top, but some extra attention to detail is needed to ensure a proper puff.
Preheat a cast iron skillet over medium-high heat until very hot (no oil needed).
-
Roll your dough into 6–7 inch rounds about ¼ inch thick. Make sure the dough is well-rested and rolled evenly—thin edges won’t puff as well.
-
Cook one pita at a time: place the round in the dry skillet, after 30–45 seconds, bubbles should form-flip it. Cook the second side for about 1 minute, then flip it again. On this third pass, it should puff up.
**Optional tip: Cover the skillet with a lid or domed pan lid during the last flip to trap heat and steam, this can help encourage a full puff.
-
Remove when both sides are golden with some nice spots, and wrap in a clean towel to keep soft.
Pro tips if the pita bread is not puffing on the stove
-
-Don’t skip the rest time after rolling—10–15 minutes helps the gluten relax.
-A hot pan is crucial; too cool and it won’t puff.
-Covering the pan during cooking can help trap steam, boosting the chances of a perfect pocket.
-Slight moisture helps, so don’t let your rolled dough dry out before cooking.
Storing sourdough pita bread
-
Sourdough pita bread is best on the day of but can be stored in an airtight container or bag at room temperature for up to 3 days or freeze them for longer storage.
Notes
Baker's schedule: Mix the dough in the AM and allow to rest until doubled in size (4-6 hours depending on the temperature in your home), place in the refrigerator for 8-24 hours and bake the following day.
Can I use all-purpose flour? Yes, but I recommend using a high protein all-purpose flour (11.7% or higher) for the best structure. You may also need to add an extra 10–20 grams of flour while kneading, depending on the dough’s feel.
Comments