
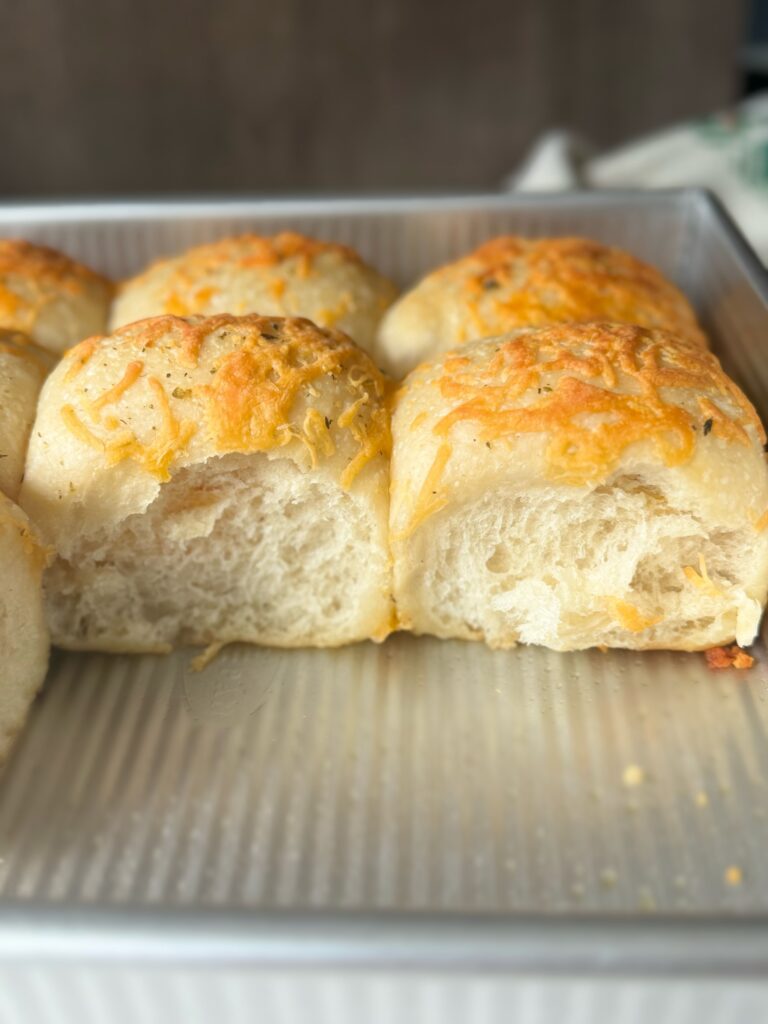
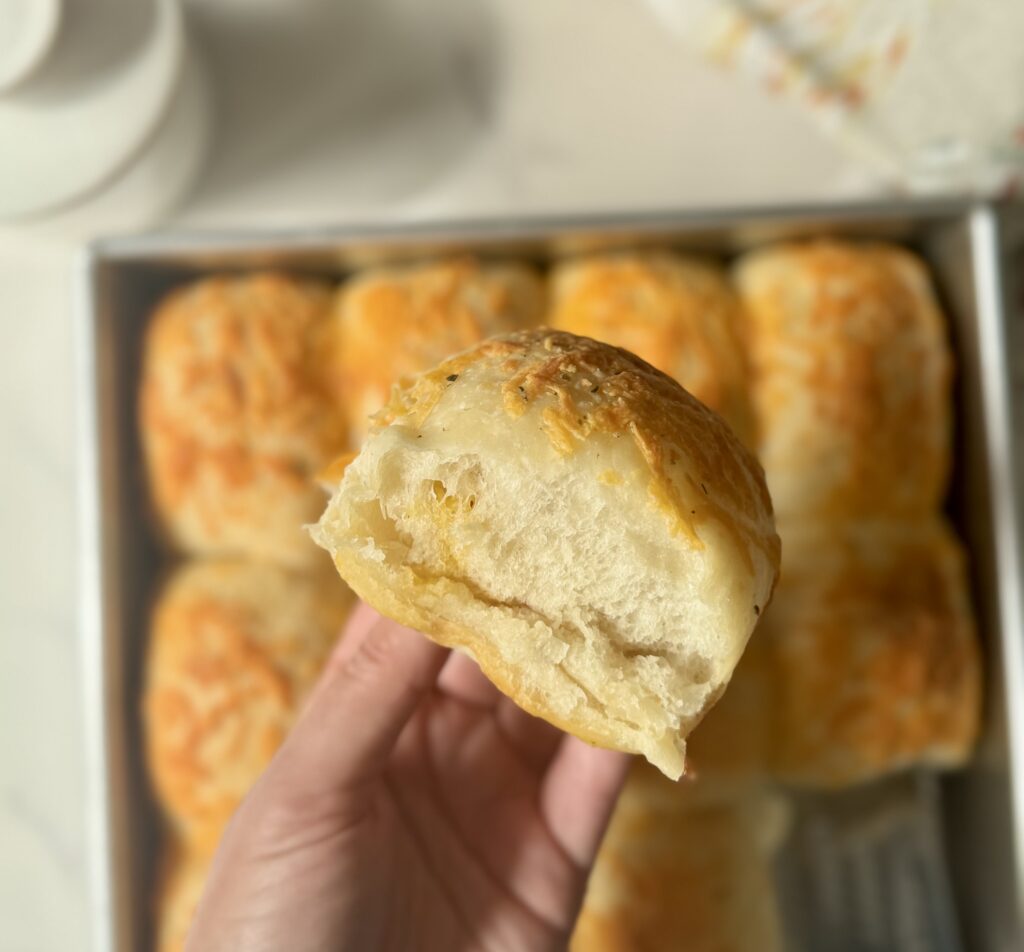
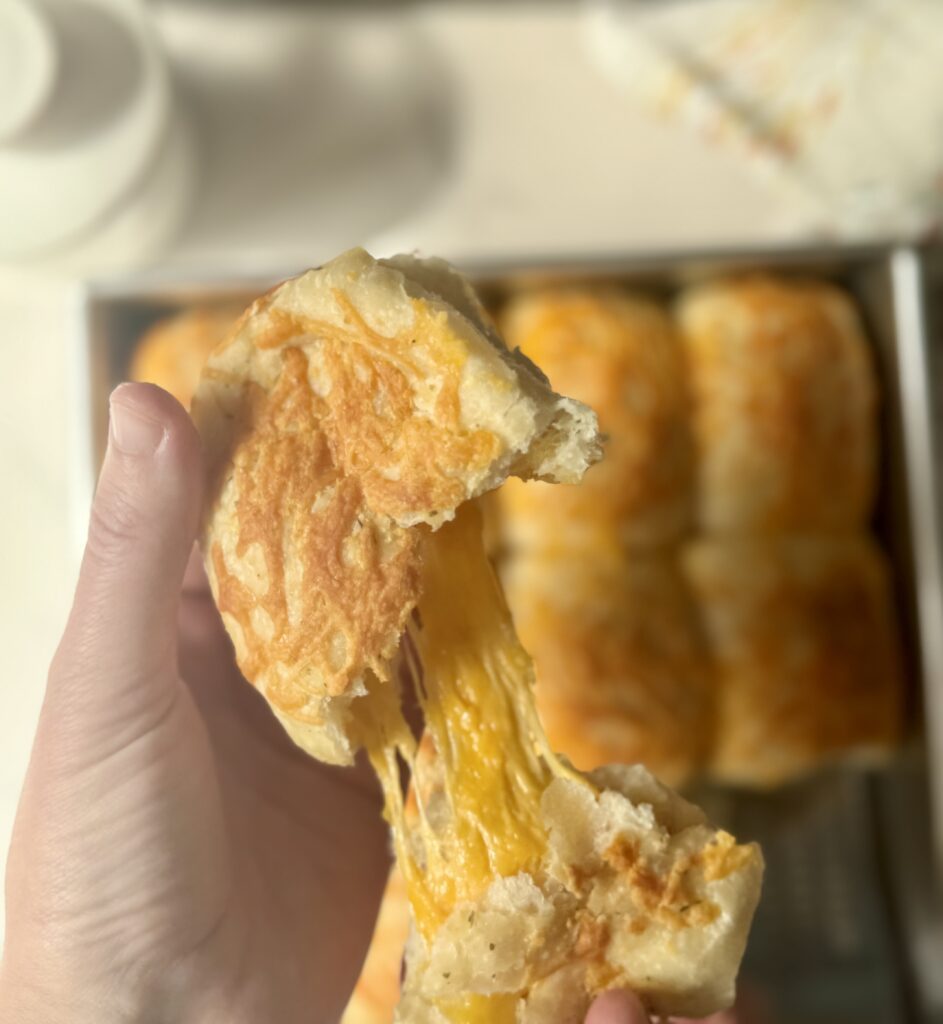
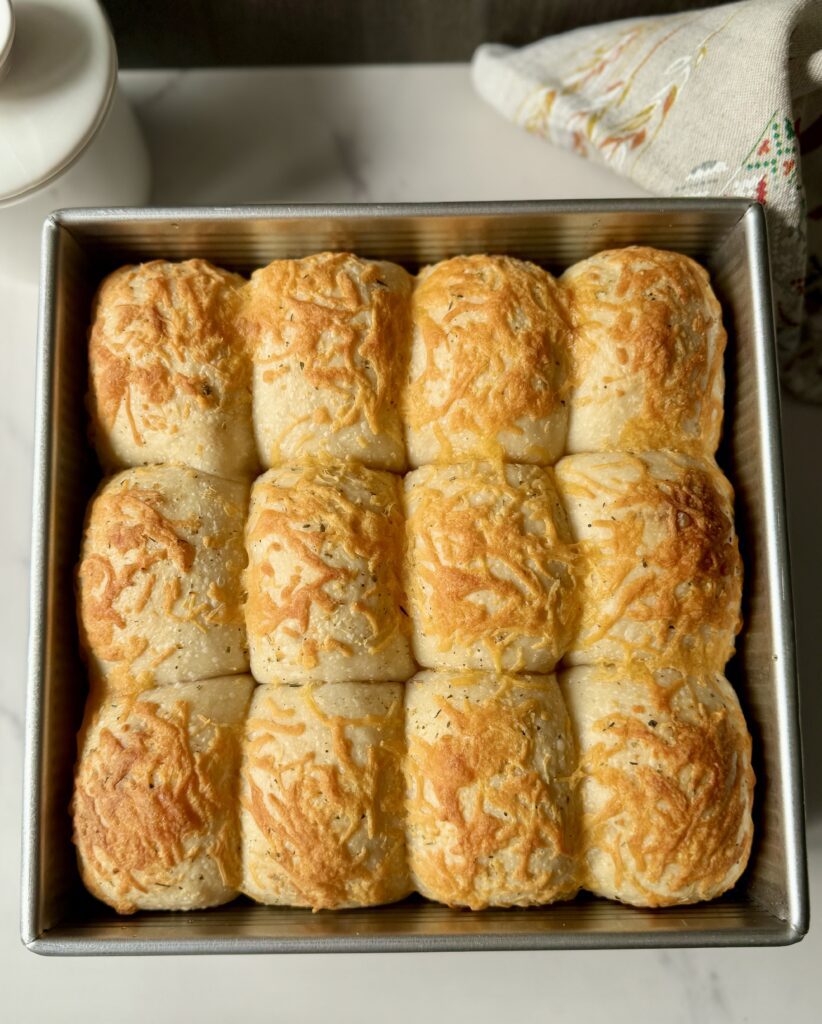
Stuffed sourdough cheese buns are a delicious fusion of rich flavors and textures, combining the tangy, chewy sourdough with a gooey, melted cheese filling. The natural depth of sourdough adds a subtle complexity that complements the savory cheese inside, creating a perfect balance in every bite.
The garlic butter sauce brushed on top makes these buns even more irresistible, infusing them with a rich, aromatic flavor and a slight crunch from the golden crust. This combination makes them an ideal appetizer, snack, or even a side dish, perfect for sharing at gatherings or enjoying yourself.
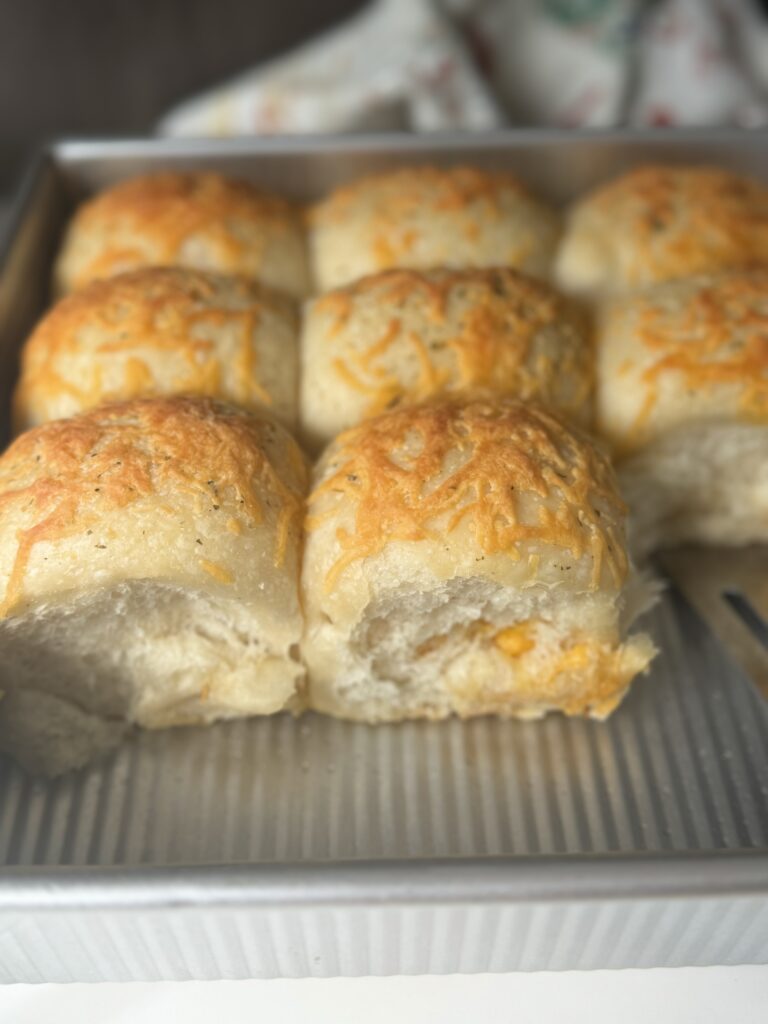
Their soft interior and savory filling, paired with the garlic butter finish, ensure they’re a hit for any occasion.

Why I love this recipe
When developing this recipe, I aimed to create a show-stopping appetizer or snack that would excite the taste buds. The long fermentation of the sourdough brings out deep, complex flavors in the slightly sweet bun, which pairs perfectly with the rich, savory melted cheese inside.
The result is a phenomenal combination of textures and tastes that will leave a lasting impression at any gathering. Here are just a few more reasons why I love this recipe:
- Stuffed sourdough cheese buns are 100% sourdough making them easier to digest.
- The dough itself is a dream to work with and quite versatile. Feel free to use the recipe to make regular dinner rolls, a sandwich loaf, or even hamburger buns.
- Stuffed sourdough cheese buns are mixed by hand; no equipment is needed!
What cheese should I use?
In this recipe, I use a mixture of sharp and mild cheddar cheese which is a personal preference, but feel free to use whatever you like! Here are a few options:
- Mozzarella – Melts beautifully and gives a classic, stretchy texture.
- Gruyère – A nutty, slightly sweet cheese that melts smoothly.
- Fontina – Creamy and mild, with a hint of earthiness.
- Gouda – Adds a sweet and slightly smoky flavor.
- Parmesan (mixed with another cheese) – Adds a salty, umami kick when combined with a melty cheese.
Each cheese offers a different flavor and texture profile, making it easy to customize the buns to your preference.
How to make stuffed sourdough cheese buns
Baker’s schedule:
Day 1: Feed your starter the night before you mix the dough.
Day 2: Mix the dough in the morning and allow it to ferment for 7-8 hours or until doubled. Shape and stuff the buns and place them into the refrigerator overnight.
Day 3: Remove the buns from the fridge and allow them to rest for 4-5 hours or until they fill the pan and bake.
Equipment
- 1 9×9 inch baking pan (glass or metal works well)
- Parchment paper
- Mixing bowl
- Food scale
- Bench scraper or dough scraper
Ingredients
- 360 grams of bread flour
- 240 grams of milk
- 80 grams of sourdough starter (active and bubbly)
- 24 grams of sugar
- 28 grams of unsalted butter (softened)
- 5 grams of salt
- 120 grams of cubed cheese of your choice (I used cheddar)
For the Garlic butter:
- 1/4 cup of unsalted butter melted
- 3 cloves of garlic (minced)
- 1 & 1/2 teaspoons of Italian seasoning
- 1/4 cup of shredded cheese to top the buns
Mix the dough
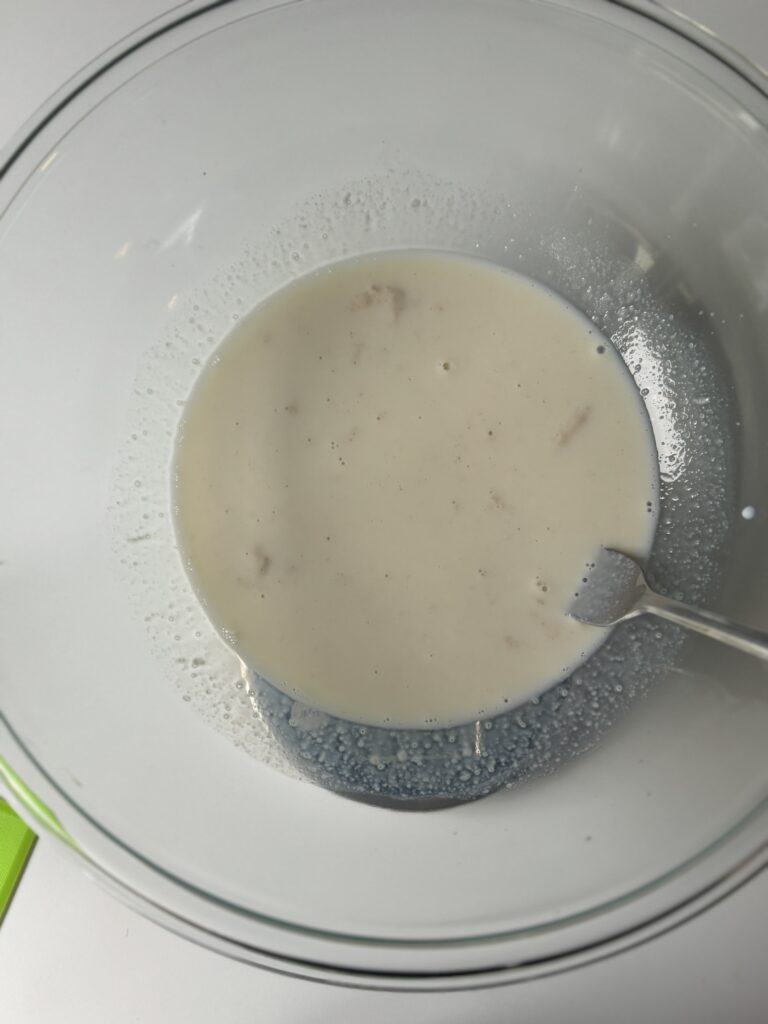
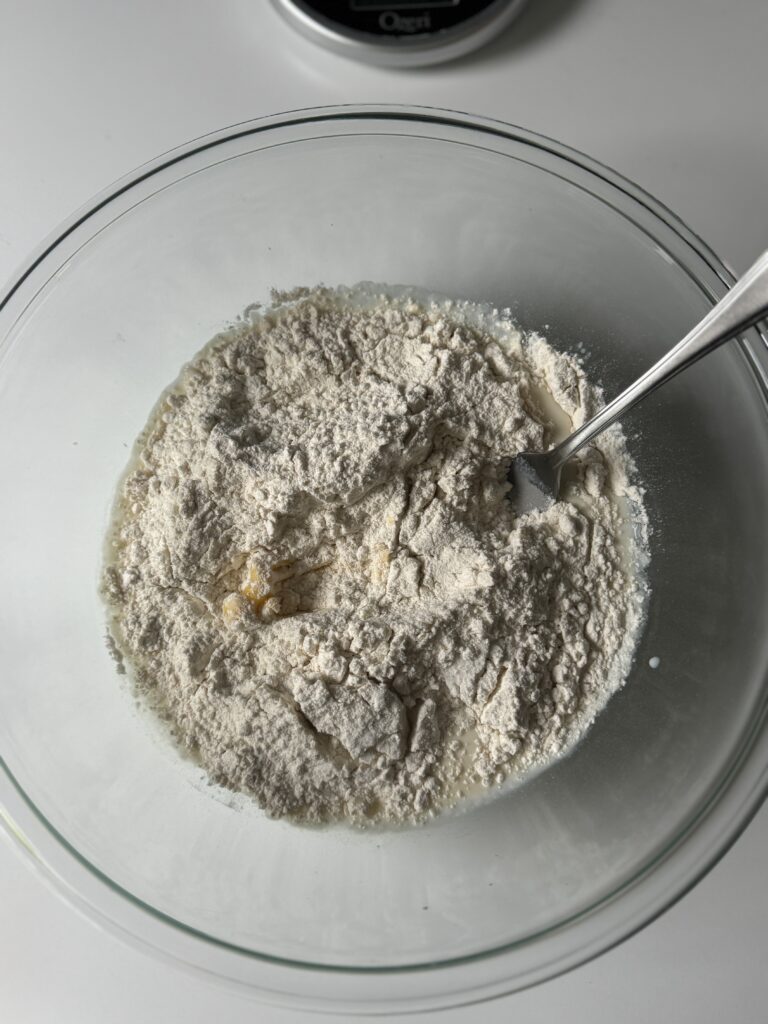
- Warm the milk for 20-30 seconds in the microwave and then add it to a mixing bowl. Stir in the starter and sugar until mostly dissolved.
- Next, add the flour, softened butter, and salt and mix until a rough dough ball is formed.
- Once complete, cover the bowl with plastic wrap or a damp towel and let it rest for 30-45 minutes.
Knead the dough & stretch & folds
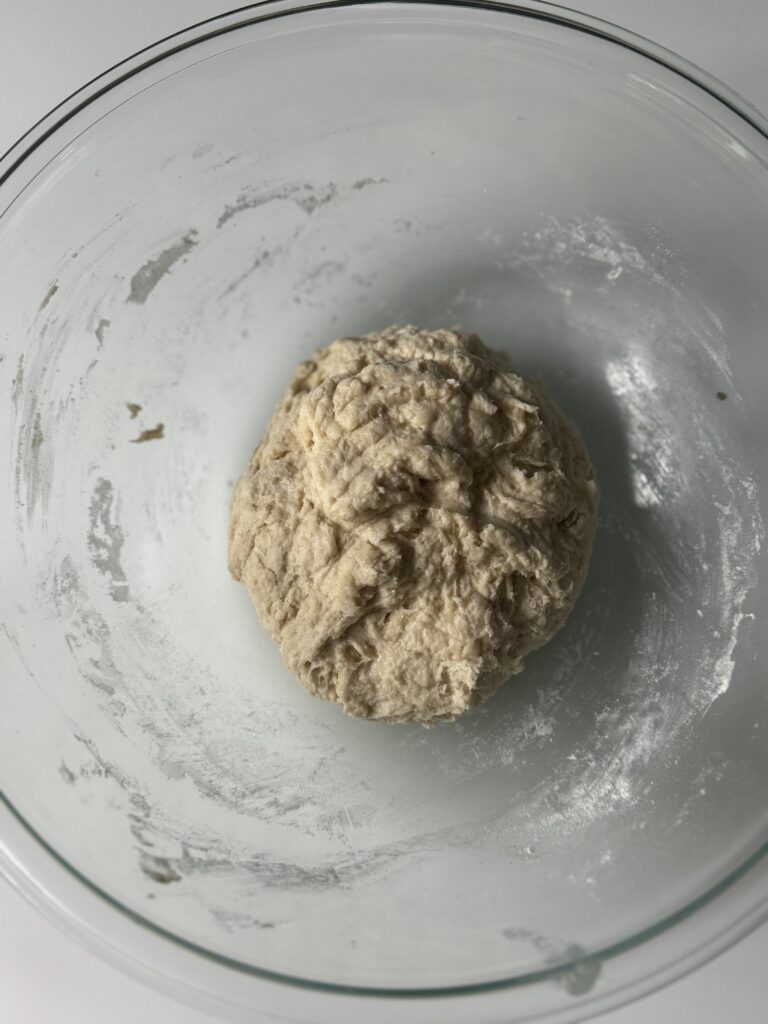
- After the dough has rested, turn it out on a lightly floured surface and knead it until it is smooth and comes together. Not much additional flour should be needed.
- Once complete, place the dough in a buttered bowl and let it rest for 45 minutes.
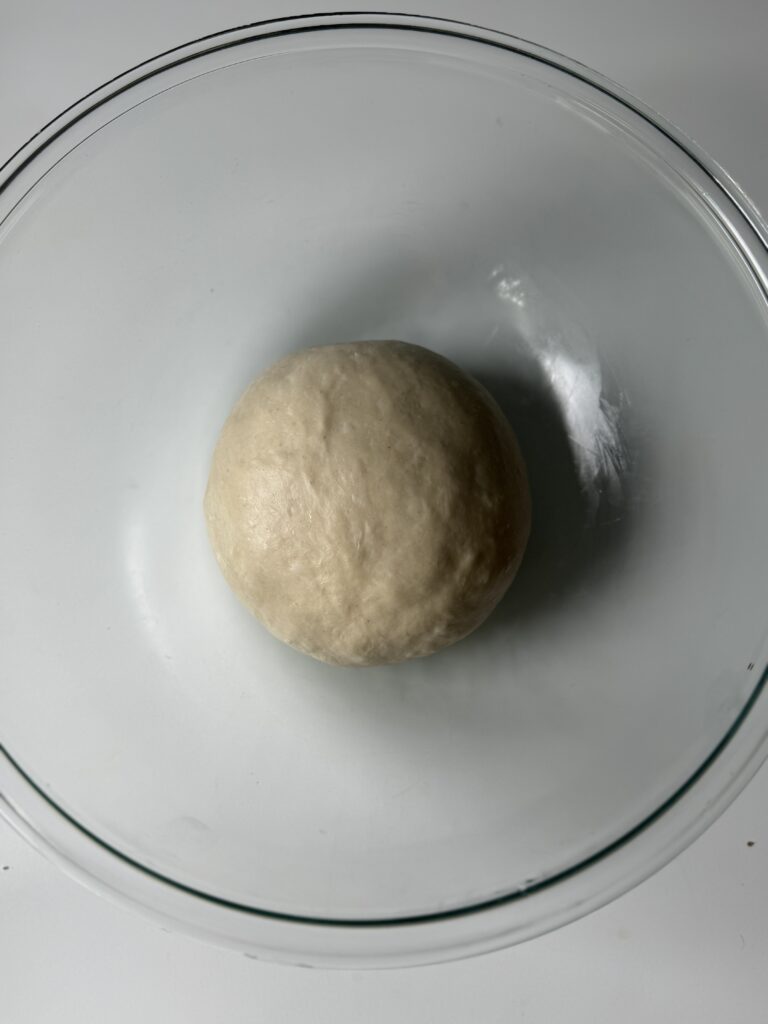
- Perform 2-3 stretch and folds in 45-minute increments. Then let the dough rest, covered for the remaining bulk rise.
Shape & stuff the sourdough cheese buns
- Line your baking pan with parchment paper. I have baked the sourdough cheese buns without parchment paper, but to prevent a mess & soggy bottoms I recommend using it.
- After the dough has doubled in size, turn it out on a clean work surface and have your cheese cubes handy.
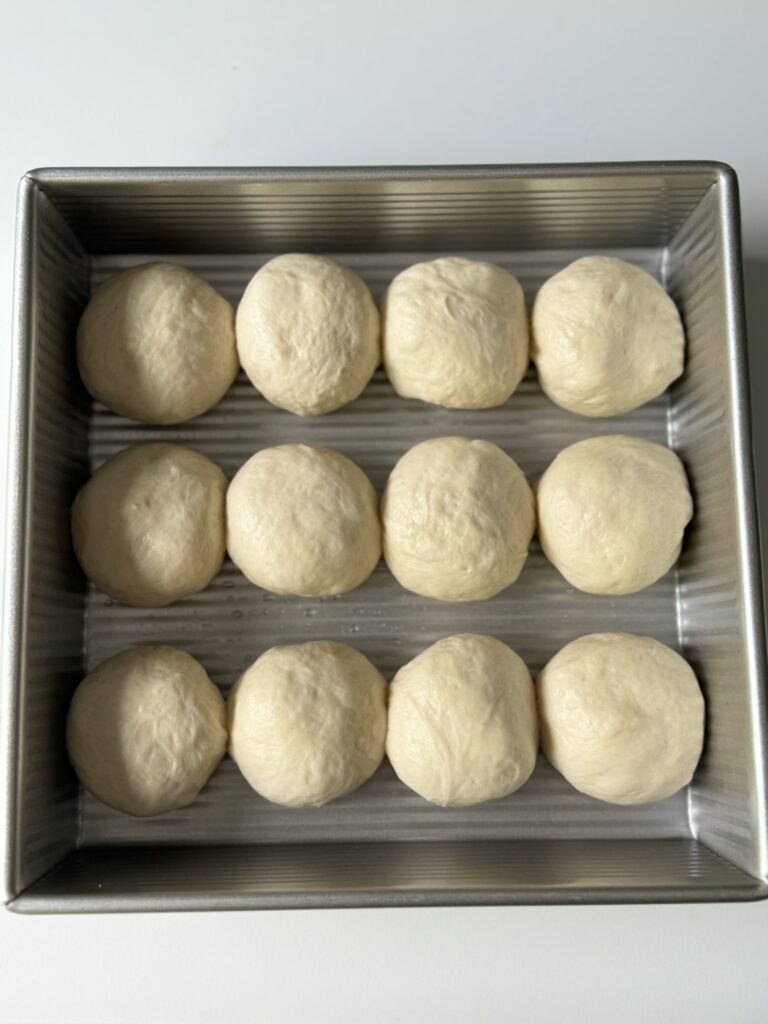
- Using a food scale, divide the dough into 12 equal pieces (around 60 grams each).


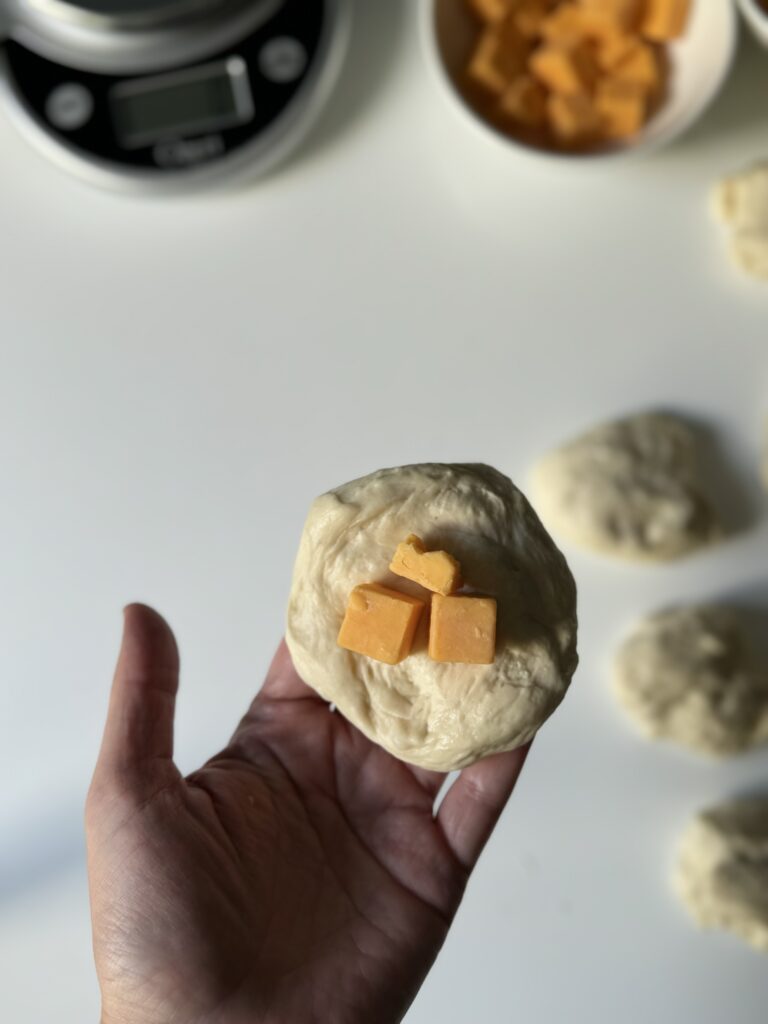
- To stuff a dough ball with cheese, flatten the dough into a small circle with your hands, place a portion of cheese in the center, I found that 8-10 grams of cheese was a good amount, but feel free to add more or less depending on your preference.
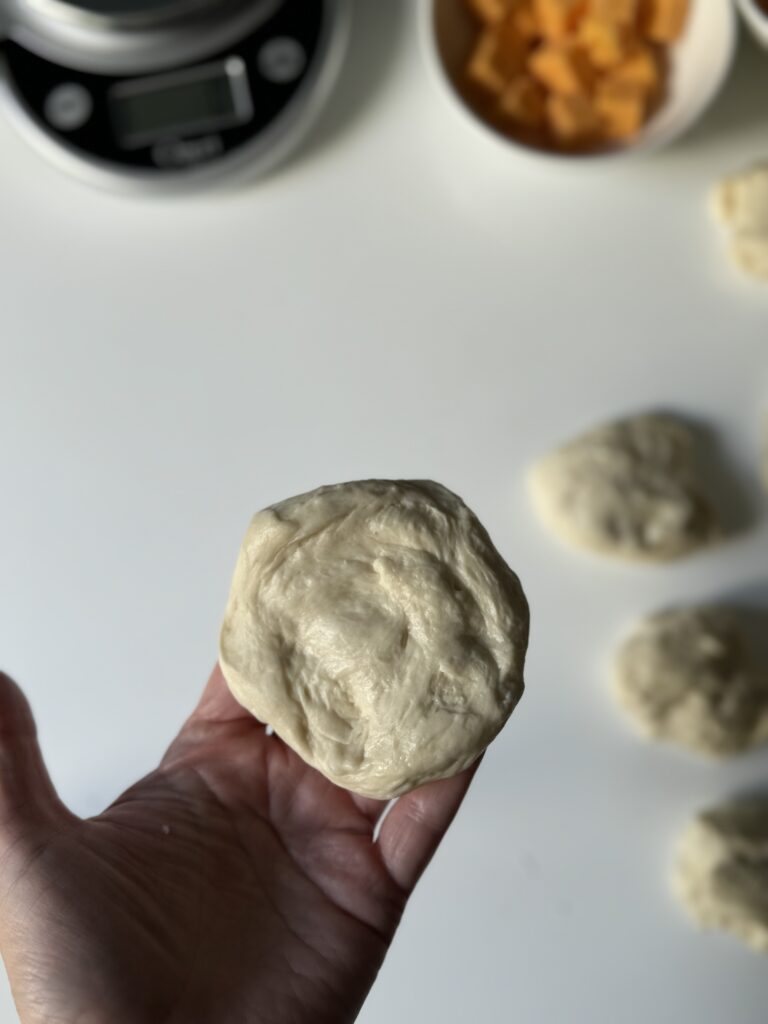
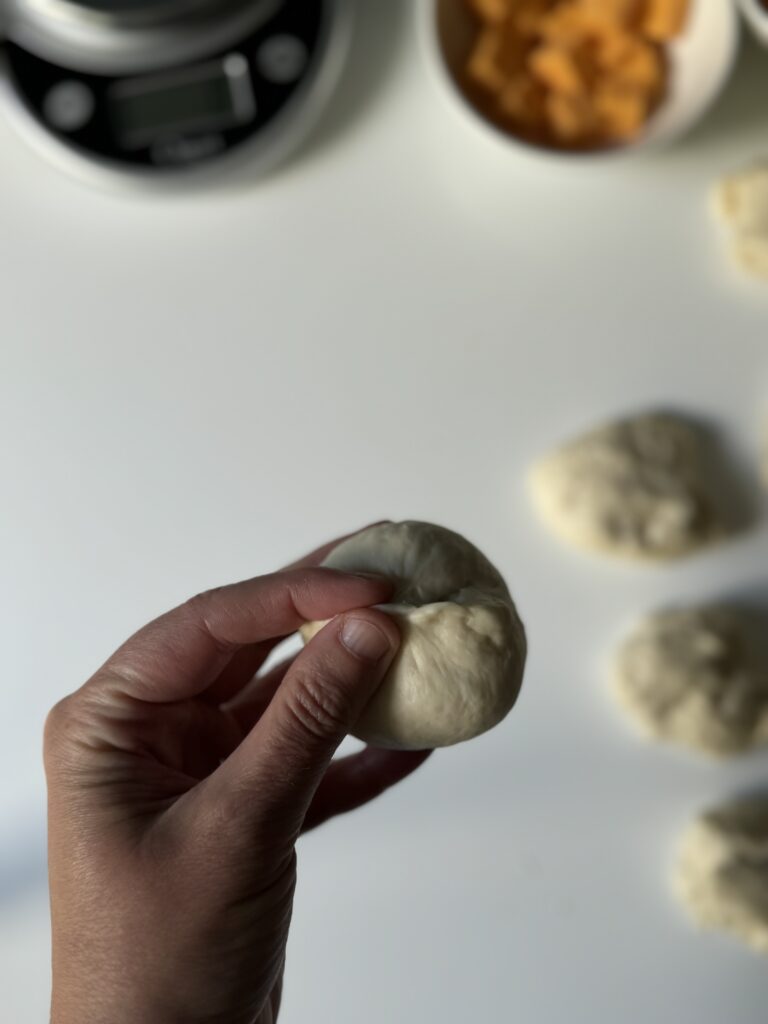
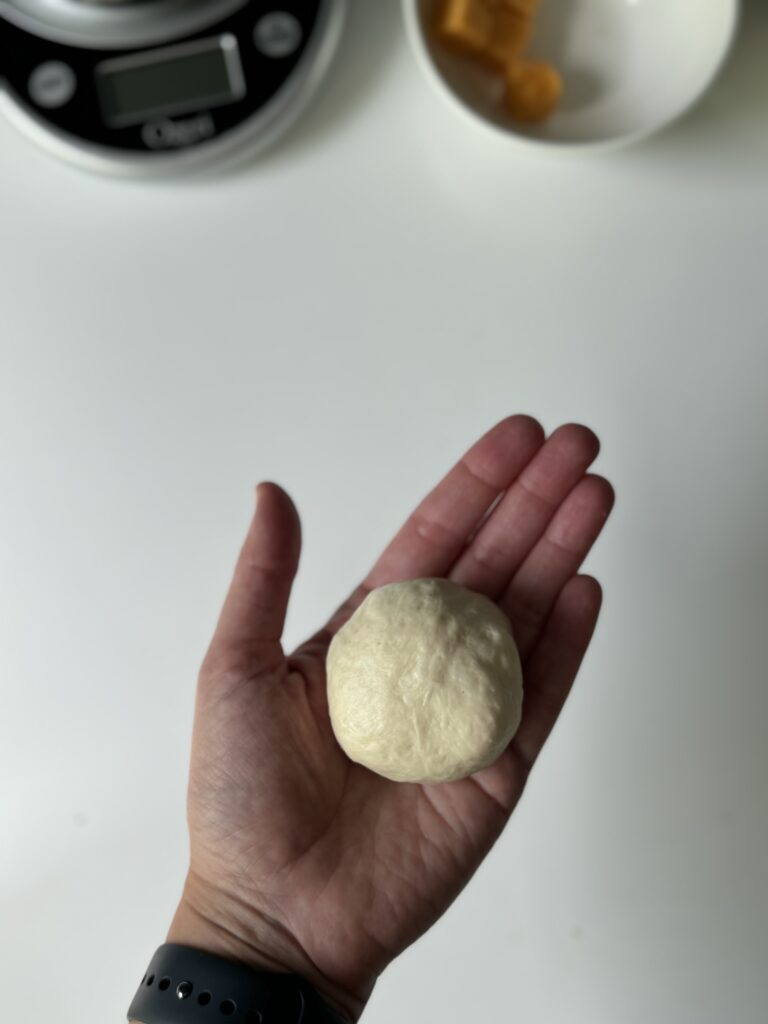
- Then carefully pull the edges of the dough up and over the cheese. Pinch the edges together to seal the cheese inside, making sure there are no gaps. Shape it back into a smooth ball and place it seam-side down on your baking pan.

- After all of the cheese buns have been shaped and placed in the baking pan, cover the pan with plastic wrap and place it in the refrigerator overnight.
*Stuffed sourdough cheese buns can be baked on the same day after they have finished their second proof.
Proof, Brush, & Bake
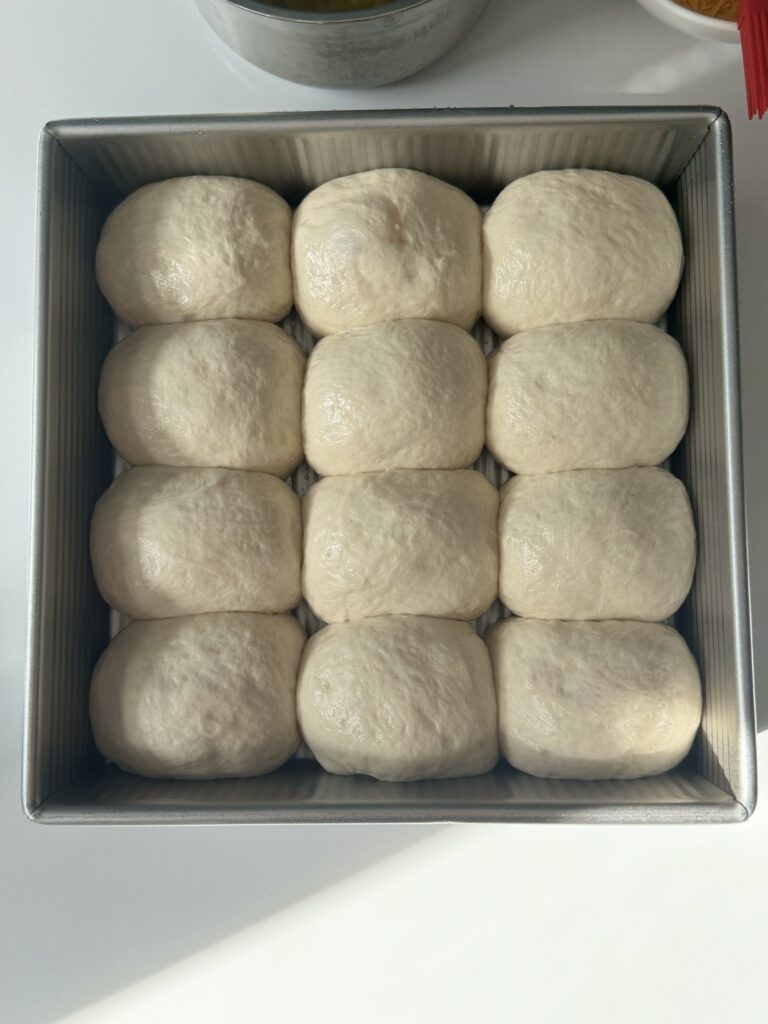
- The following morning remove the stuffed sourdough cheese buns from the fridge and allow them to puff up until they fill the pan (timing on this can vary, mine took 5 hours). Using a warm spot will help, but ensure they aren’t resting anywhere over 80 degrees F as the butter will melt out of them.
- Once they have puffed up and are ready to bake preheat the oven to 375 degrees F.
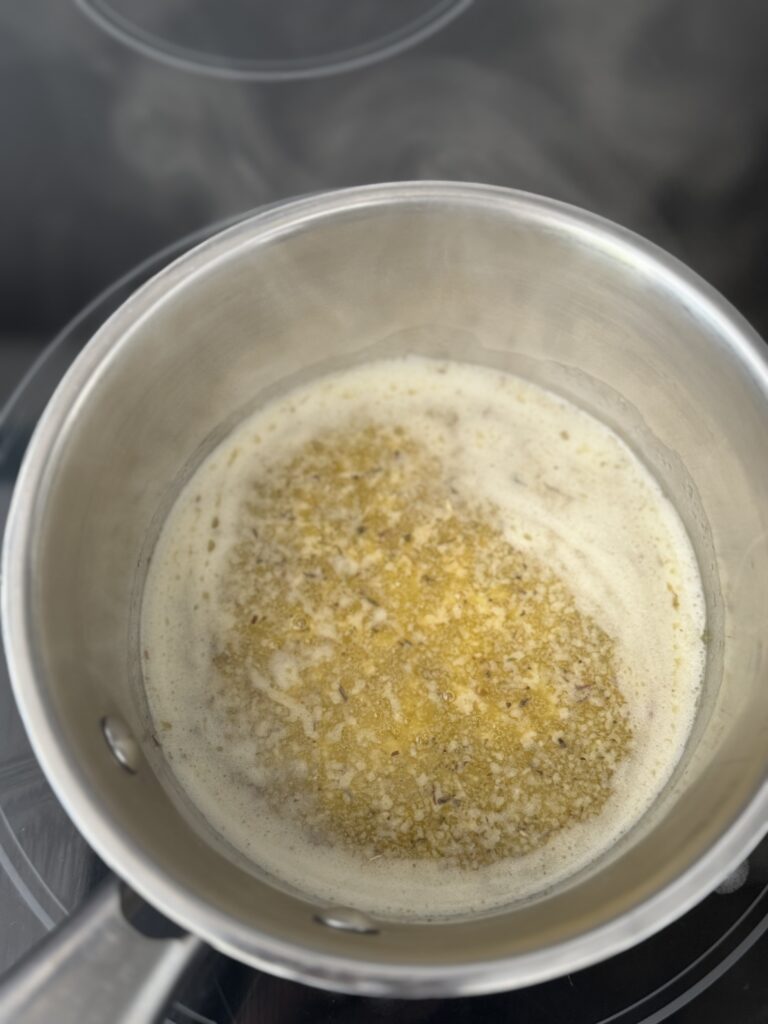
- In a small saucepan melt the butter on low and then add the garlic and Italian seasoning. Cook the garlic & herbs for 1-2 minutes or until fragrant.
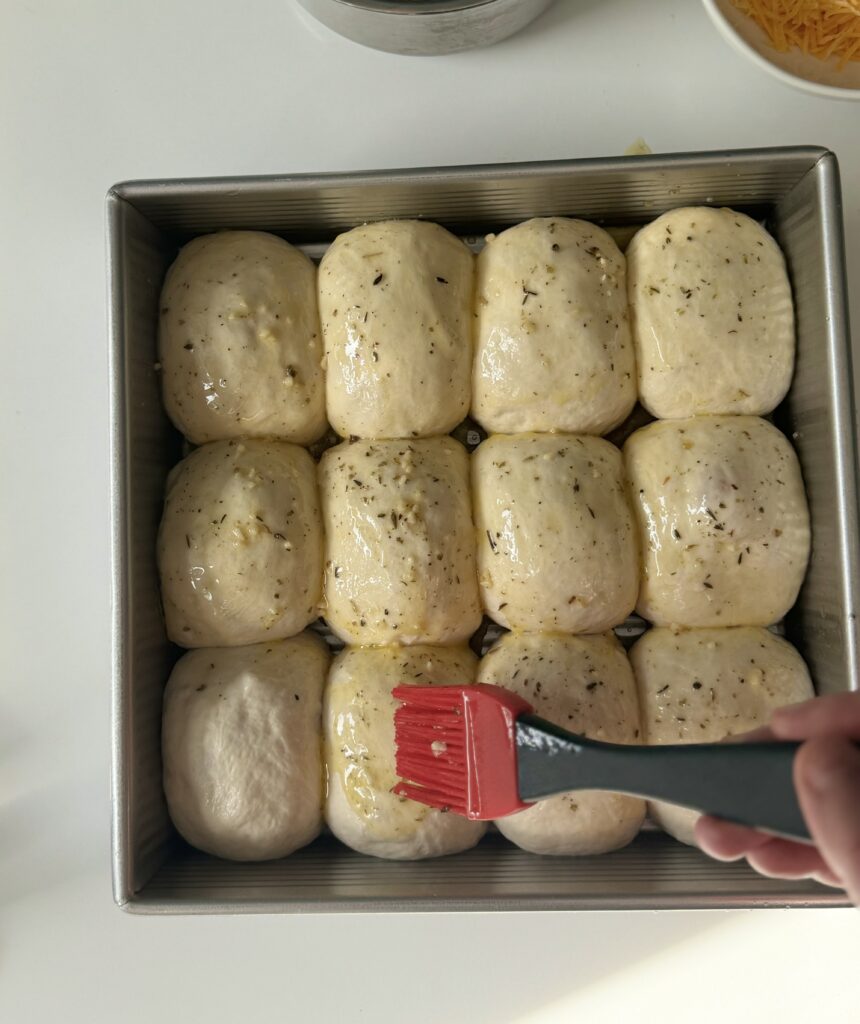
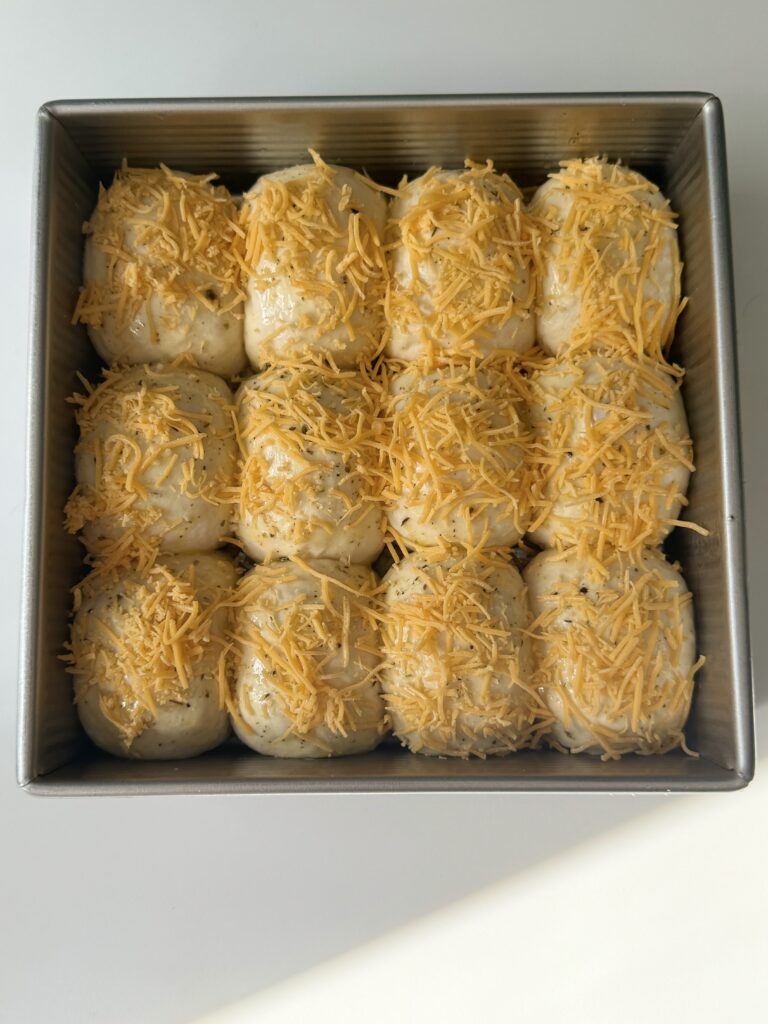
- Liberally brush the garlic butter over each bun and sprinkle the shredded cheese on top.
- Bake the stuffed sourdough cheese buns for 23-26 minutes. The internal temperature should be 190-200 degrees F once fully cooked.
- Allow the buns to rest in the pan for 10 minutes before enjoying warm. Keeping them in the pan for too long will cause soggy bottoms.
Storing stuffed sourdough cheese buns
- At Room Temperature (1-2 days): Allow the buns to cool completely, then store them in an airtight container or wrap them tightly in plastic wrap. Keep them in a cool, dry place for up to 2 days.
- In the Refrigerator (up to 5 days): For longer storage, place the cooled buns in an airtight container or wrap each bun individually in plastic wrap or foil, and store them in the refrigerator. Reheat in the oven or microwave before serving.
- In the Freezer (up to 3 months): To freeze, allow the buns to cool completely, then wrap each one tightly in plastic wrap or foil. Place them in a freezer-safe bag or container. When ready to eat, thaw in the refrigerator overnight and reheat in the oven at 350°F (175°C) for 10-15 minutes until warm.
More sourdough recipes
- Soft Sourdough Dinner Rolls
- Crusty Sourdough Rolls (European style)
- Sourdough Discard Crescent Rolls
- Sourdough Hoagie Rolls [Sourdough Sandwich Rolls]

Stuffed Sourdough Cheese Buns
The perfect recipe for stuffed sourdough cheese buns, featuring a soft base filled with melted, gooey cheese and topped with a garlic butter sauce. These irresistible buns are perfect for any meal or snack!
Equipment
- 1 9x9 inch baking pan
- Parchment paper
- Food scale
- Bench scraper or dough scraper
- Mixing bowl
Ingredients
For the dough
- 360 grams bread flour
- 240 grams milk
- 80 grams sourdough starter (active and bubbly)
- 24 grams sugar
- 28 grams unsalted butter (softened)
- 5 grams salt
- 120 grams of cubed cheese of your choice (I use a mix of cheddar cheese)
For the garlic butter
- 1/4 cup unsalted butter (melted)
- 3 cloves of garlic (minced)
- 1.5 teaspoons italian seasoning
- 1/4 cup of shredded cheese (for topping the buns)
Instructions
Mix the dough
-
Warm the milk for 20-30 seconds in the microwave and then add it to a mixing bowl. Stir in the starter and sugar until mostly dissolved.
-
Next, add the flour, softened butter, and salt and mix until a rough dough ball is formed.
-
Once complete, cover the bowl with plastic wrap or a damp towel and let it rest for 30-45 minutes.
Knead the dough & stretch & folds
-
After the dough has rested, turn it out on a lightly floured surface and knead it until it is smooth and comes together. Not much additional flour should be needed.
-
Once complete, place the dough in a buttered bowl and let it rest for 45 minutes.
-
Perform 2-3 stretch and folds in 45-minute increments. Then let the dough rest, covered for the remaining bulk rise.
Shape & stuff the sourdough cheese buns
-
Line your baking pan with parchment paper. I have baked the sourdough cheese buns without parchment paper, but to prevent a mess & soggy bottoms I recommend using it.
-
After the dough has doubled in size, turn it out on a clean work surface and have your cheese cubes handy.
-
Using a food scale, divide the dough into 12 equal pieces (around 60 grams each).
-
To stuff a dough ball with cheese, flatten the dough into a small circle with your hands, place a portion of cheese in the center, I found that 8-10 grams of cheese was a good amount, but feel free to add more or less depending on your preference.
-
Then carefully pull the edges of the dough up and over the cheese. Pinch the edges together to seal the cheese inside, making sure there are no gaps. Shape it back into a smooth ball and place it seam-side down on your baking pan.
-
After all of the cheese buns have been shaped and placed in the baking pan, cover the pan with plastic wrap and place it in the refrigerator overnight.
*Stuffed sourdough cheese buns can be baked on the same day after they have finished their second proof.
Proof, Brush, & Bake
-
The following morning remove the stuffed sourdough cheese buns from the fridge and allow them to puff up until they fill the pan (timing on this can vary, mine took 5 hours). Using a warm spot will help, but ensure they aren't resting anywhere over 80 degrees F as the butter will melt out of them.
-
Once they have puffed up and are ready to bake preheat the oven to 375 degrees F.
-
In a small saucepan melt the butter on low and then add the garlic and Italian seasoning. Cook the garlic & herbs for 1-2 minutes or until fragrant.
-
Liberally brush the garlic butter over each bun and sprinkle the shredded cheese on top.
-
Bake the stuffed sourdough cheese buns for 23-26 minutes. The internal temperature should be 190-200 degrees F once fully cooked.
-
Allow the buns to rest in the pan for 10 minutes before enjoying warm. Keeping them in the pan for too long will cause soggy bottoms.
Storing stuffed sourdough cheese buns
-
At Room Temperature (1-2 days): Allow the buns to cool completely, then store them in an airtight container or wrap them tightly in plastic wrap. Keep them in a cool, dry place for up to 2 days.
-
In the Refrigerator (up to 5 days): For longer storage, place the cooled buns in an airtight container or wrap each bun individually in plastic wrap or foil, and store them in the refrigerator. Reheat in the oven or microwave before serving.
-
In the Freezer (up to 3 months): To freeze, allow the buns to cool completely, then wrap each one tightly in plastic wrap or foil. Place them in a freezer-safe bag or container. When ready to eat, thaw in the refrigerator overnight and reheat in the oven at 350°F (175°C) for 10-15 minutes until warm.
Notes
Baker's schedule:
Day 1: Feed your starter the night before you mix the dough.
Day 2: Mix the dough in the morning and allow it to ferment for 7-8 hours or until doubled. Shape and stuff the buns and place them into the refrigerator overnight.
Day 3: Remove the buns from the fridge and allow them to rest for 4-5 hours or until they fill the pan and bake.

Comments