

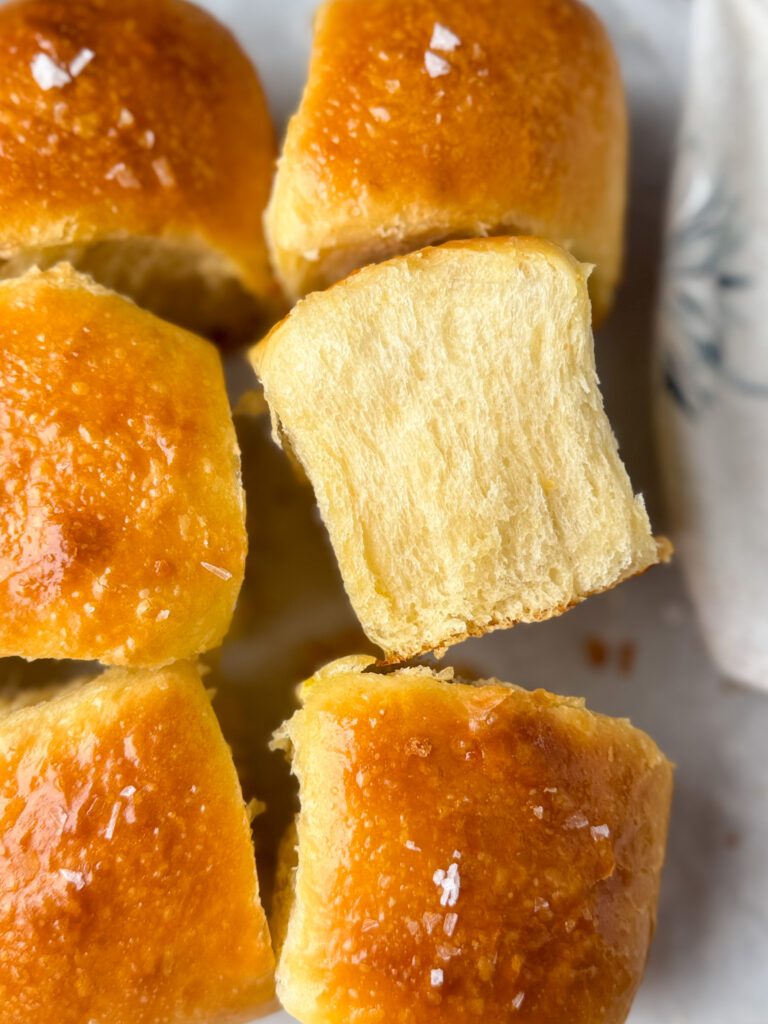
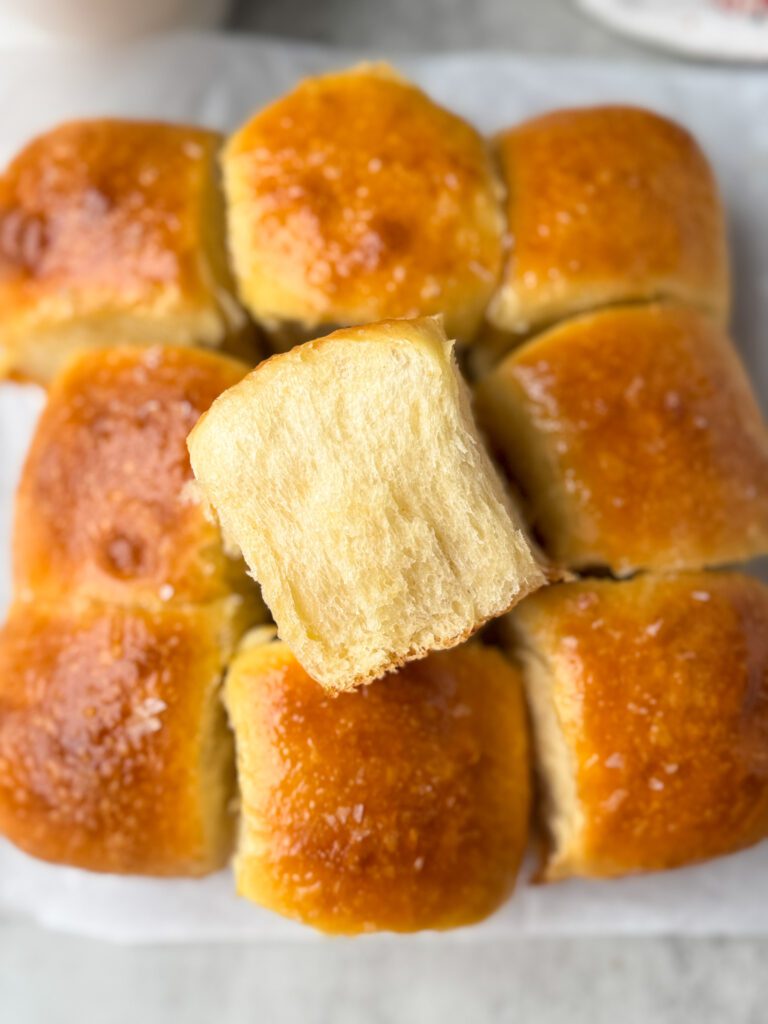
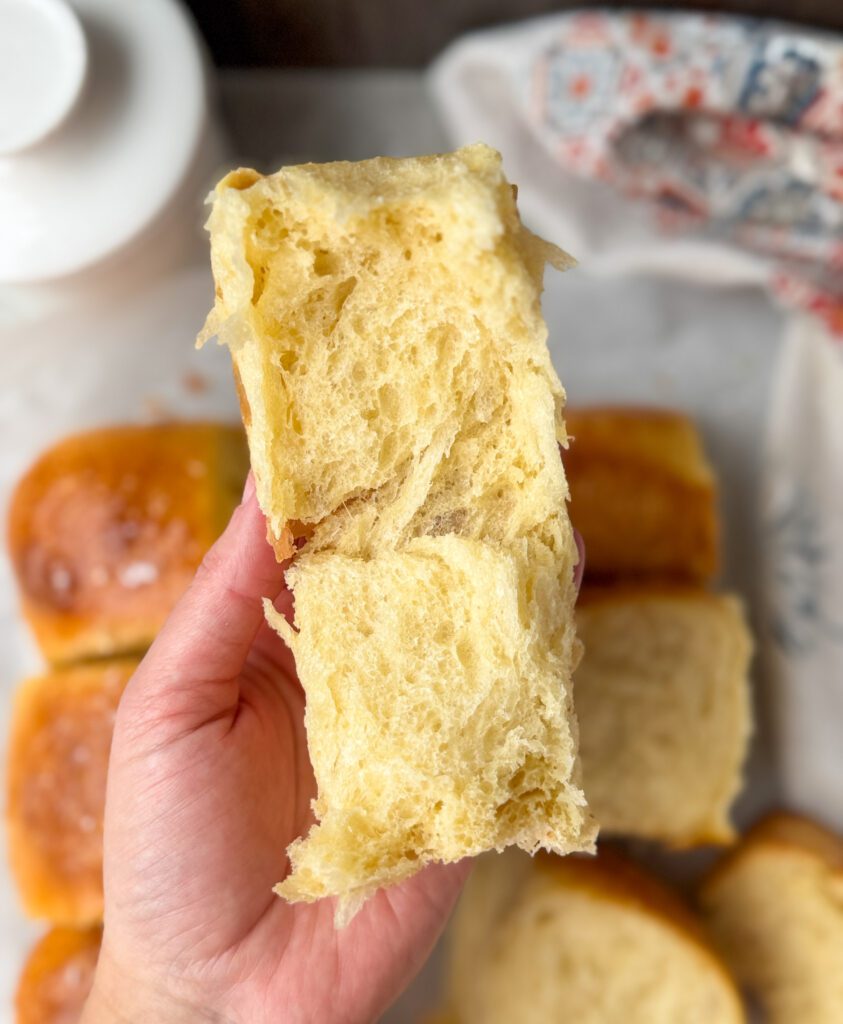
These soft sourdough brioche dinner rolls are light and airy with a golden-brown crust glistening with melted butter. The combination of sourdough and extended fermentation gives these buttery rolls a rich and delectable flavor. Perfect for your next gathering, they might just become the star of the meal!
There’s something special about enjoying a homemade dinner roll, and the effort of making them from scratch elevates any meal. That’s why I dedicated time to perfecting this sourdough brioche dinner roll recipe before sharing it with you.
I wanted these rolls to earn a place on your dinner table, whether for a summer BBQ, Thanksgiving feast, birthday celebration, or Christmas dinner. The enticing aroma of these buttery sourdough rolls is simply irresistible, and I assure you, everyone will be eager for the very last bite!
Why I love this recipe
- These rolls are 100% sourdough making them easier to digest & a healthier option.
- These rolls are mixed by hand; no equipment is needed!
- The dough itself is versatile and can be made into babka bread, hamburger buns, or any variation of sweet bread.
- Sourdough brioche dinner rolls are made with a sweet stiff starter, making the texture so soft and pillowy. Additionally, the dough is long-fermented with no sour flavor.

What is a sweet stiff starter?
A sweet stiff sourdough starter is a type of sourdough starter that is characterized by its low hydration and sweetness. Stiff starters typically have around 50% hydration or less, which makes them thicker and more dough-like in texture. The sweetness comes from the sugar and the natural fermentation process of the starter, which produces sugars that give the dough a sweet flavor. This ultimately mutes that notable sourdough tang that isn’t always desired in sweet recipes.
How to make soft sourdough brioche dinner rolls: step-by-step
Baker’s schedule: make the sweet stiff starter the evening before the dough is mixed. Mix the dough the following morning and allow it to rise for 8-12 hours. Shape & place it in the refrigerator overnight. Allow the rolls to rise and bake the following morning.
Fermentation temperatures: Enriched dough tends to rise slower due to the additions of butter & eggs. The dough does well in a warmer temperature. My dough took 7 hours to double around 74 degrees F.
Ingredients
For the sweet stiff starter:
- 15 grams of active sourdough starter
- 30 grams of water
- 15 grams of sugar
- 60 grams of all-purpose flour
For the dough:
- 100 grams of sweet sourdough starter from above
- 100 grams of milk
- 50 grams of sugar
- 2 large eggs
- 5 grams of salt
- 310 grams of bread flour
- 50 grams of unsalted butter (softened)
- For the eggwash: 1 egg and a teaspoon of water
Equipment
- Mixing bowl
- Food scale
- Silicone or plastic dough scraper
- 1 8×8 or 9×9 inch baking dish (round or square would work)
Make the sweet stiff starter
- To a clean jar add 15 grams of active sourdough starter (it is recommended the starter has been fed within the past 12 hours).
- Next, add the sugar and water and stir until it becomes milky.
- Lastly, add the flour and mix until a dough-like ball is formed. You can knead it on a clean surface to ensure all of the flour has been absorbed.
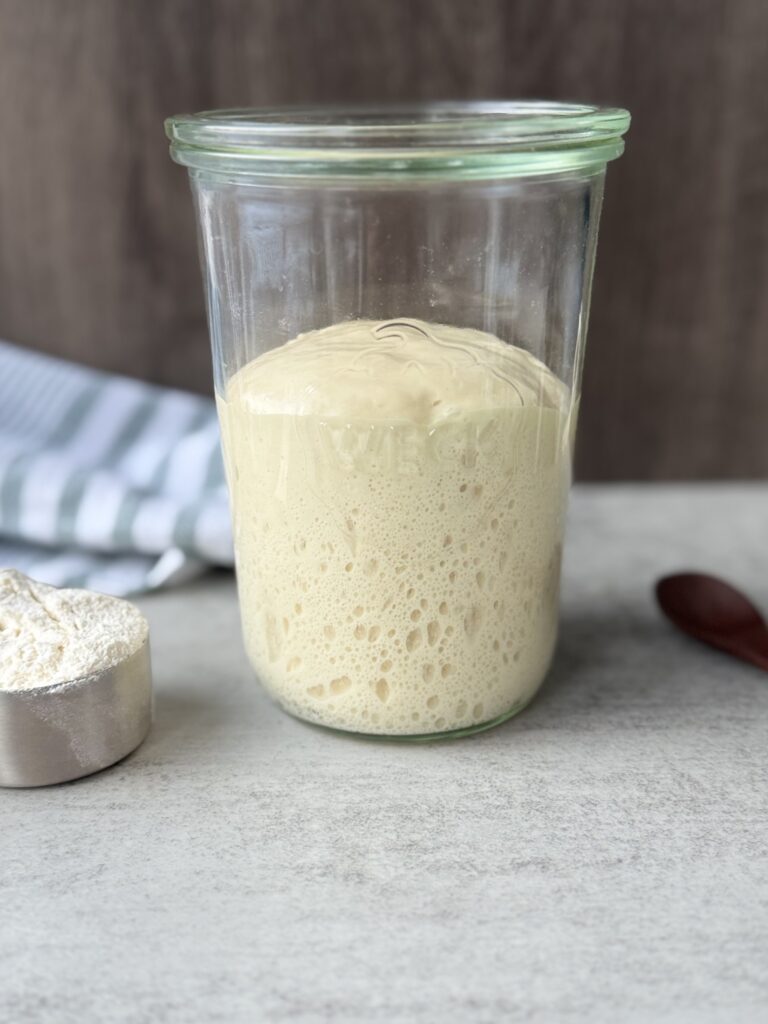
- Cover the jar loosely and allow it to rest for 10-12 hours.
Mix the dough
Note: Ensure your sweet stiff starter has doubled in size before mixing the dough.
You can mix this dough by hand or with a stand mixer.
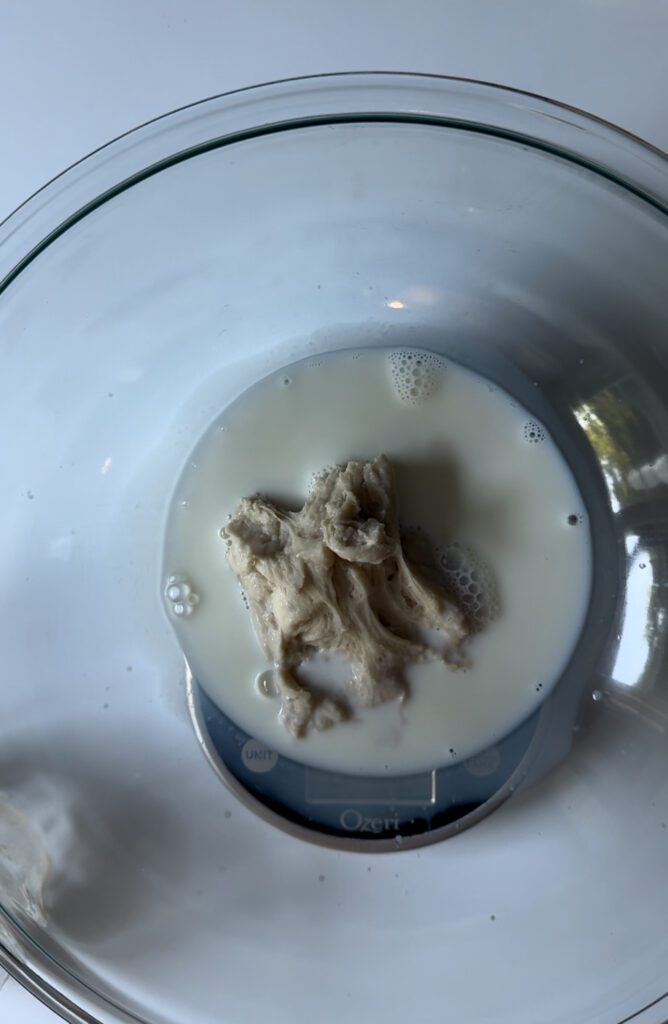
- Begin by warming the milk either in the microwave or over low heat on the stove (I microwave it for 30-45 seconds).
- Add the milk to a medium mixing bowl and whisk in the sweet stiff starter and sugar with a fork. It’s perfectly fine if the starter doesn’t fully break down.

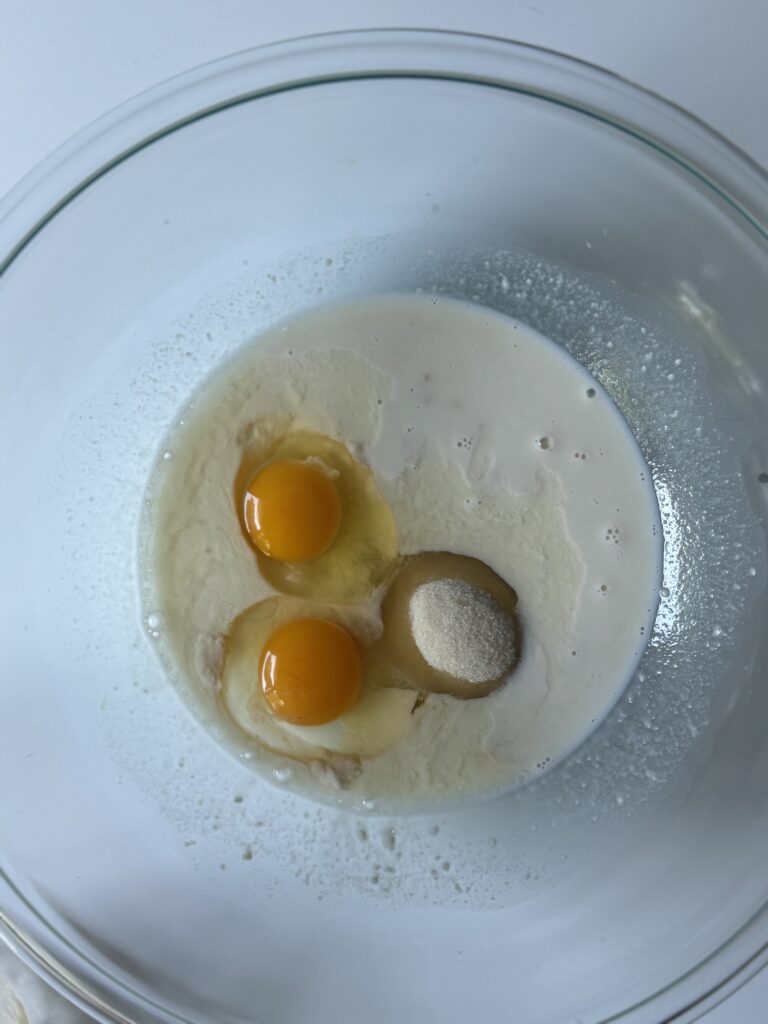
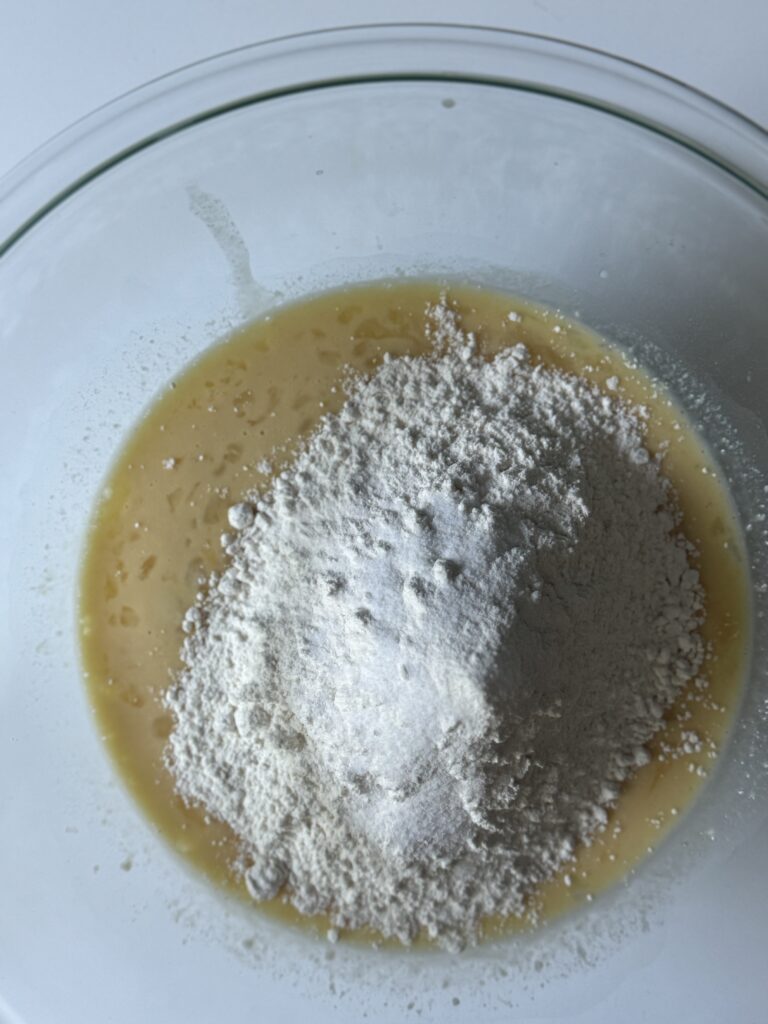
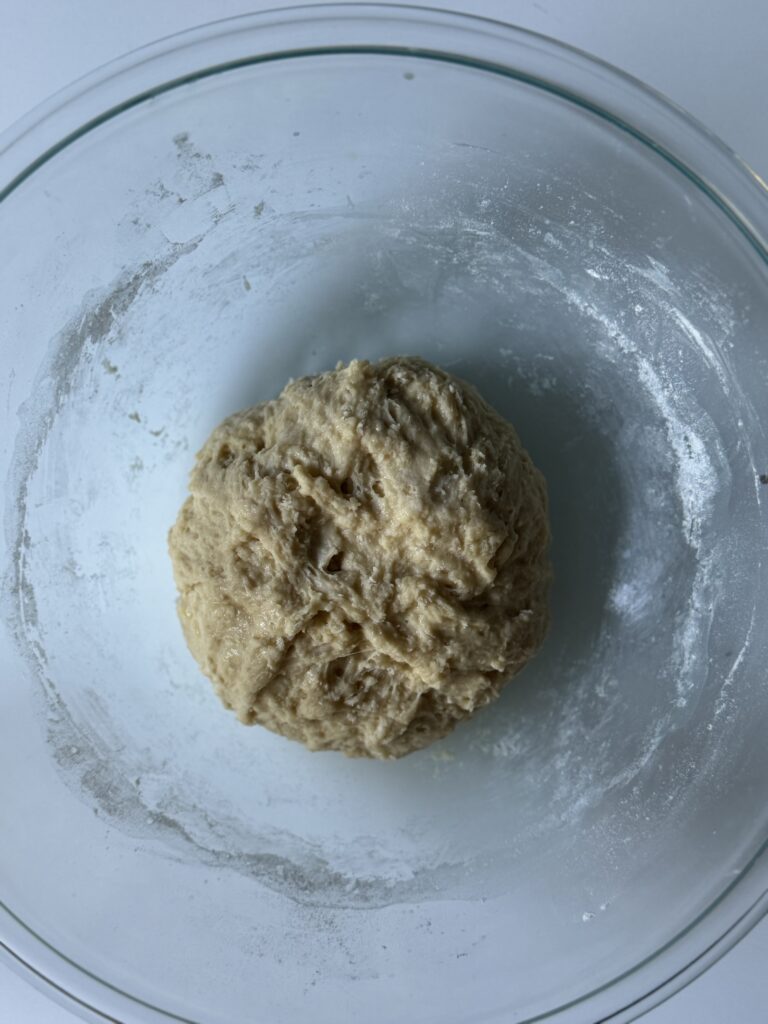
- Whisk in the eggs until combined, then add the flour and salt. Mix until a shaggy dough forms.
- Cover the bowl with plastic wrap or a damp towel and allow it to rest for 45 minutes.
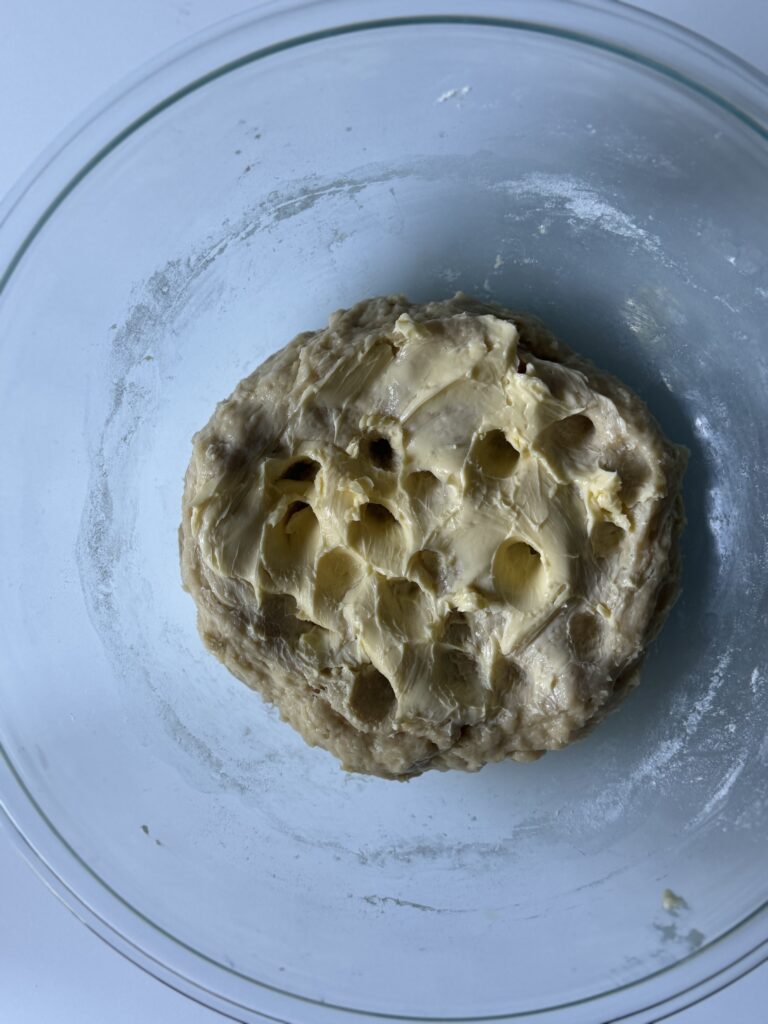
The butter is intentionally being left out here as it will be easier to knead in after the dough has rested.
Knead the dough & add the butter
- Ensure the butter is softened enough, spread it around the dough, and dimple it in.
- Then, fold the dough into itself a few times in the bowl and transfer it to a clean work surface that is lightly floured.
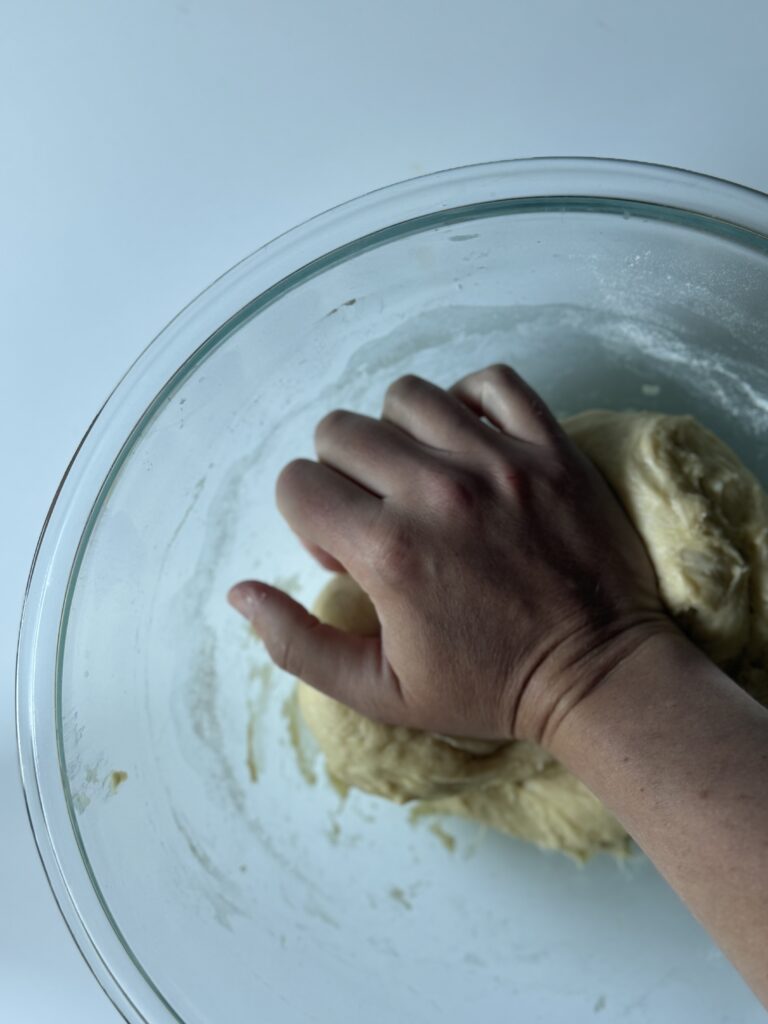
- Knead the dough for 8-10 minutes or until it comes together. The dough will become stickier as you knead it. The butter will also stick to your work surface while kneading. Use a dough scraper to clean it up and work it back into the dough.
Try not to exceed using more than a few tablespoons of flour during the kneading process.
- If the dough starts to tear or you simply feel frustrated while kneading it, let the dough rest for 5-10 minutes and then come back to it.
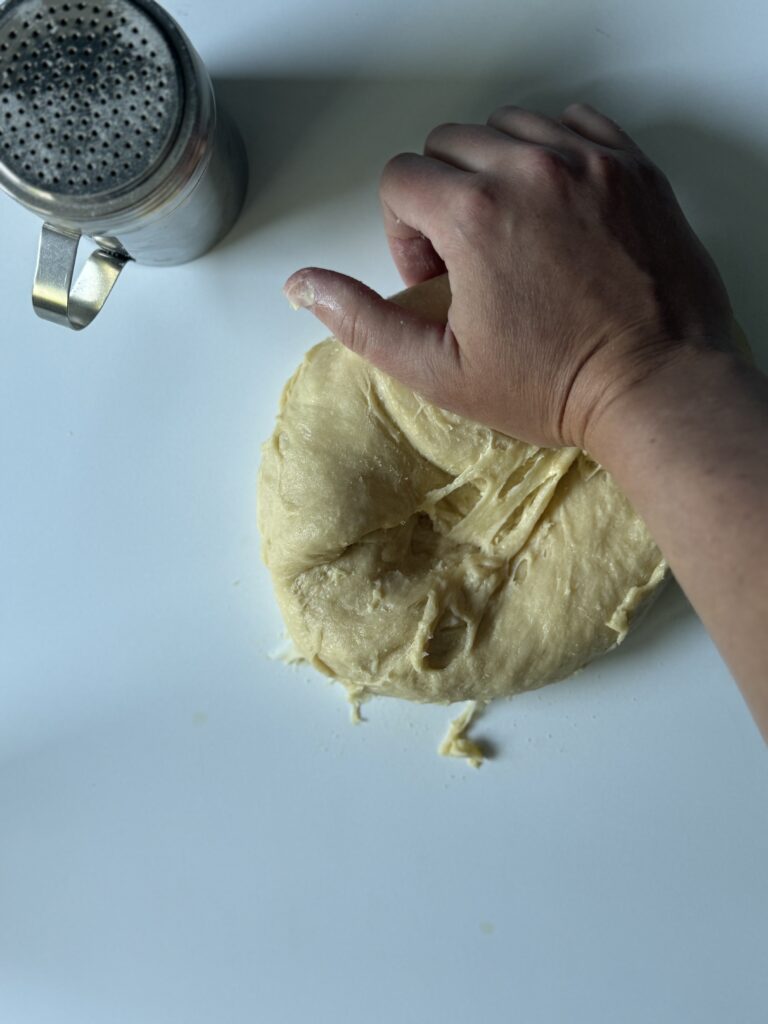
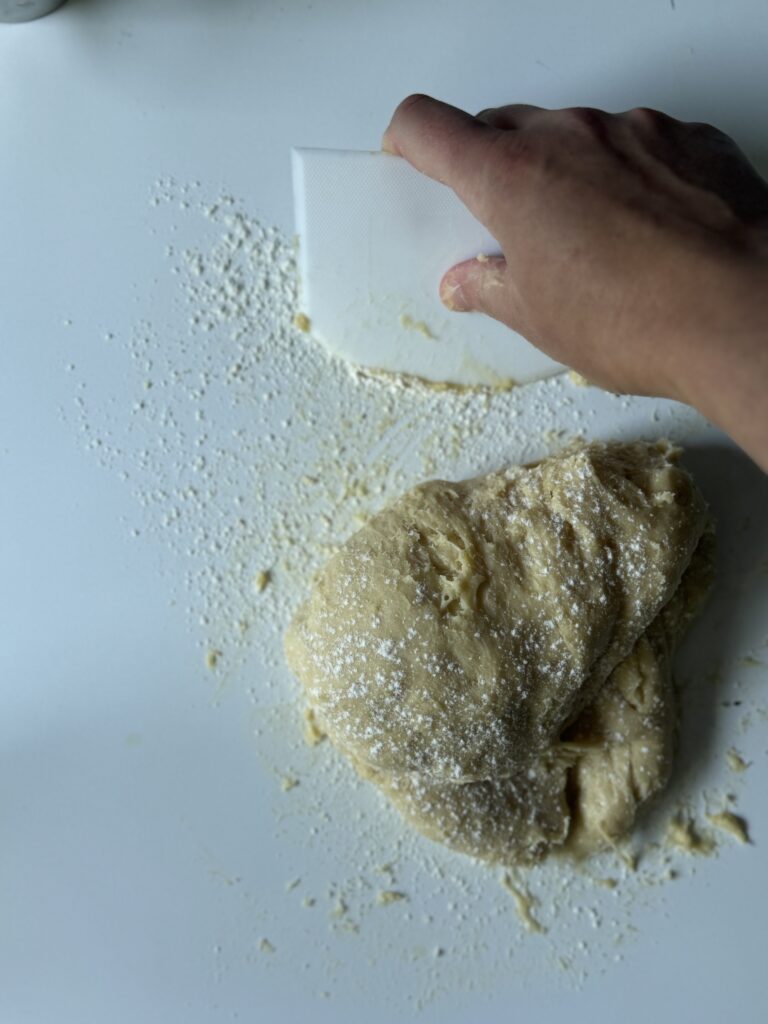
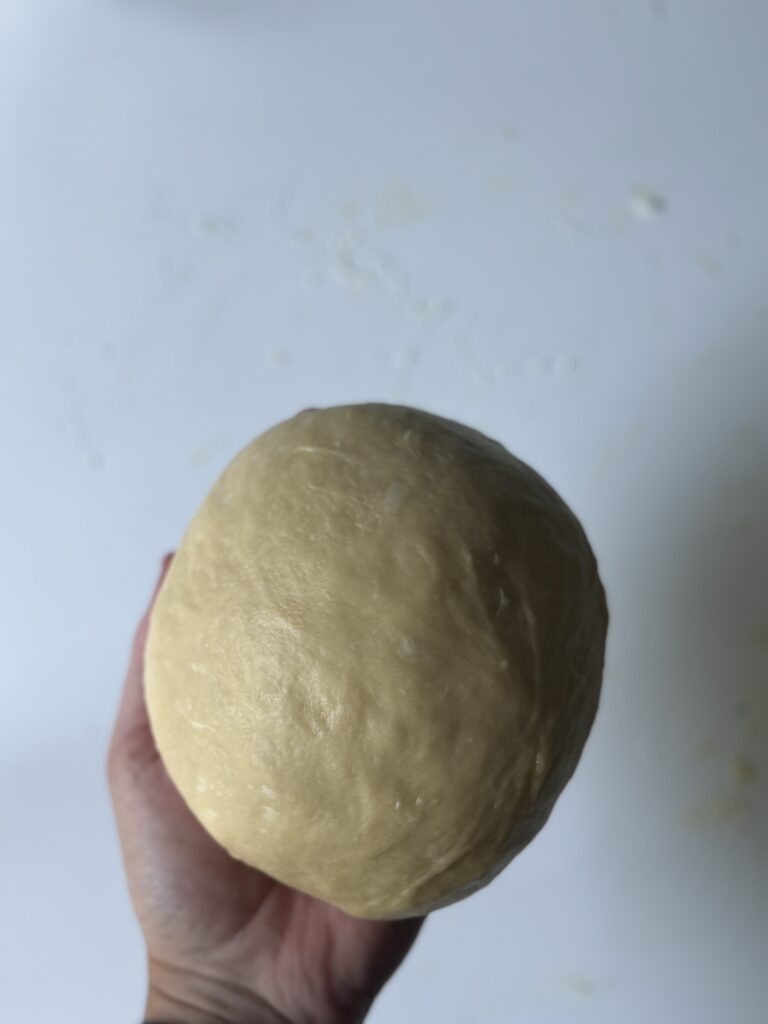
- The dough has been properly kneaded once it comes together, is smooth, elastic, and not as sticky. It will be a bit tacky & this is normal.
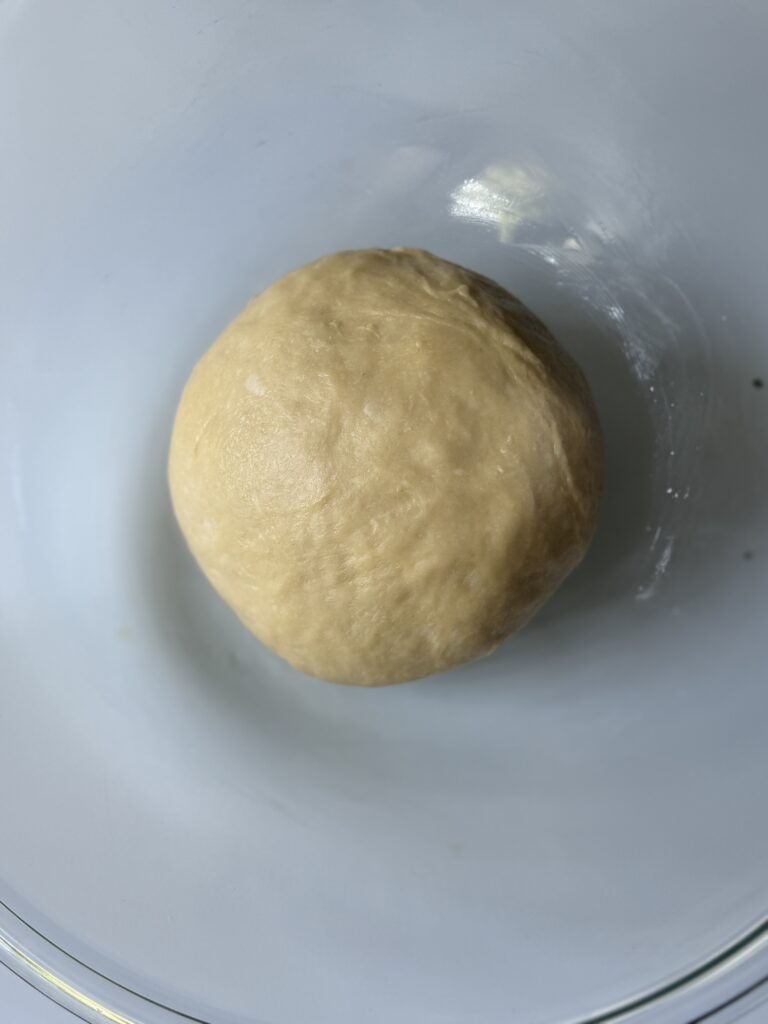
- Once complete, place the dough in a buttered bowl and cover it for 45 minutes.
Allow it to rest in a warm place. Turn your oven on and then off and place the dough inside.
- Perform 1 stretch and fold 45 minutes to an hour into the bulk fermentation to ensure optimal gluten development.
- After the stretch and fold, allow the dough to rest for the remainder of the bulk fermentation (8-12 hours) or until doubled in size.
Shape & Refrigerate
- The dough can be shaped and refrigerated overnight OR the dough can be refrigerated for up to 24 hours and shaped when ready to use.
- When you’re ready to shape the dough, generously butter and lightly oil the baking pan to prevent sticking. Alternatively, you can line the pan with parchment paper.
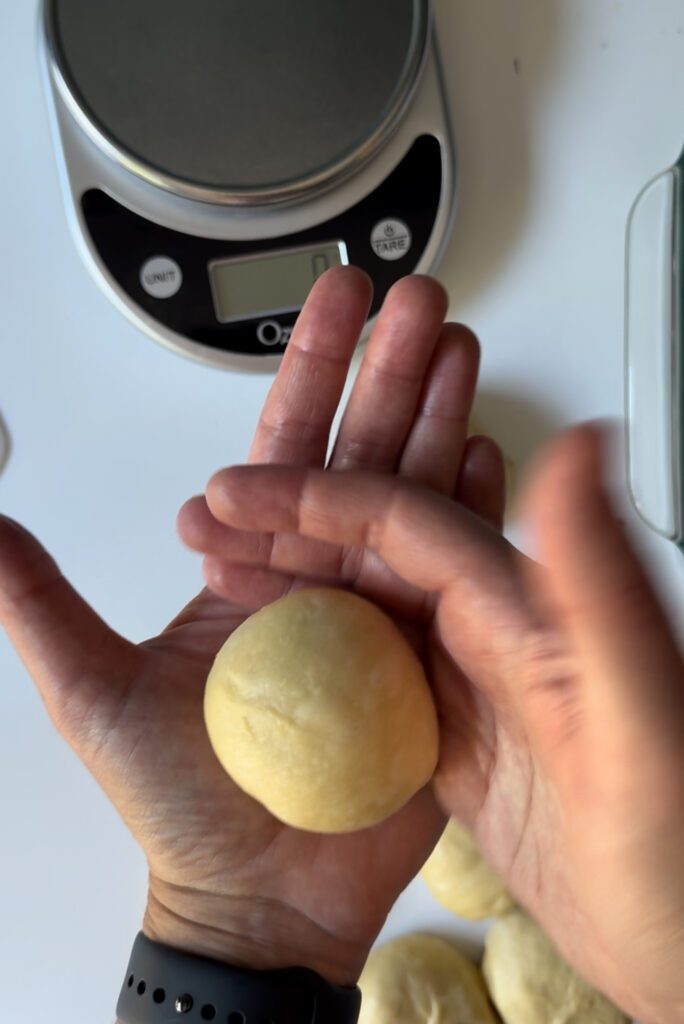
- Using a food scale, divide the dough into 9 equal portions (weighing between 80-85 grams each).
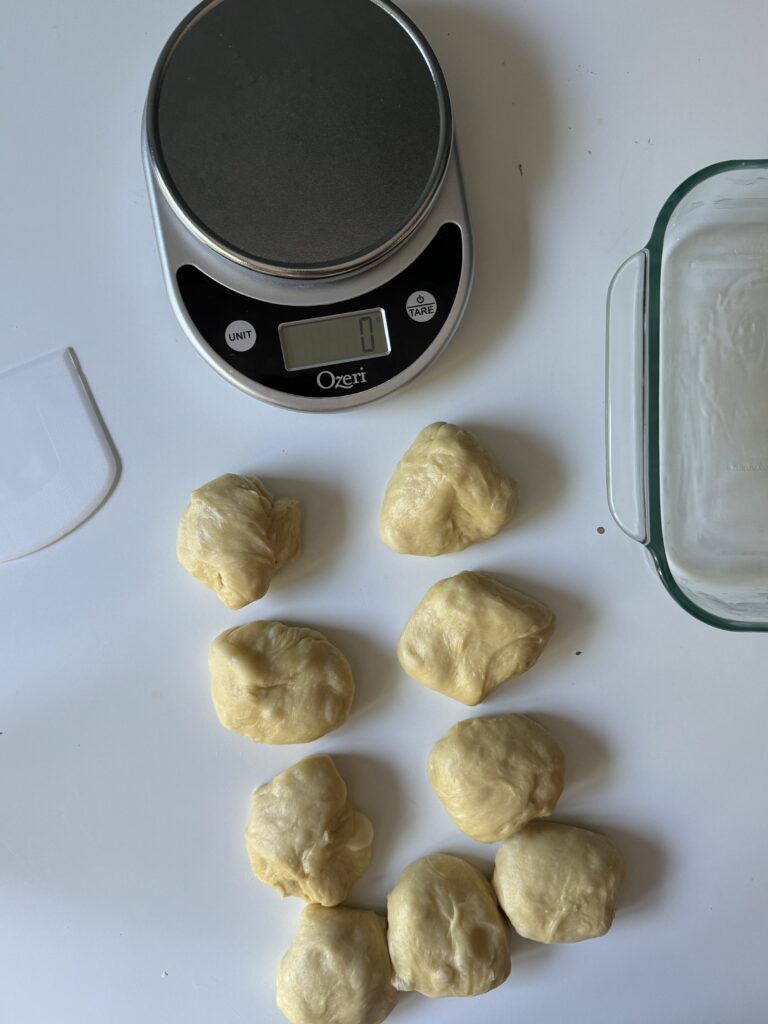
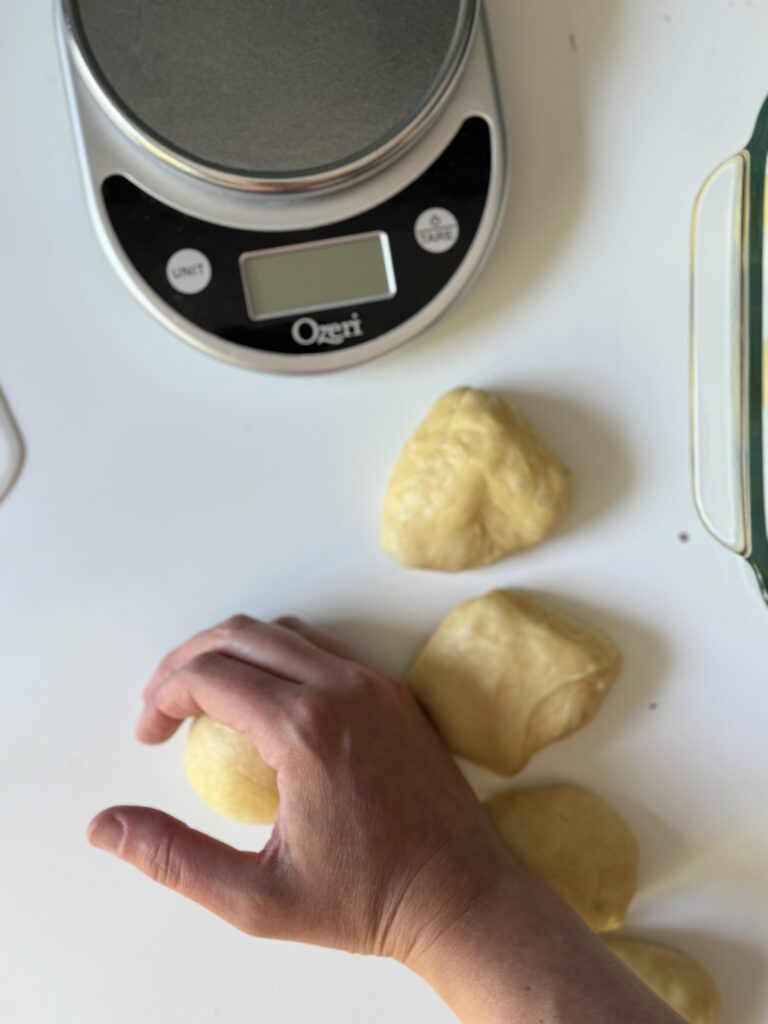
- Shape each dough piece into a ball, starting by pinching the seams together into the center.
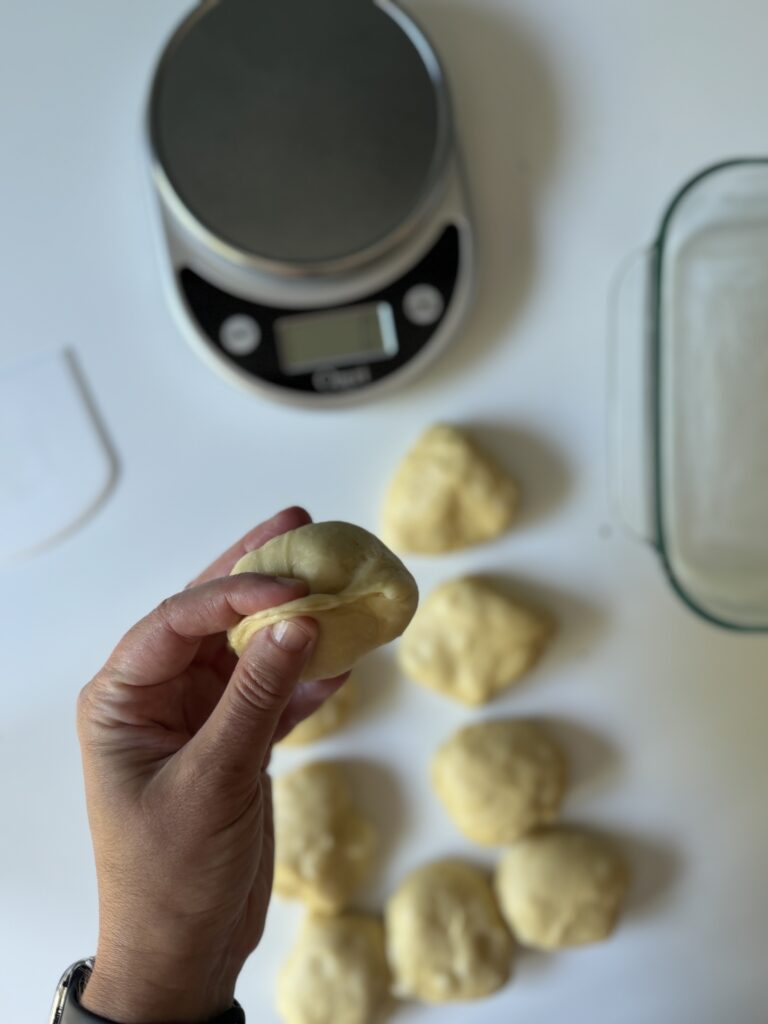
- Place the dough in your hand and scoop it under itself repetitively to tighten the seams. You can also round it out & tighten it up with the palm of your hand and a flat surface.
- Place each roll into the baking pan, cover with plastic wrap, and place into the refrigerator overnight. The rolls can be baked the same day—just let them rise for 4–6 hours, or until they fill the pan, then bake.

Second Rise & Bake
- The following morning remove the dough from the refrigerator and allow it to rise in a warm spot (this can take 4-7 hours depending on the temperature). Mine takes around 6 hours at 72 degrees F.
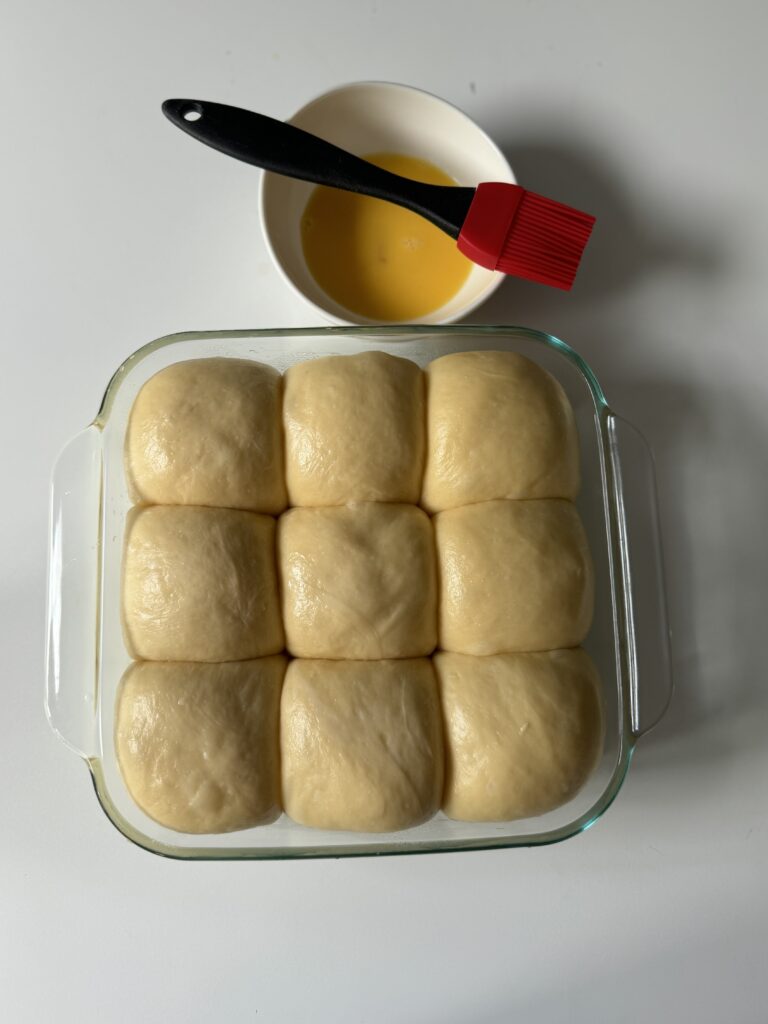
- The rolls are ready when they’ve puffed up to fill the pan and feel soft and airy to the touch.
- Once ready to bake, preheat the oven to 375 degrees F and make the egg wash.
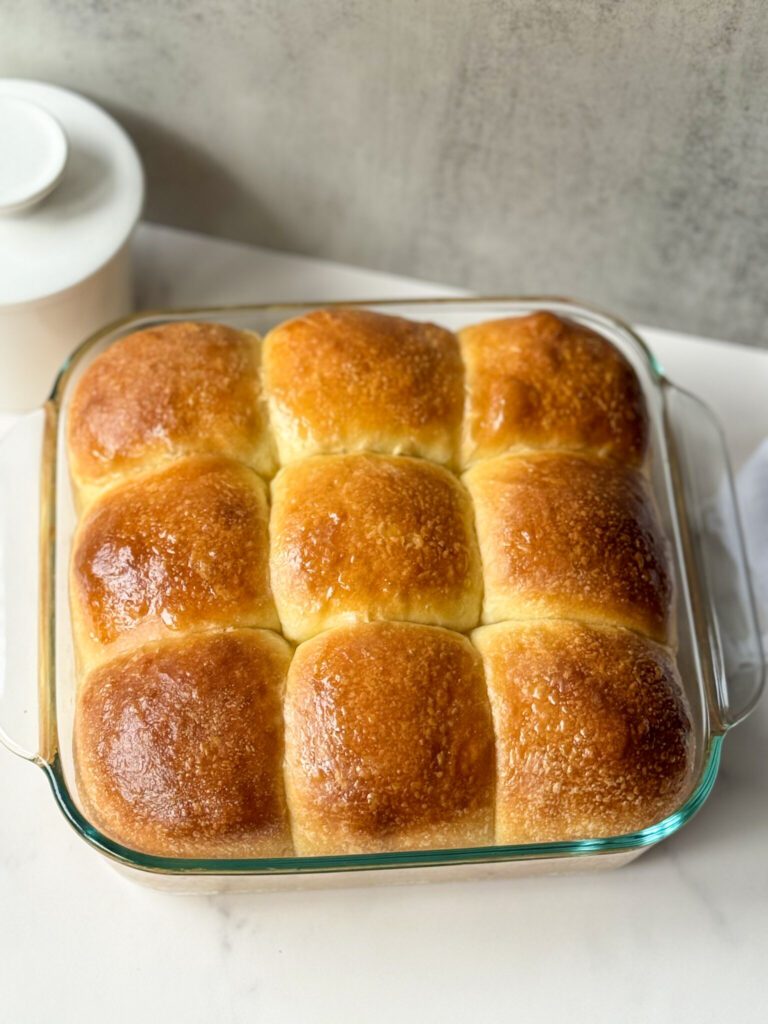
- Brush the rolls with the egg wash and bake for 20-25 minutes or until golden brown. Check the rolls at 20 minutes.
Pro tip: The rolls are perfectly baked when the tops are golden brown and the centers reach an internal temperature of 190–195°F (88–90°C)
- Right after the rolls come out of the oven, brush them with melted butter and sprinkle with flaky sea salt for the perfect finishing touch.
- Store any leftover rolls in an airtight container at room temperature for 2-3 days.
More sourdough recipes like this
- Soft Sourdough Dinner Rolls (with make ahead options!)
- Sourdough Brioche by Hand
- Soft & Fluffy Sourdough Challah (same day bake!)
- Sourdough Hamburger Buns

Soft Sourdough Brioche Dinner Rolls
Equipment
- Mixing bowl
- Food scale
- Silicone Scraper or dough scraper
- 1 8×8 or 9×9 inch baking dish round or square would work
Ingredients
For the sweet stiff starter
- 15 grams active sourdough starter
- 15 grams cane sugar
- 30 grams water
- 60 grams all-purpose flour
For the dough
- 100 grams sweet sourdough starter from above
- 100 grams milk
- 50 grams sugar
- 2 large eggs
- 310 grams bread flour
- 5 grams salt
- 50 grams unsalted butter softened
For the egg wash
- 1 egg
- 1 teaspoon water
Instructions
Make the sweet stiff starter
- To a clean jar add 15 grams of active sourdough starter (it is recommended the starter has been fed within the past 12 hours).
- Next, add the sugar and water and stir until it becomes milky.
- Lastly, add the flour and mix until a dough-like ball is formed. You can knead it on a clean surface to ensure all of the flour has been absorbed.
- Cover the jar loosely and allow it to rest for 10-12 hours.
Mix the dough
- Note: Ensure your sweet stiff starter has doubled in size before mixing the dough.This dough can be mixed by hand or a stand mixer.
- Begin by warming the milk either in the microwave or over low heat on the stove (I microwave it for 30-45 seconds).
- Add the milk to a medium mixing bowl and whisk in the sweet stiff starter and sugar with a fork. It’s perfectly fine if the starter doesn’t fully break down.
- Whisk in the eggs until combined, then add the flour and salt. Mix until a shaggy dough forms.
- Cover the bowl with plastic wrap or a damp towel and allow it to rest for 45 minutes.
- The butter is intentionally being left out here as it will be easier to knead in after the dough has rested.
Knead the dough & add the butter
- Ensure the butter is softened enough, spread it around the dough, and dimple it in.
- Then, fold the dough into itself a few times in the bowl and transfer it to a clean work surface that is lightly floured.
- Knead the dough for 8-10 minutes or until it comes together. The dough will become stickier as you knead it. The butter will also stick to your work surface while kneading. Use a dough scraper to clean it up and work it back into the dough.
- Try not to use more than a few tablespoons of flour during the kneading process.
- If the dough starts to tear or you simply feel frustrated while kneading it, let the dough rest for 5-10 minutes and then come back to it.
- The dough has been properly kneaded once it comes together, is smooth, elastic, and not as sticky. It will be a bit tacky & this is normal.
- Once complete, place the dough in a buttered bowl and cover it for 45 minutes.
- Allow it to rest in a warm place. Turn your oven on and then off and place the dough inside.
- Perform 1 stretch and fold 45 minutes to an hour into the bulk fermentation to ensure optimal gluten development.
- After the stretch and fold, allow the dough to rest for the remainder of the bulk fermentation (8-12 hours) or until doubled in size. Avoid placing the dough anywhere warmer than 78°F, if it gets too warm, the butter can melt out and affect the texture.
Shape & Refrigerate
- The dough can be shaped and refrigerated overnight OR the dough can be refrigerated for up to 24 hours and shaped when ready to use.
- When you’re ready to shape the dough, generously butter and lightly oil the baking pan to prevent sticking. Alternatively, you can line the pan with parchment paper.
- Using a food scale, divide the dough into 9 equal portions (weighing between 80-85 grams each).
- Shape each dough piece into a ball, starting by pinching the seams together into the center.
- Place the dough in your hand and scoop it under itself repetitively to tighten the seams. You can also round it out & tighten it up with the palm of your hand and a flat surface.
- Place each roll into the baking pan, cover with plastic wrap, and place into the refrigerator overnight. The rolls can be baked the same day—just let them rise for 4–6 hours, or until they fill the pan, then bake.
Second Rise & Bake
- The following morning remove the dough from the refrigerator and allow it to rise in a warm spot (this can take 4-7 hours depending on the temperature). Mine take about 6 hours around 72 degrees F. Avoid placing the dough anywhere warmer than 78°F.
- The rolls are ready when they’ve puffed up to fill the pan and feel soft and airy to the touch.
- Once ready to bake, preheat the oven to 375 degrees F and make the egg wash by whisking together the egg and water.
- Brush the rolls with the egg wash and bake for 20-25 minutes or until golden brown. Check the rolls at 20 minutes.Your rolls are perfectly baked when the tops are golden brown and the centers reach an internal temperature of 190–195°F (88–90°C)
- Right after the rolls come out of the oven, brush them with melted butter and sprinkle with flaky sea salt for the perfect finishing touch.
Storage
- These rolls are best enjoyed on the day they are baked. Store any leftover rolls in an airtight container at room temperature for 2-3 days.
Leave a Comment & Rate the Recipe