
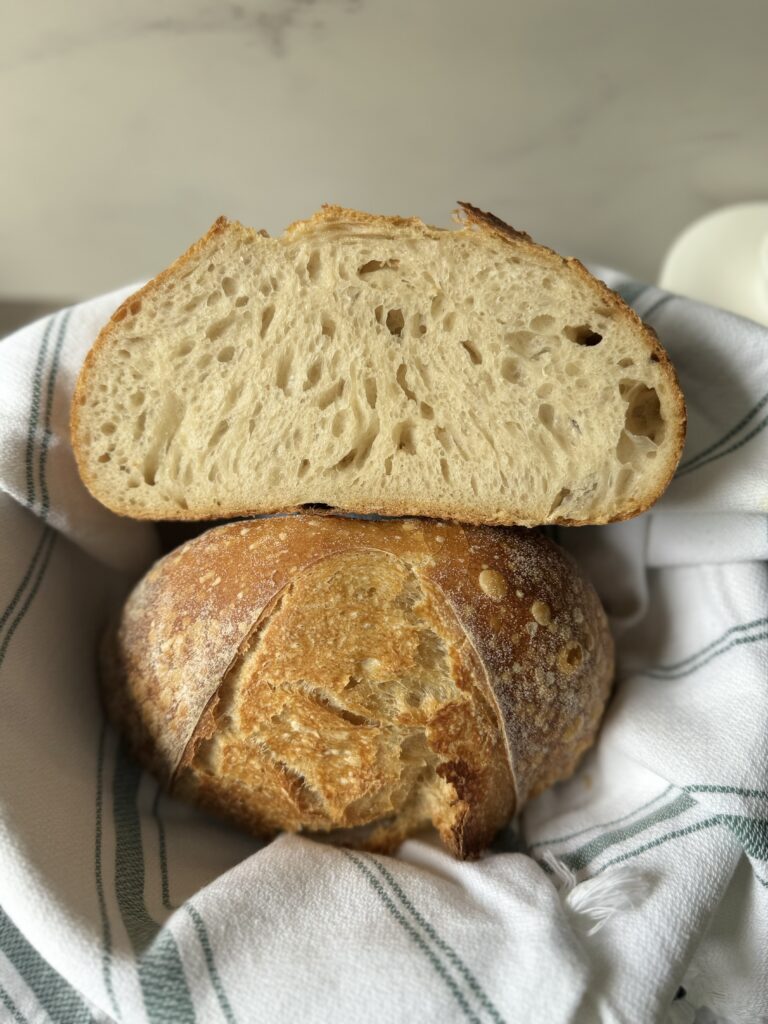
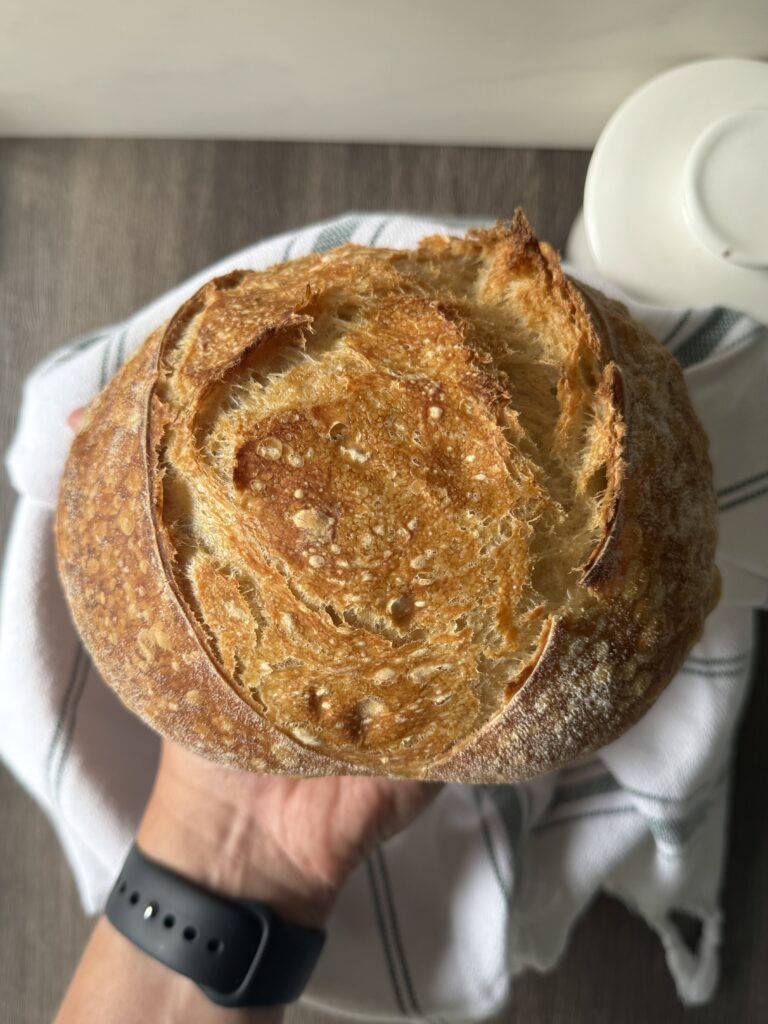
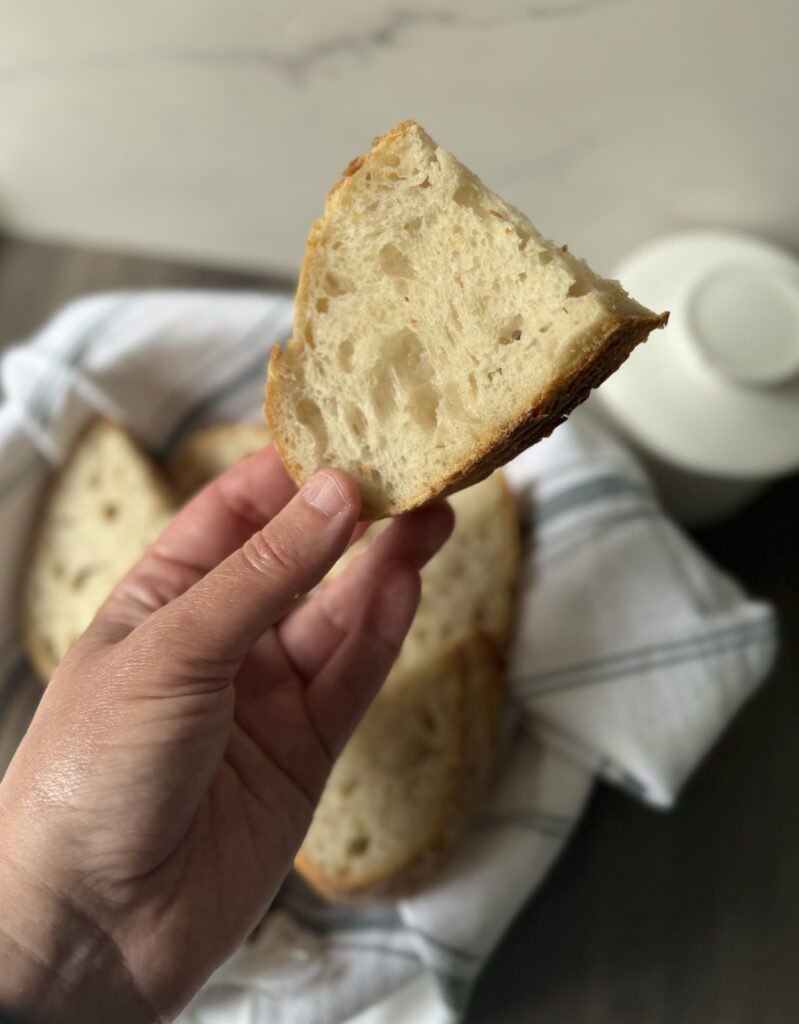
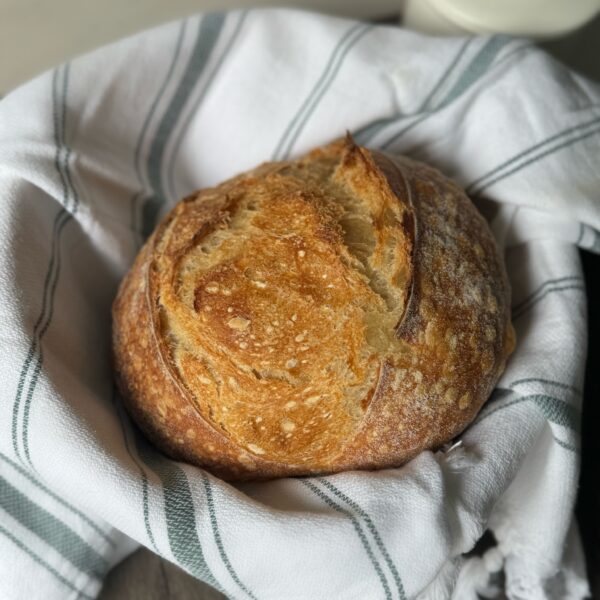
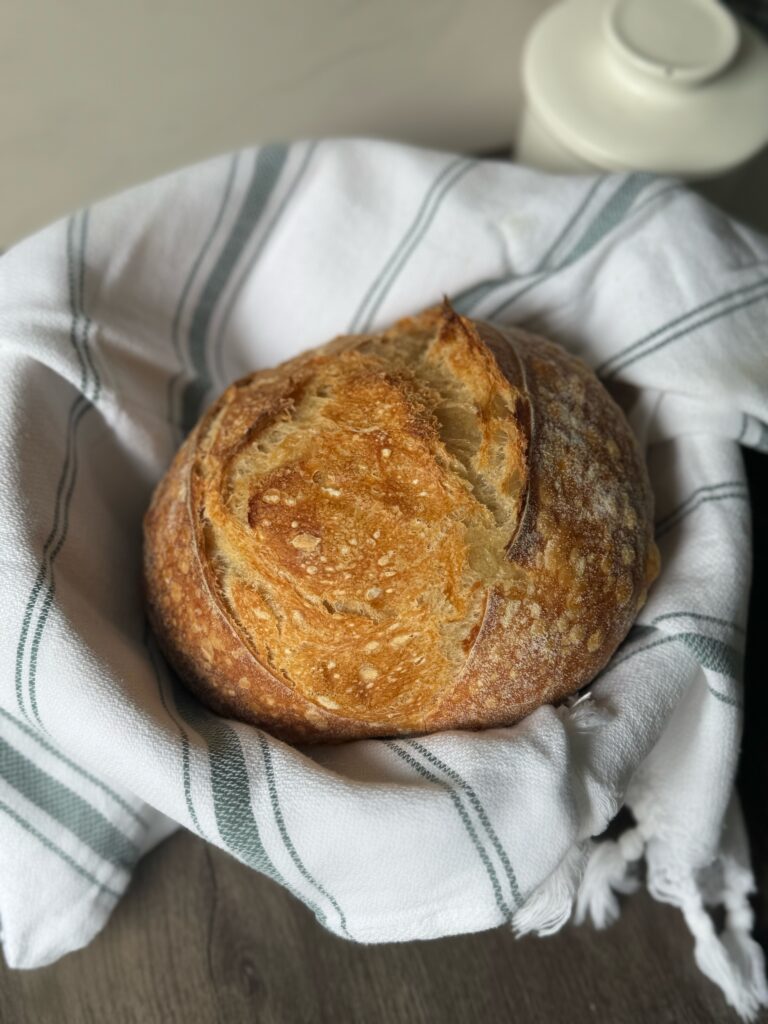
This small sourdough loaf, made entirely with all-purpose flour, is perfect for those who want to enjoy fresh bread without leftovers. It also serves as an excellent bread bowl for soups and stews.
Half the size of a traditional sourdough loaf, this recipe is ideal for beginners in sourdough baking. No fancy secrets or techniques are required—just follow my step-by-step guide to create a perfect, petite loaf.
The texture is wonderful, with a crispy exterior and a thick, fluffy, chewy interior. Don’t let anyone tell you that you can’t make a great sourdough loaf with just all-purpose flour!
Why I love this recipe
- Out of bread flour? No problem! This small sourdough loaf is made with all-purpose flour and yields a lovely result.
- Making a small sourdough loaf leaves no leftovers and is a great option for those who don’t need a large loaf.
- The loaf is versatile- use it as a bread bowl or slice it with soup or stew.
Tips and Modifications
- Fermentation times: The dough takes about 7-8 hours of its first bulk fermentation at 70 degrees F. However, this can vary depending on the temperature in your environment. Watch the dough, not the clock.
- Flour: I use King Arthur all-purpose flour which has a protein content of 11.7%. I recommend using an all-purpose flour around this level for a solid final result.
- Sourdough starter: Ensure your sourdough starter has been fed within the past 12 hours before mixing the dough. It should be active and bubbly to ensure a significant rise.
How to make a small sourdough loaf (step-by-step)
Baker’s schedule: mix the dough in the AM, allow it to double in size, place it in the refrigerator overnight to bake for the following morning.
Ensure your sourdough starter has been fed within the past 12 hours and is active and bubbly.
Ingredients
- 250g of all-purpose flour (protein content 11.5% or higher)
- 165g of lukewarm water
- 70g of fed sourdough starter
- 5g salt
Equipment
- Dutch oven or cast iron
- Bench scraper
- Mixing bowl
- Food scale
- Parchment paper
- Scoring tool
Note: To make a regular-sized loaf: use 500g of flour, 330 g of water, and 9g of salt.
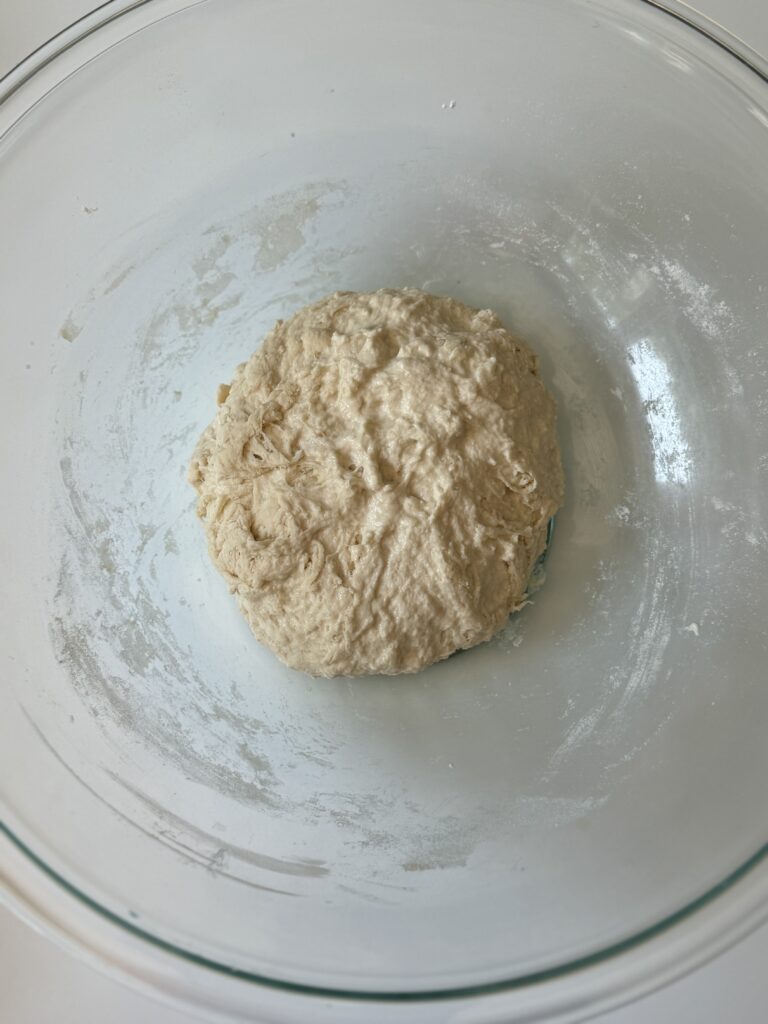
Mix the Dough
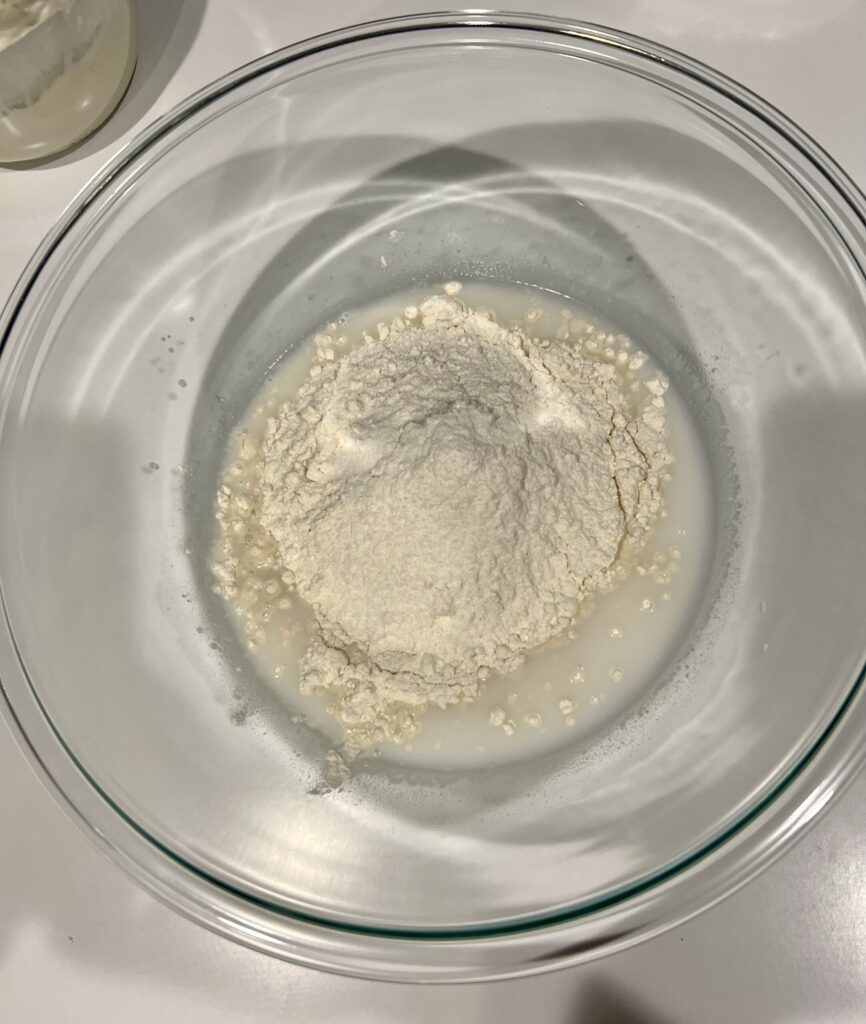
- To a mixing bowl dissolve the sourdough starter in the water until it becomes milky.
- Add the flour and mix until all of the flour has absorbed the water (the salt is intentionally being left out).
- The dough will be sticky and shaggy. Cover it with plastic wrap and allow it to rest for 30-45 minutes.
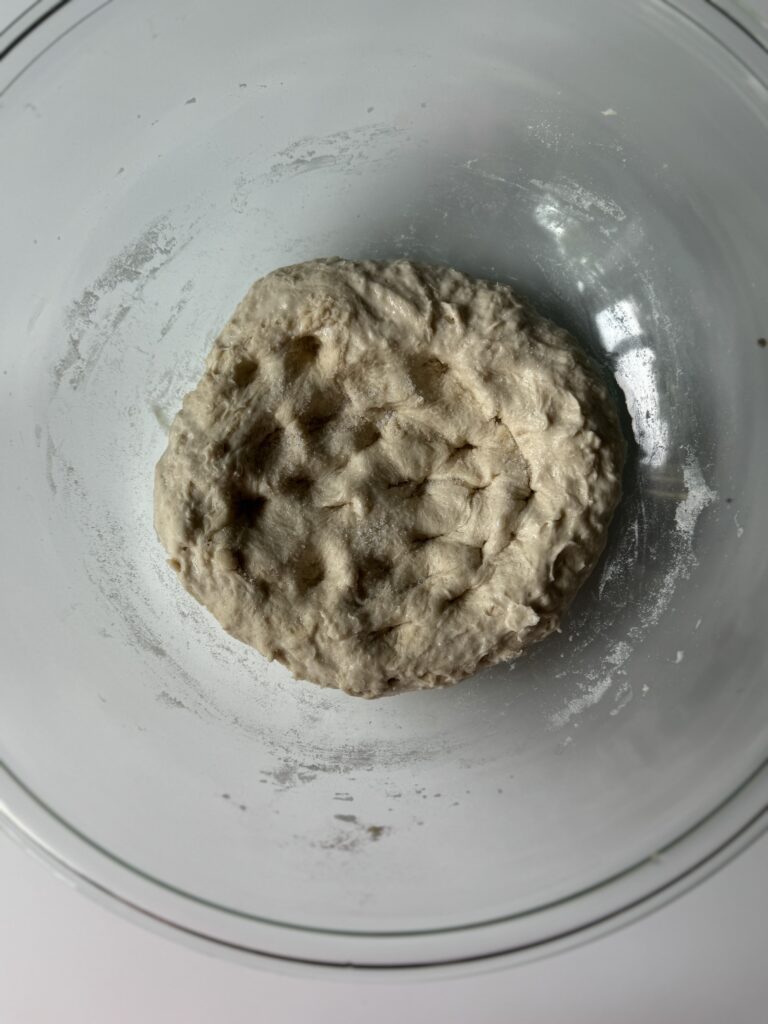
Add the salt & strengthen the dough
- After the dough has rested, sprinkle the salt over top of it and dimple it into the dough.
- Fold the dough into itself a few times and proceed to slap the dough against the bowl for (2-3 minutes) to ensure it is well mixed. The dough should feel smoother & stronger at this point.
- Once complete, cover the dough with plastic wrap and let it rest for 30 minutes.
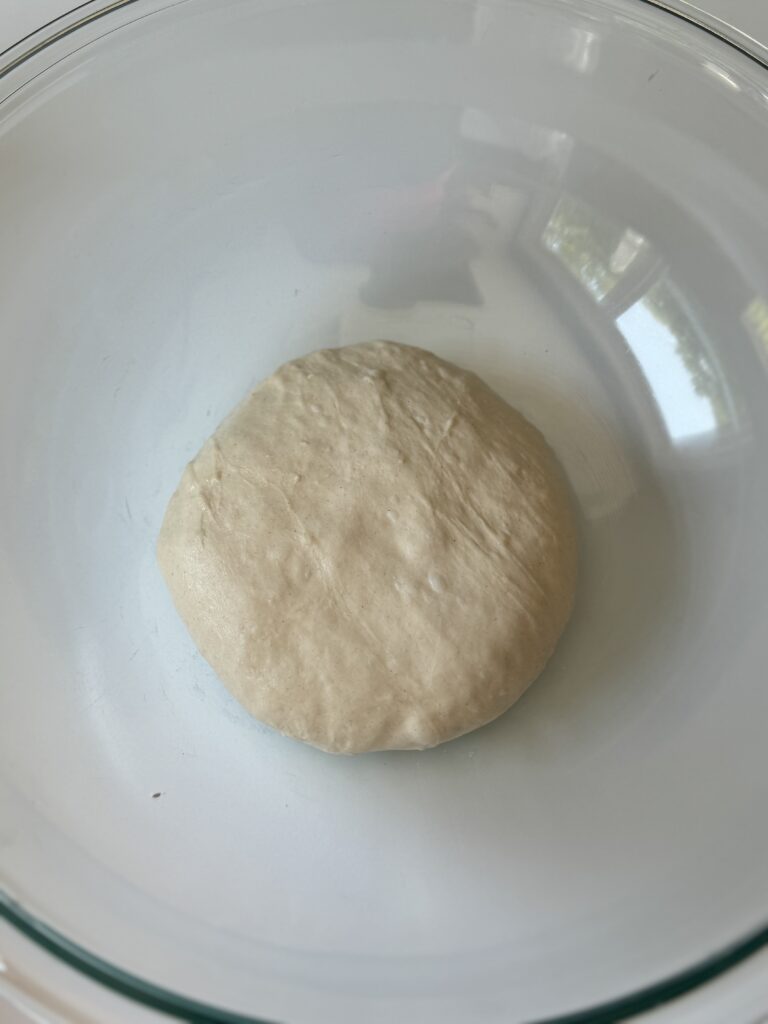
Stretch and fold the dough
- Perform the first stretch and fold after the dough has rested.
- To do this, scoop underneath a portion of the dough, stretch it a few inches (be careful not to rip the dough), and fold it to the opposing side. See the video below.
- Once complete, cover it with plastic wrap and let it rest for 30 minutes.
- Perform 2 more stretch and folds in 30 minutes increments, cover the dough, and allow it to rest for the remaining bulk rise (until about doubled in size).
Fermentation times: The dough typically needs about 7–8 hours for its first bulk fermentation at around 70°F, but the exact time can vary depending on the warmth of your kitchen.
Preshape the dough
- Place the dough on a lightly floured surface and create a round shape by using your hands. See the video below for a demonstration.
- To create a round shape use your hands to repeteively turn the dough and pull it towards yourself. Do this until you get the desired shape. The tension will naturally settle in the middle of the dough, giving it a better oven spring when baked.
- Once a round shape has been achieved, cover the dough with a bowl or towel and allow it rest for 15 minutes.
Final Shaping
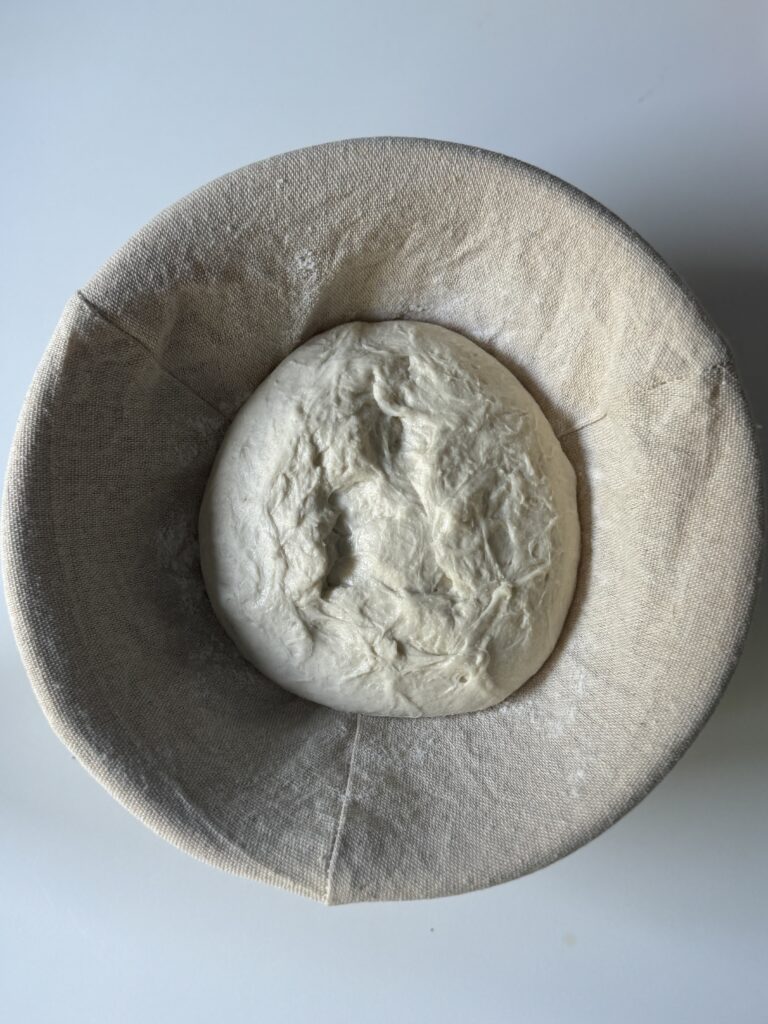
- After the dough has rested, flip it over and flatten it a bit. Shape it using the envelope method. Folding the top portion to the center, the left side to the center, the right side over the left side, and the bottom to the center. Flip it over and tighten the shape by pulling it gently towards yourself and spinning it in circular motions.
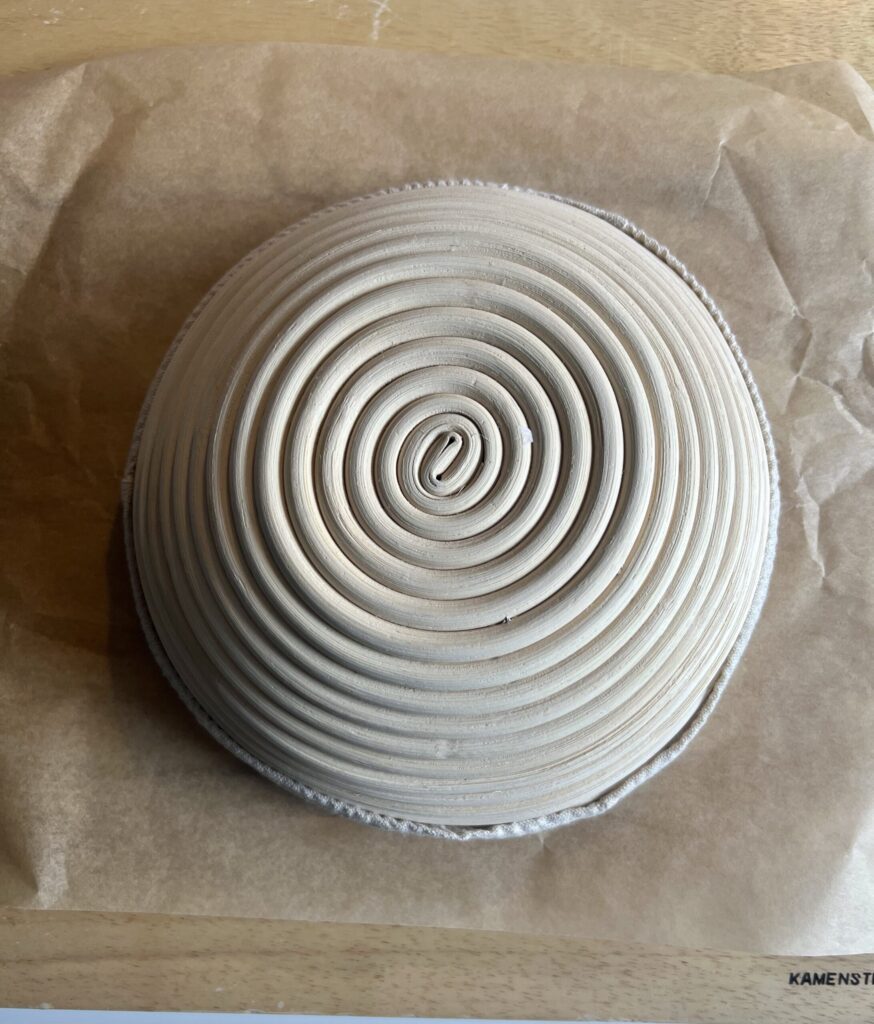
- Once the final shape has been achieved, place it in a linen-lined, lightly floured banneton basket seam-side up.
- Cover it with a damp towel or place it in a tied plastic bag and let it rest in the refrigerator for 12-18 hours.
Score and Bake
- The following morning preheat the oven to 450 degrees with the baking pan in the oven for 30-45 minutes.
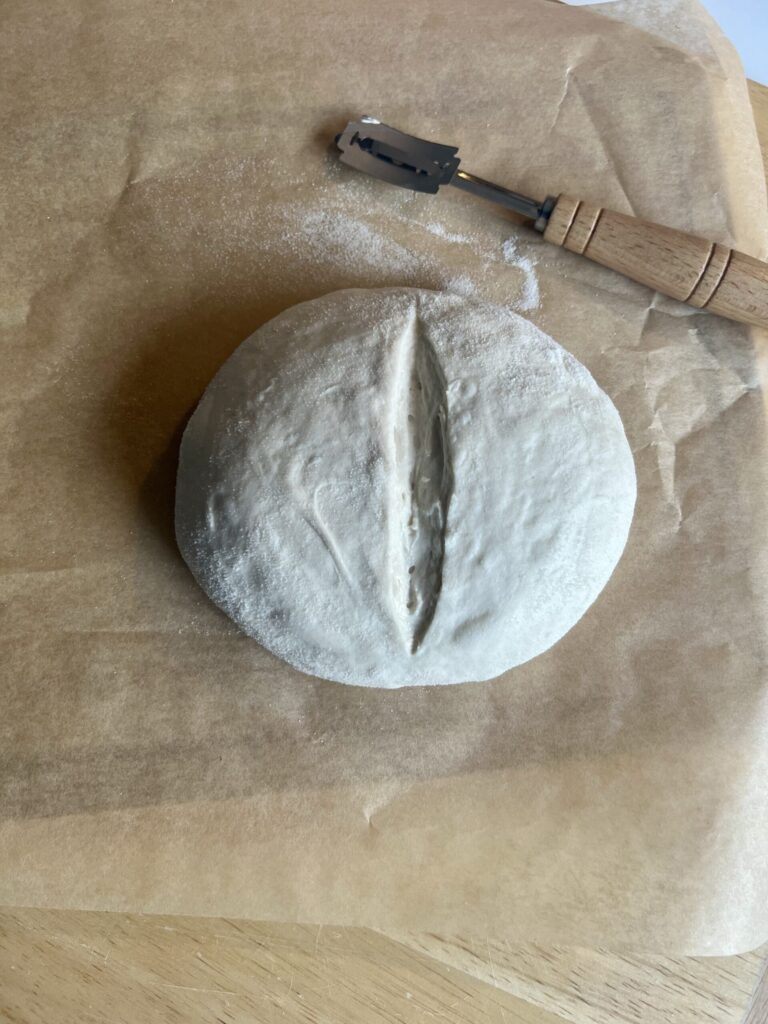
- Cut a small piece of parchment paper and invert the bowl on the paper.
- To score the dough, use a scoring lame to make a swift, 4-inch cut down the center. Be sure to apply firm pressure and make the cut deep and quick.
- Place the dough in the pan with the parchment paper and bake covered for 20 minutes.
- After 20 minutes, remove the lid, decrease the oven to 425 degrees F, and bake for another 17-20 minutes.
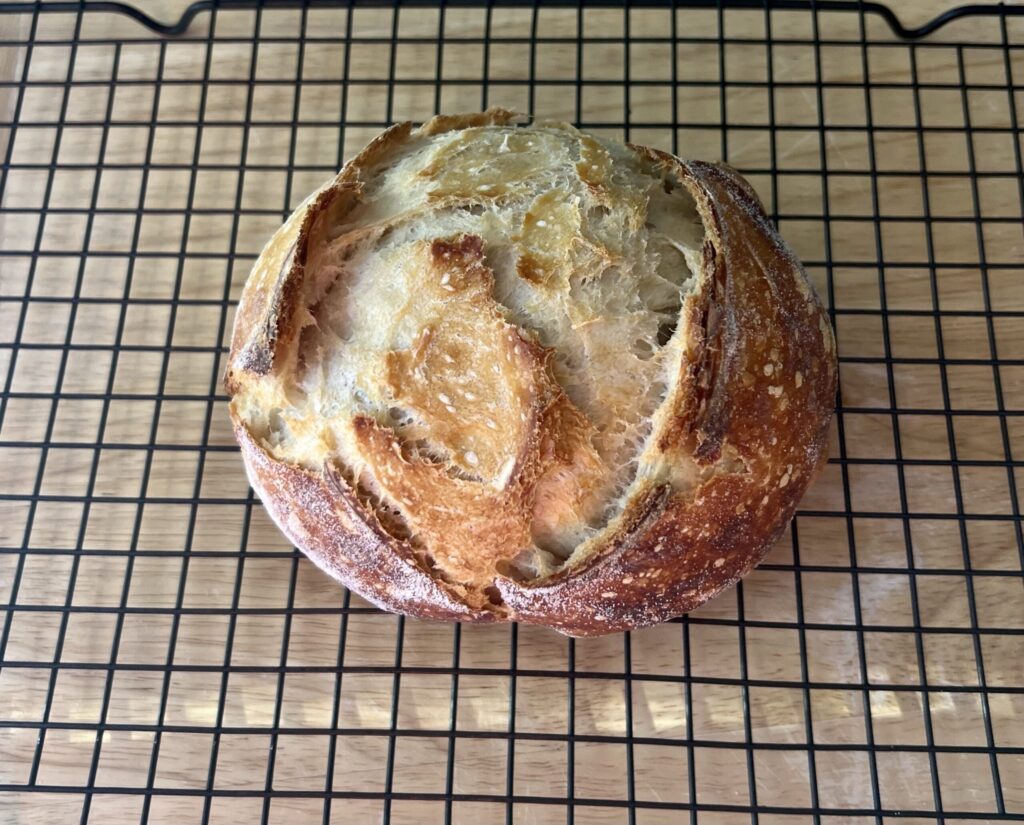
- Allow the bread to cool on a cooling rack for 1-2 hours.
- The small sourdough loaf is best enjoyed on the same day but can be stored in your bread bag of choice for up to 3 days on your counter.
More sourdough bread recipes
- Simple Sourdough Recipe
- Sourdough Blueberry Bread
- Sourdough Bread (with a sweet levain)
- Country Sourdough Bread
Small Sourdough loaf (with AP flour)
An easy small sourdough loaf recipe made with all-purpose flour. Perfect for beginners, this small, crispy loaf is ideal for soups, stews, or as a bread bowl!
Equipment
- Dutch oven or cast iron
- Bench scraper
- Mixing bowl
- Food scale
- Parchment paper
- Scoring tool
Ingredients
- 165 grams lukewarm water
- 70 grams sourdough starter (active and bubbly)
- 250 grams all-purpose flour (protein content should be 11.5% or higher)
- 5 grams salt
Instructions
Mix the dough
-
To a mixing bowl dissolve the sourdough starter in the water until it becomes milky.
-
Add the flour and mix until all of the flour has absorbed the water (the salt is intentionally being left out).
-
The dough will be sticky and shaggy. Cover it with plastic wrap and allow it to rest for 30-45 minutes.
Add the salt & trengthen the dough
-
After the dough has rested, sprinkle the salt over top of it and dimple it into the dough.
-
Fold the dough into itself a few times and proceed to slap the dough against the bowl for (2-3 minutes) to ensure it is well mixed. The dough should feel smoother & stronger at this point.
-
Once complete, cover the dough with plastic wrap and let it rest for 30 minutes.
Stretch and folds
-
Perform the first stretch and fold after the dough has rested. To do this, scoop underneath a portion of the dough, stretch it a few inches (be careful not to rip the dough), and fold it to the opposing side. Stretch and fold all 4 quadrants of the dough.
-
Once complete, cover it with plastic wrap and let it rest for 30 minutes.
-
Perform 2 more stretch and folds in 30 minutes increments, cover the dough, and allow it to rest for the remaining bulk rise (until about doubled in size).
The dough typically needs about 7–8 hours for its first bulk fermentation at around 70°F, but the exact time can vary depending on the warmth of your kitchen.
Preshape the dough
-
Place the dough on a lightly floured surface and create a round shape by using your hands.
-
To create a round shape use your hands to repeteively turn the dough and pull it towards yourself. Do this until you get the desired shape. The tension will naturally settle in the middle of the dough, giving it a better oven spring when baked.
-
Once a round shape has been achieved, cover the dough with a bowl or towel and allow it rest for 15 minutes.
Final shaping
-
After the dough has rested, flip it over and flatten it a bit. Shape it using the envelope method. Folding the top portion to the center, the left side to the center, the right side over the left side, and the bottom to the center. Flip it over and tighten the shape by pulling it gently towards yourself and spinning it in circular motions.
-
Once the final shape has been achieved, place it in a linen-lined, lightly floured banneton basket seam-side up.
-
Cover it with a damp towel or place it in a tied plastic bag and let it rest in the refrigerator 12-18 hours.
Score and bake
-
The following morning preheat the oven to 450 degrees with the baking pan in the oven for 30-45 minutes.
-
Cut a small piece of parchment paper and invert the bowl on the paper.
-
To score the dough, use the scoring lame to make a swift, 4-inch cut down the center. Be sure to apply firm pressure and make the cut deep and quick.
-
Place the dough in the pan with the parchment paper and bake covered for 20 minutes.
-
After 20 minutes, remove the lid, decrease the oven to 425 degrees F and bake for another 17-20 minutes.
-
Allow the bread to cool on a cooling rack for 1- 2 hours.
-
The small sourdough loaf is best enjoyed on the same day but can be stored in your bread bag of choice for up to 3 days on your counter.
Notes
Baker's schedule: mix the dough in the AM, allow it to rise until doubled (7-9 hours) and place it in the refrigerator overnight to bake for the following morning.
Fermentation times: The dough takes about 7-8 hours for its first bulk fermentation at 70 degrees F. However, this can vary depending on the temperature in your environment. Watch the dough, not the clock.
Ensure your sourdough starter has been fed within the past 12 hours and is active and bubbly.
To make a regular-sized loaf: use 500g of flour, 330 g of water, and 9g of salt.
Nutrition
Nutritional information is automatically calculated and should be used as an approximation only.
Comments