
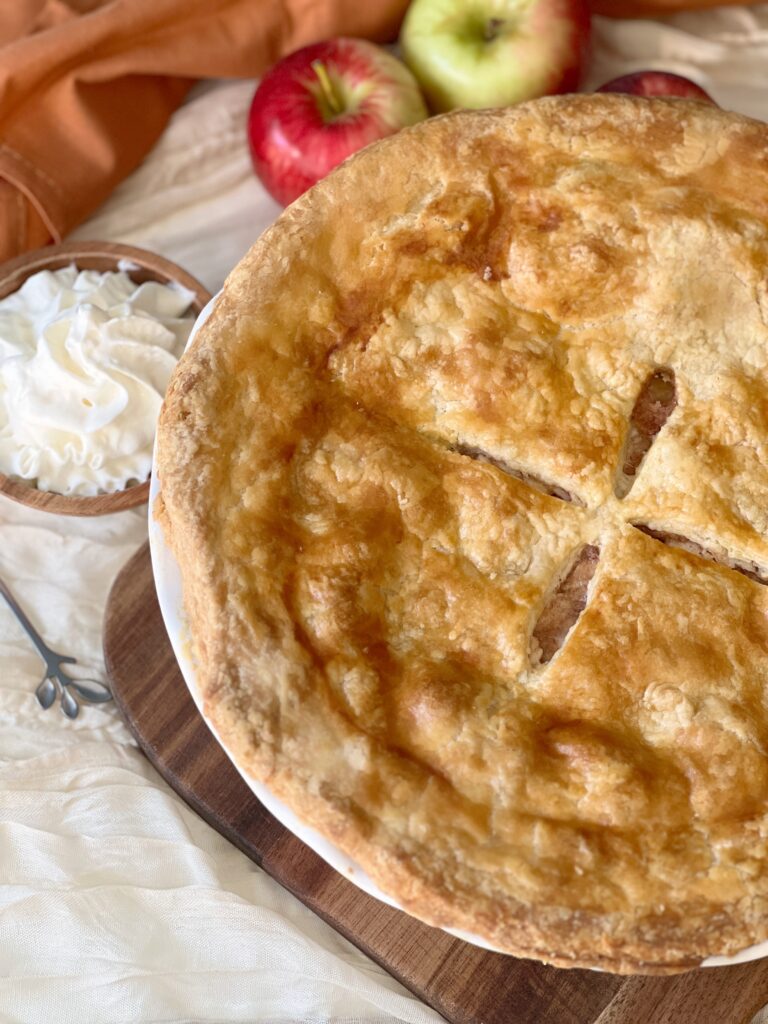
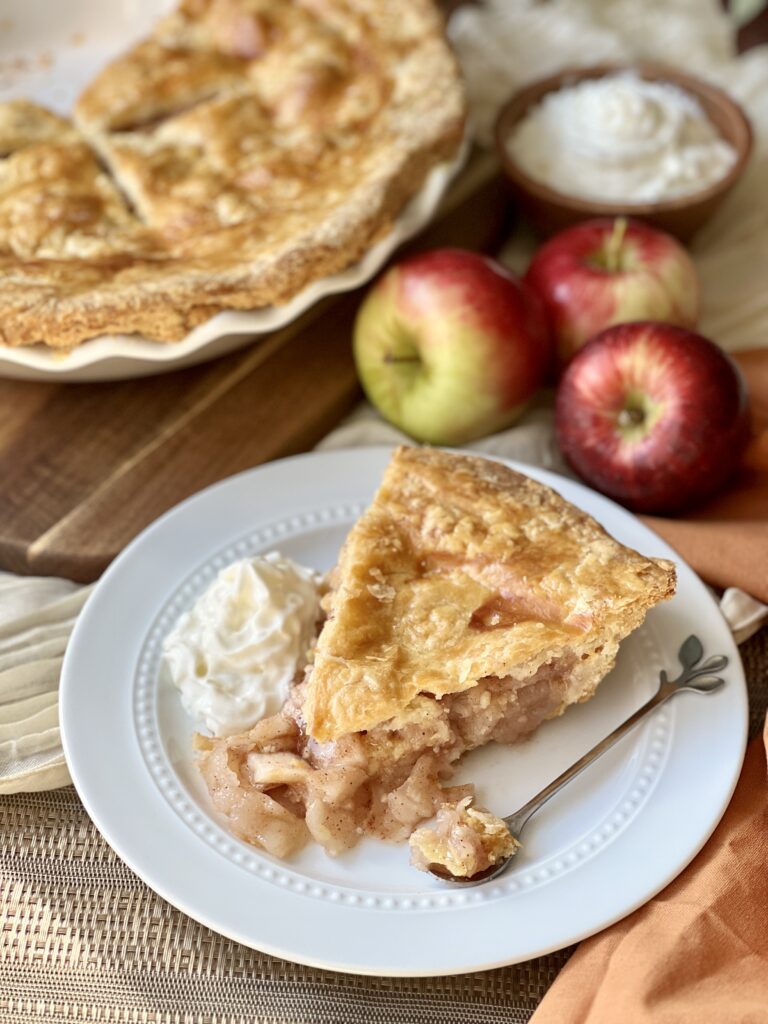
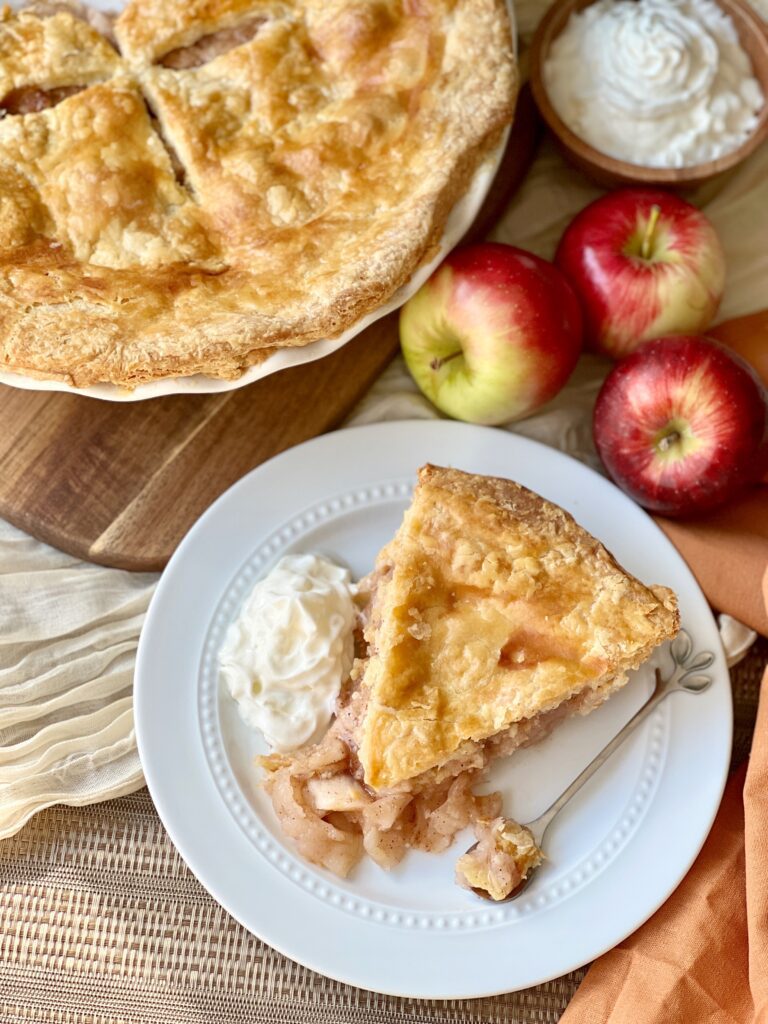
This is my ultimate go-to apple pie recipe, the epitome of apple pie perfection. Fresh apples harmonize with sweet sugar and spices, all embraced by a luxurious, buttery crust. And the best part? It’s a breeze to make, with no unnecessary complications.
Everyone needs a good apple pie recipe, especially with the holidays around the corner. Whether you want to serve this as a treat at the next family gathering or are just craving a classic apple pie, this recipe is for you!

The best apples for apple pie
There are many varieties of apples out there, but here are a few that should be readily available to you and make for great pie apples.
- Granny Smith: Known for their tartness and firm texture, Granny Smith apples hold up well during baking. Their acidity balances the sweetness of the pie filling.
- Honeycrisp: Honeycrisp apples offer a wonderful blend of sweet and tart flavors, and their crispness adds a delightful crunch to your pie.
- Cortland: Cortland apples have a rich, complex flavor and hold their shape nicely when baked. They provide a pleasing balance of sweetness and tart.
- Jonagold: Jonagold apples are a hybrid of Jonathan and Golden Delicious apples, offering a well-balanced flavor profile with a crisp texture that softens beautifully when baked.
- Fuji: Fuji apples are sweet and crisp, making them a great choice for those who prefer a sweeter apple pie. They hold their shape and add a pleasant sweetness to the filling.
Which pie crust do I use?
A good apple pie begins with the perfect pie crust. I recommend using my sourdough pie crust recipe, but any homemade or store-bought pie crust will do.
If you do end up using store-bought pie crust, I suggest following the baking instructions on the package.
How to make apple pie
Ingredients & Equipment
- 6-7 cups of peeled and sliced apples
- 3/4 cup of sugar
- 1 tablespoon of flour
- 1 teaspoon of cinnamon
- 1/4 teaspoon of nutmeg
- 1 tablespoon of lemon juice
- 1/4 teaspoon of salt
- 2 tablespoons of unsalted butter cut into cubes
- 1 egg and 1 teaspoon of water for the eggwash
You will need:
- 1 9-inch pie plate
- mixing bowl
- rolling pin
- measuring cups and spoons
- pie shield or aluminum foil
Instructions for apple pie made easy
- Preheat your oven to 400 degrees F and place the rack in the center of the oven.
- Pull out the pie crust you plan to use and let it sit at room temperature for 10-15 minutes.
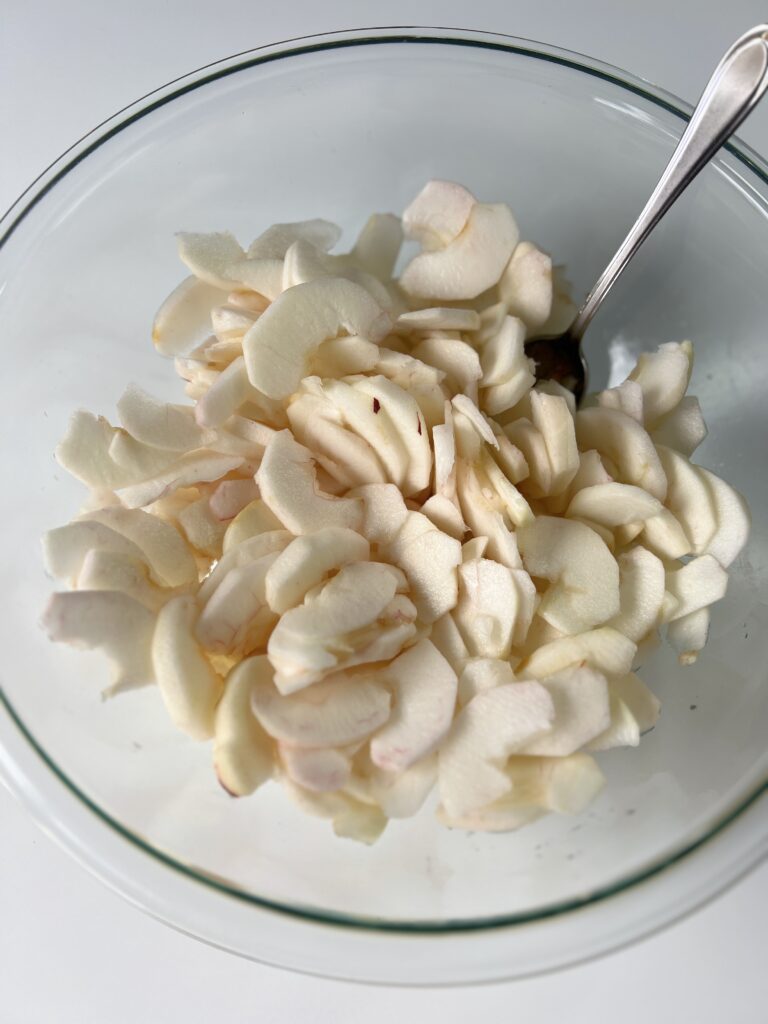
- Peel, core, and slice your apples thinly and place them into a large mixing bowl.
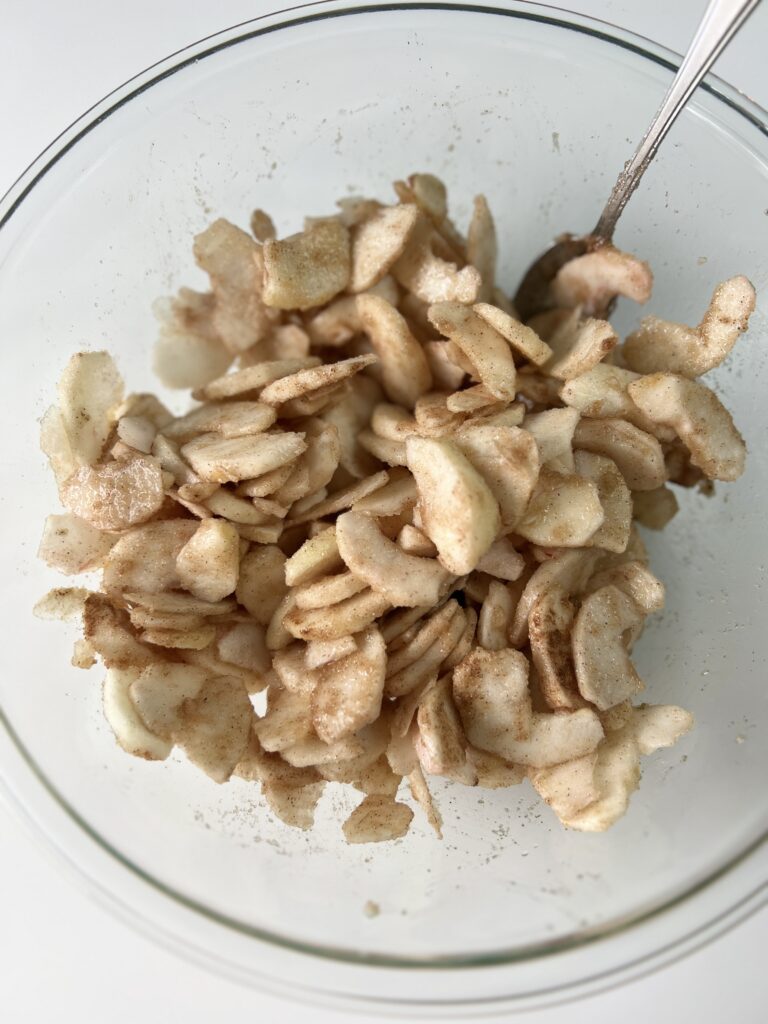
- Add the sugar, flour, cinnamon, nutmeg, lemon, and salt and toss until combined.
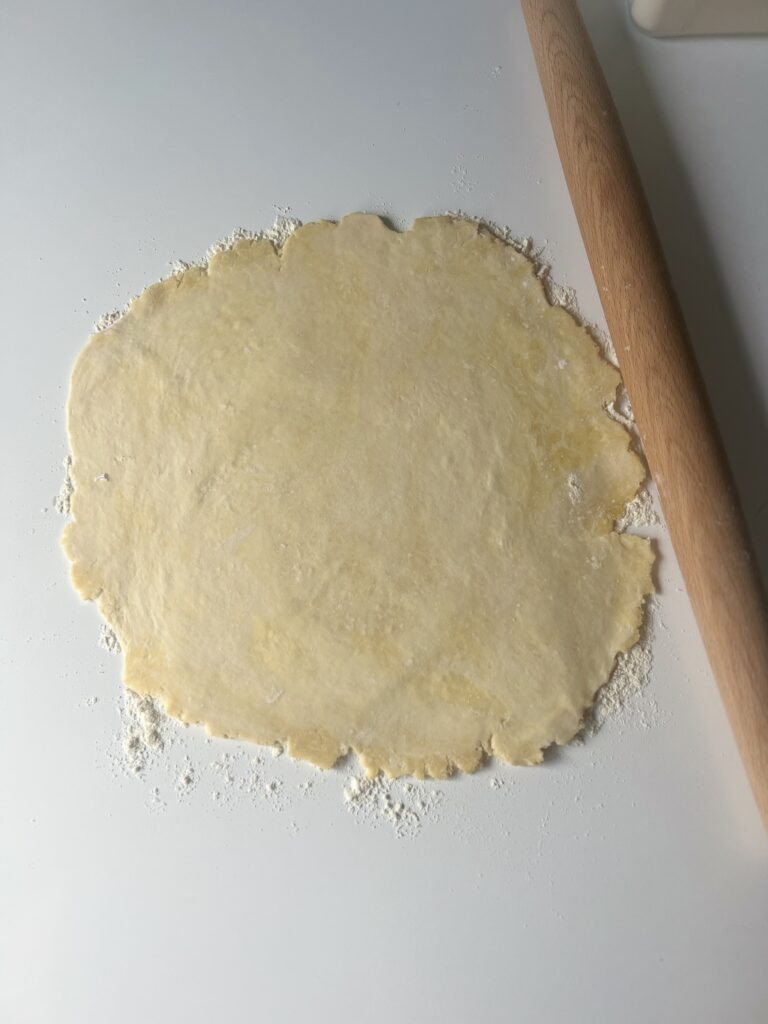
- On a liberally floured surface roll out the pie crust into a 12-inch circle that is 1/8 inch thick.
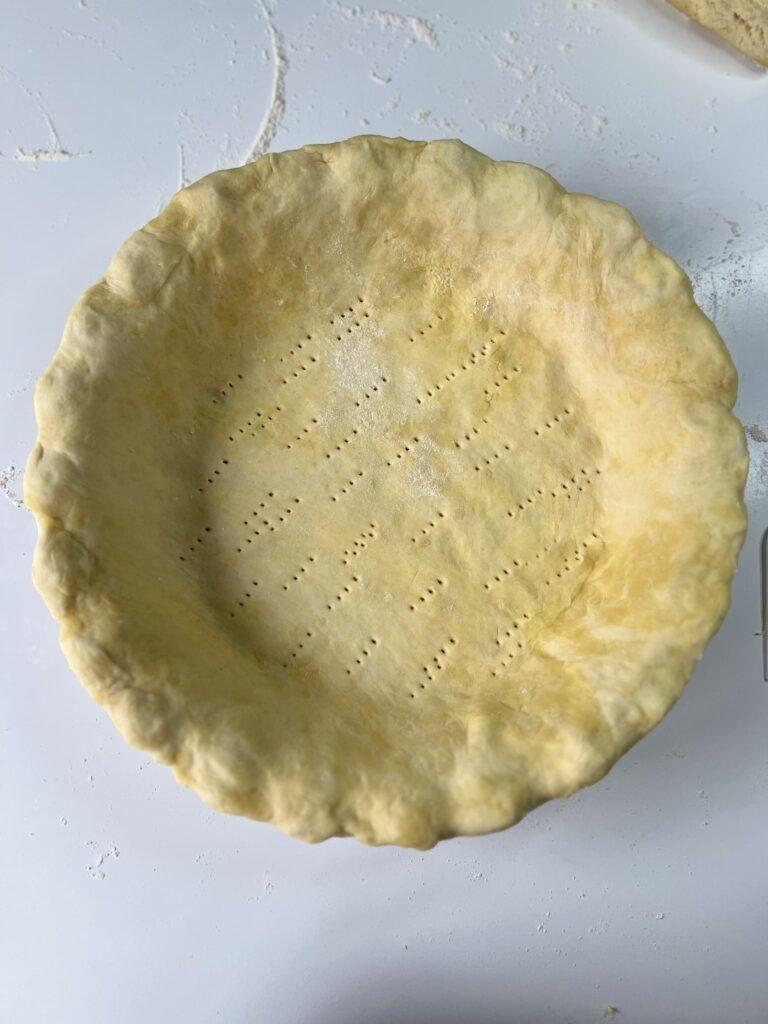
- Place the pie crust on the bottom of the dish and press it gently down to fit the dish. Cut any additional crust off that may hang over the dish.
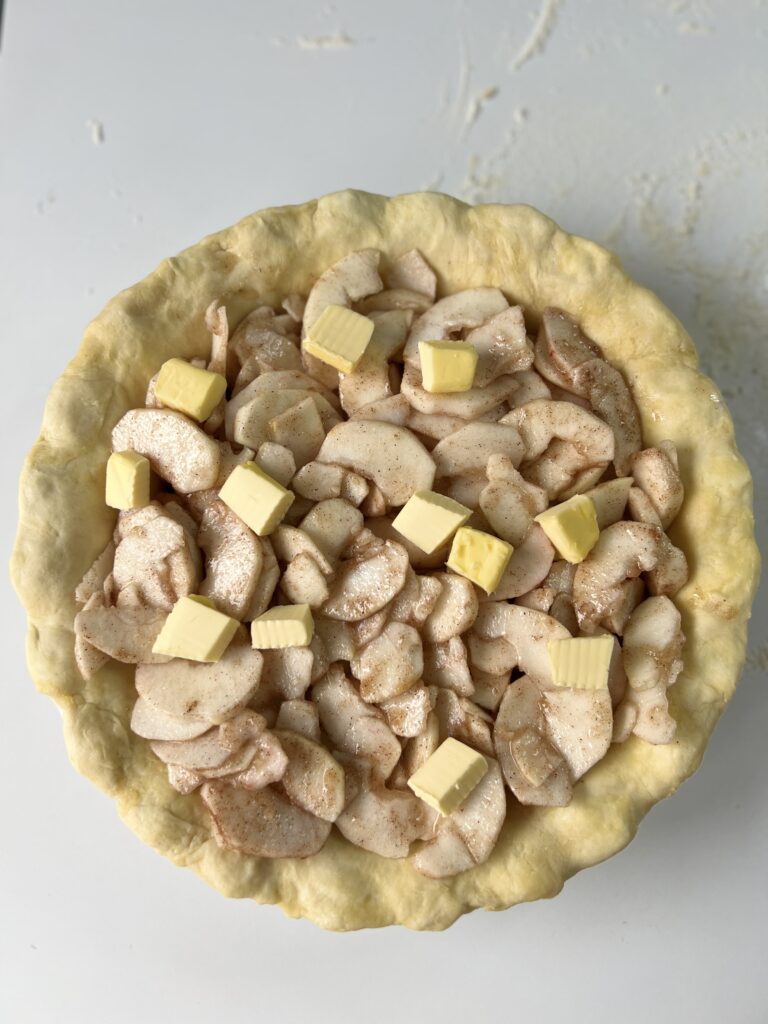
- Poke a few holes in the bottom of the crust using a fork. Then, spoon the apple filling into the pie and spread it around evenly.
- Place the cubed butter on top of the filling.
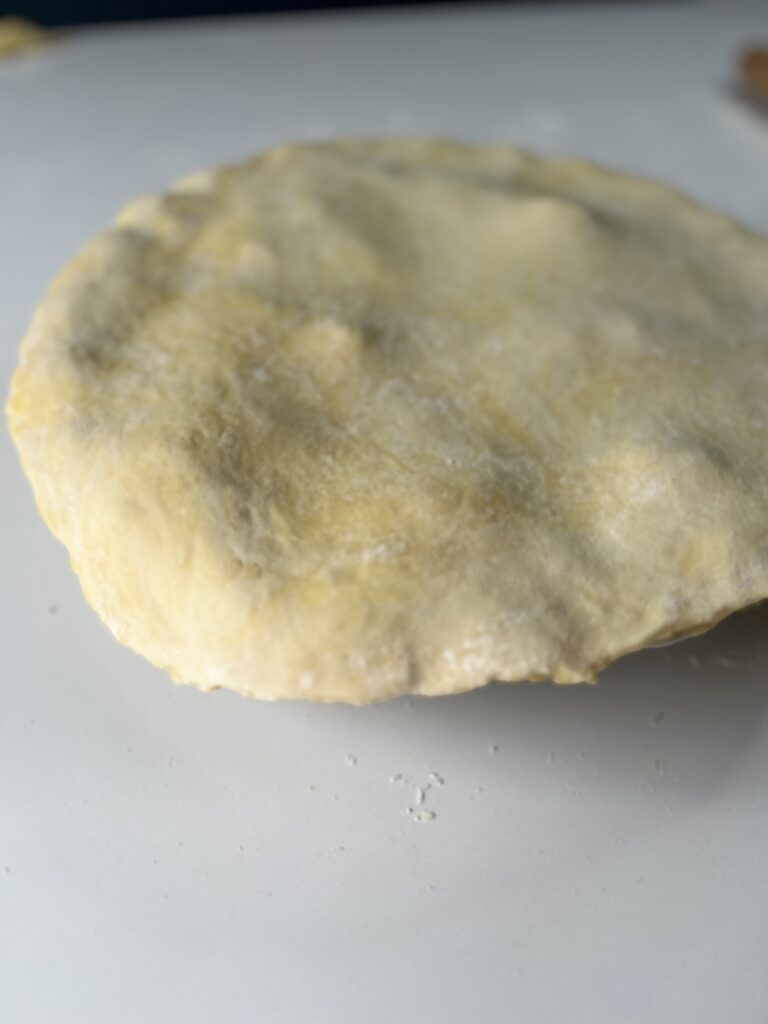
- On a liberally floured surface roll out the second pie crust into a 12-inch circle that is 1/8 inch thick.
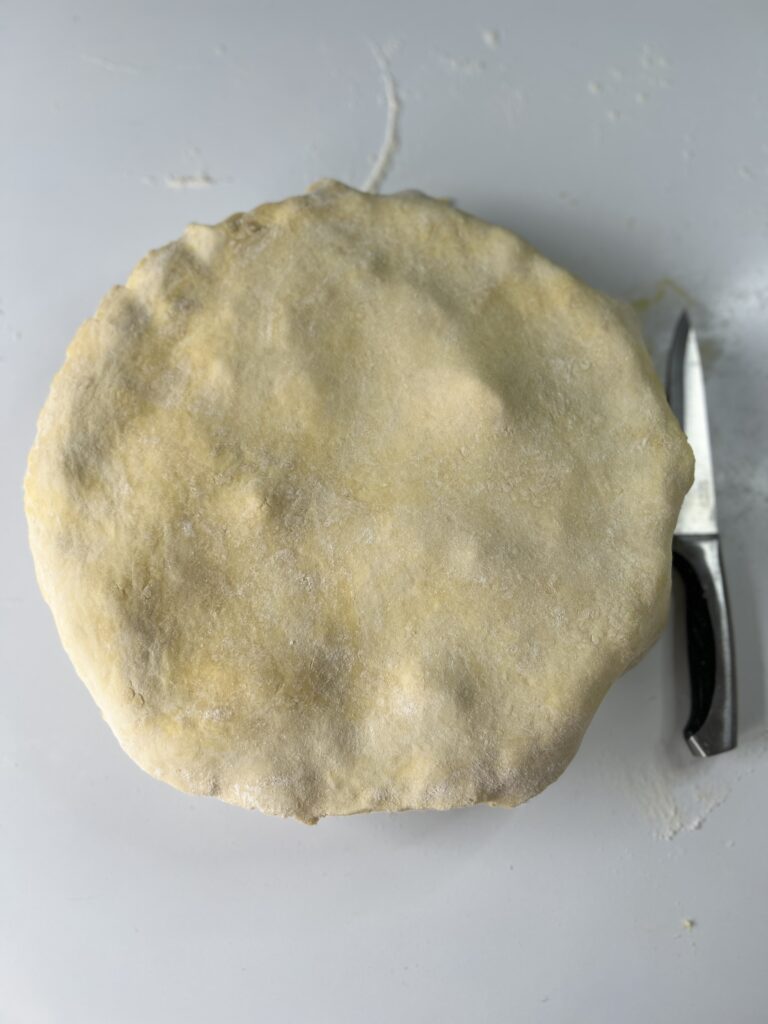
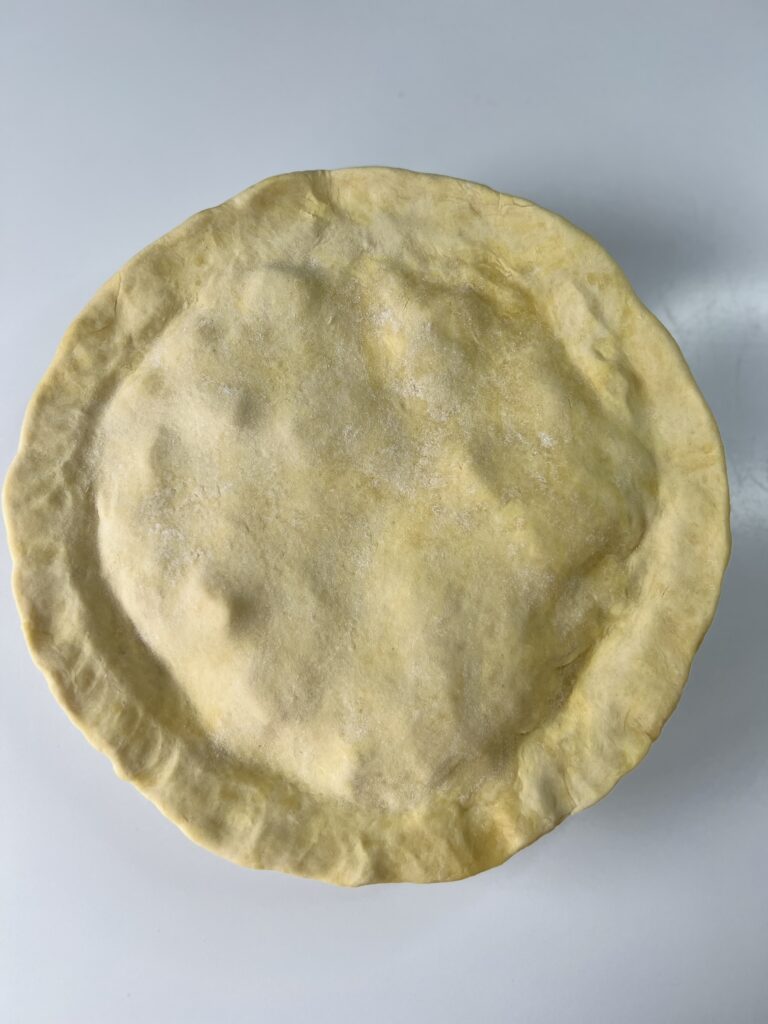
- Place the pie crust over the top of the filling and trim off any excess pie crust.
- Then, crimp the bottom and top pie crust edges together either by using a fork or your fingers until they are both sealed together all the way around.
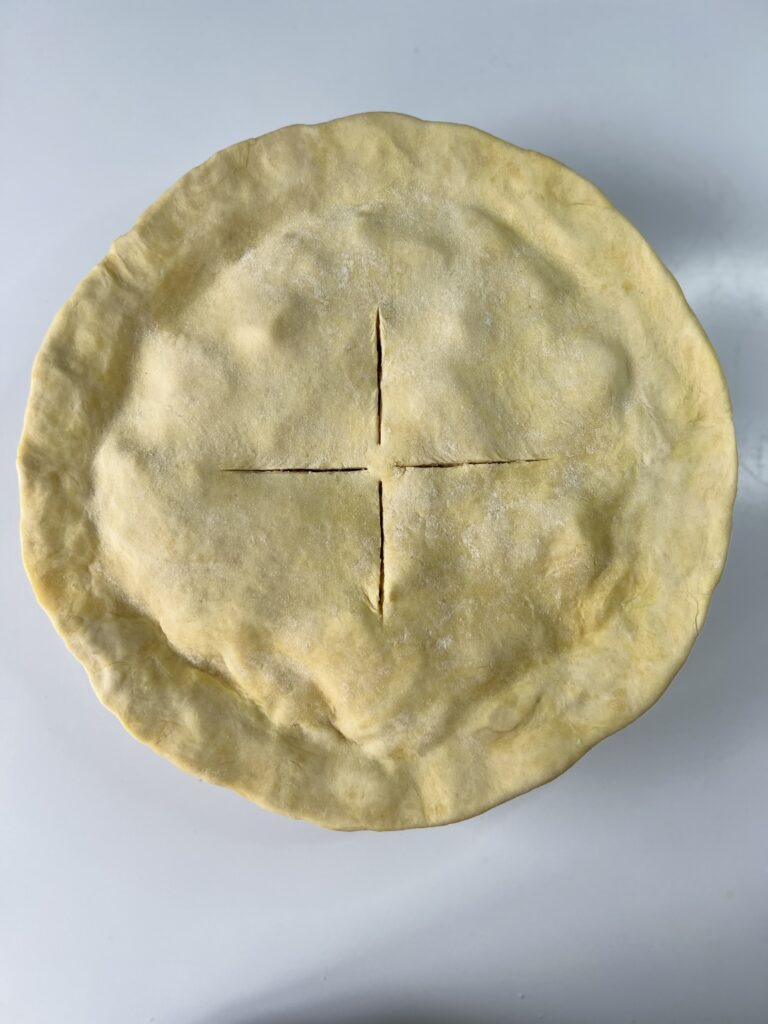
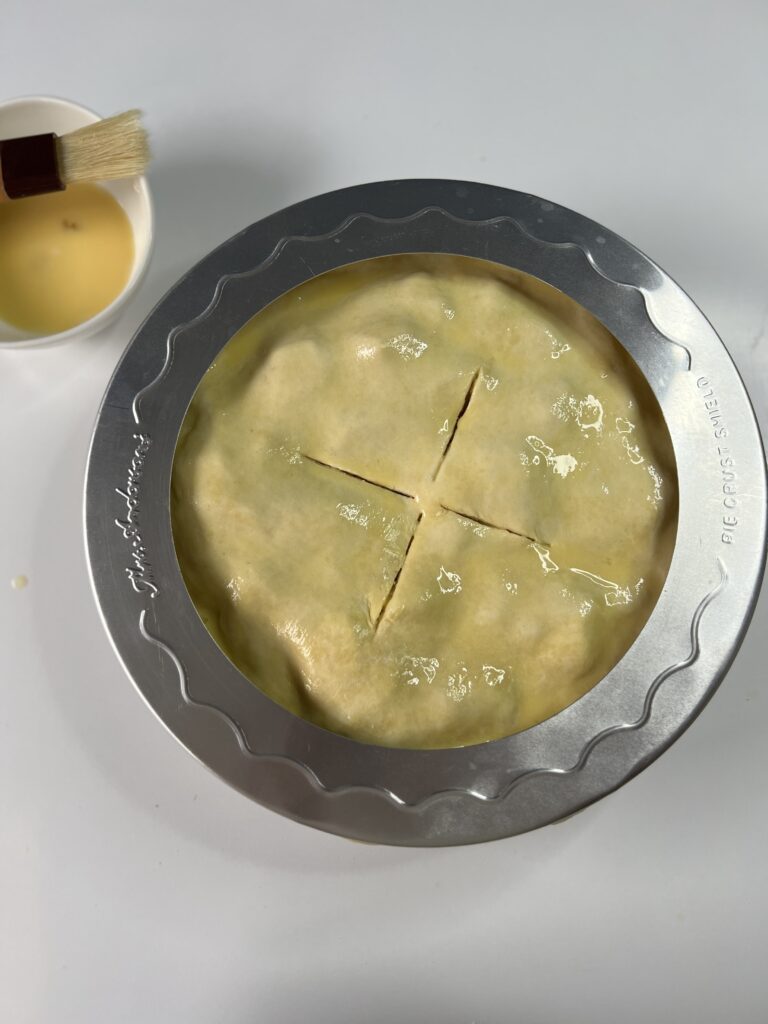
- Whisk together the egg and water and brush the pie with the egg wash. Use a sharp knife to cut at least 4 vents in the crust.
- To avoid the edges of the pie from browning too much place your pie shield around the pie. Alternatively, you can cut a 38-inch strip of aluminum foil and wrap it around the edges of the pie.
- Place the pie on a baking sheet to catch any drippings and bake the pie for 25 minutes with the pie shield then reduce the temperature to 375 degrees and bake for 30-35 minutes more without the pie shield. Periodically check the edges for burning.
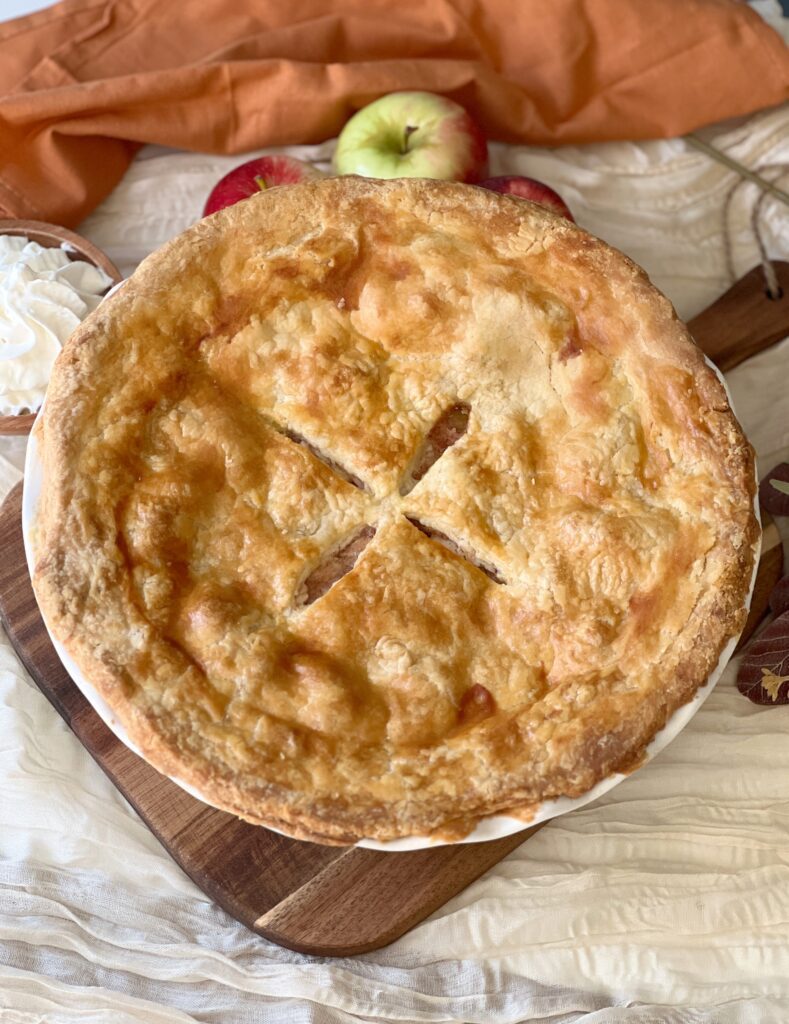
- You know the pie is done once you see that it is golden brown and bubbling.
Storing apple pie
- Allow the pie to fully cool before slicing and serving, this can take anywhere from 2-4 hours.
- Apple pie stores well in the refrigerator for up to 5 days, covered.
More dessert recipes to try:
- No-Bake Chocolate Peanut Butter Bars
- Avocado Chocolate Pudding
- Sourdough Peanut Butter Cup Cookies
- Sourdough Discard Blueberry Muffins

Apple Pie Made Easy
Discover the joy of homemade apple pie made easy with this step-by-step recipe. Enjoy the perfect blend of fresh apples and a flaky crust in no time!
Equipment
- 1 9-inch pie plate
- Mixing bowl
- Rolling Pin
- Measuring cups and spoons
- pie shield or aluminum foil
Ingredients
- 6-7 cups of peeled and sliced apples
- 3/4 cup sugar
- 1 tablespoon flour
- 1 teaspoon cinnamon
- 1/4 teaspoon nutmeg
- 1 tablespoon lemon juice
- 1/4 teaspoon salt
- 2 tablespoons unsalted butter (cut into cubes)
- 1 egg and 1 teaspoon of water (for the egg wash)
Instructions
-
Preheat your oven to 400 degrees F and place the rack in the center of the oven.
-
Pull out the pie crust you plan to use and let it sit at room temperature for 10-15 minutes.
-
Peel, core, and slice your apples thinly and place them into a large mixing bowl.
-
Add the sugar, flour, cinnamon, nutmeg, lemon, and salt and toss until combined.
-
On a liberally floured surface roll out the pie crust into a 12-inch circle that is 1/8 inch thick.
-
Place the pie crust on the bottom of the dish and press it gently down to fit the dish. Cut any additional crust off that may hang over the dish.
-
Spoon the apple filling into the pie and spread it around evenly.
-
Place the cubed butter on top of the filling.
-
On a liberally floured surface roll out the second pie crust into a 12-inch circle that is 1/8 inch thick.
-
Place the pie crust over the top of the filling and trim off any excess pie crust.
-
Then, crimp the bottom and top pie crust edges together either by using a fork or your fingers until they are both sealed together all the way around.
-
Whisk together the egg and water and brush the pie with the egg wash. Use a sharp knife to cut at least 4 vents in the crust.
-
To avoid the edges of the pie from browning too much place your pie shield around the pie. Alternatively, you can cut a 38-inch strip of aluminum foil and wrap it around the edges of the pie.
-
Place the pie on a baking sheet to catch any drippings and bake the pie for 25 minutes with the pie shield then reduce the temperature to 375 degrees and bake for 30-35 minutes more without the pie shield. Periodically check the edges for burning.
-
You know the pie is done once you see that it is a golden brown and bubbling.
-
Allow the pie to fully cool before slicing and serving, this can take anywhere from 2-4 hours.
-
Apple pie stores well in the refrigerator for up to 5 days, covered.
Notes
If using store-bought crust, it is best to follow the baking instructions on the package.
Nutrition
Nutritional information is automatically calculated and should be used as an approximation only.
Comments