
What is a sourdough crumb? The sourdough crumb is the texture of the inside of sourdough bread, which is often described as an open or closed crumb. Open crumb has large, evenly structured holes, while closed crumb lacks holes but has an even structure throughout. The crumb can have a tight, soft, gummy, or dense texture. No two sourdough crumbs will ever be the same.
Why is the crumb important? If you are looking for a bit of assistance on how to get a better structure and texture to the inside of your bread, the crumb can help you. It can tell us how the bread was baked, how long it was proofing, the technique used, and so much more. Each crumb has its own unique design and story that we can appreciate to help us in our sourdough journeys.

Why don’t I have a well-structured crumb?
There can be multiple factors contributing to an unstructured crumb. Proofing time, the kneading process, the temperature in the environment, the hydration levels, and the type of flour being used can all affect the crumb structure and texture. By examining the crumb you can determine if your bread was under-proofed or over-proofed, as well as the techniques used. Ultimately, this can help understand what adjustments need to be made, if any.
Before I began baking sourdough bread, I had no idea what a “crumb” was or what it should look like on the inside. I was mainly focused on the external appearance that I naturally overlooked this important aspect. Because of this, mistakes were made, which I can now share with you in hopes of helping others on their sourdough journey.
Below you will find photos of my own over-proofed and under-proofed crumbs to give you a better understanding of what this means and how you can improve it. And to wrap it all up I will provide tips on how to achieve a consistent well-structured sourdough crumb.
Over-proofed crumb

This is a photo of my very first sourdough loaf. Despite the obvious mistakes, I was quite proud of it! But, I mistakenly let the bread sit too long in a humid environment.
Signs of an over-proofed crumb:
- Large or irregular holes.
- A tight and dried-out texture.
- A flattened shape with a pale crust.
- It can collapse when baked and is difficult to slice.
Solution: Reduce the proofing time. Proofing time can vary seasonally as the temperature in your home plays a large role. This may require trial and error. During the winter, I can let my bread dough sit for 8-9 hours, whereas in the summer, I have to make sure it doesn’t go over 6 hours. The dough should be doubled in size, if it is any larger, it is over-proofed. My rule of thumb: watch the dough, not the clock.
Under-proofed crumb
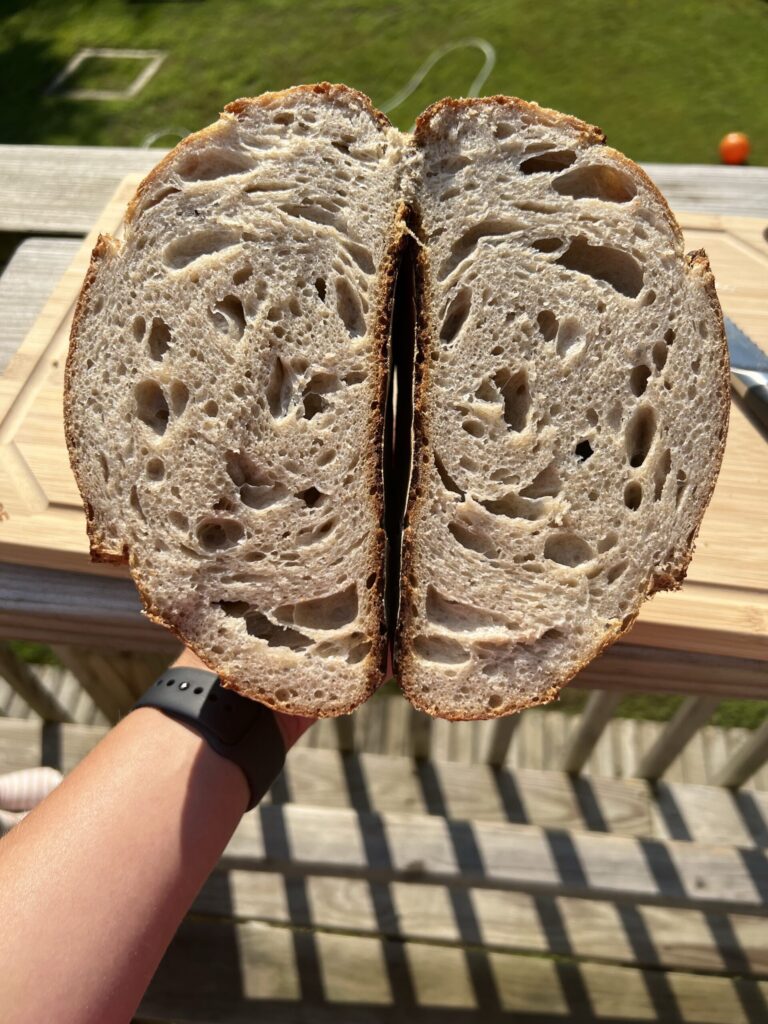
To start, I’ll say that this crumb structure is not terrible, but it is still under-proofed. This particular loaf was proofed for 6 hours during the first bulk ferment in a cool environment.
Signs of an under-proofed crumb:
- Large or unevenly structured holes.
- Gummy and dense texture.
- The loaf itself is small and misshapen with a minimal rise.
- The taste may be raw or doughy.
Solution: Let the dough rest for an extra hour or two during its first bulk rise. The dough should be doubled in size with a few air bubbles as this is a good indication that it is ready.
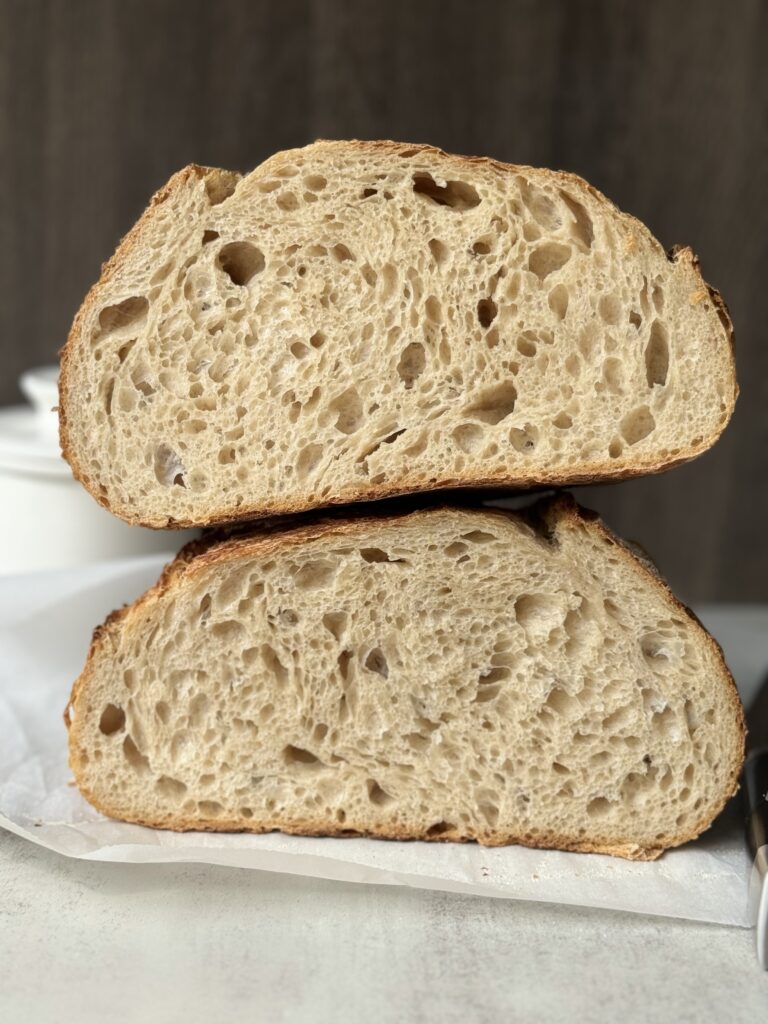
Typical crumb and how to achieve it

While there is no such thing as the “perfect” crumb, the above picture is a good reference for what a typical crumb should look like.
Signs of a well-structured crumb:
- The crumb has consistent, flowing holes.
- The texture of the bread is soft, open, and airy.
- The shape of the bread should be round and well-risen.
- There should be a nice aroma to the bread with a balanced flavor.
Factors that contribute to the crumb structure
- Proofing. The most important factor that goes into a well-structured crumb is your proofing time. This can vary seasonally and on the temperature where you are proofing your bread. My bread proofs for 8 hours at 68 degrees and 6 hours at 76 degrees. Based on the information above, analyze your crumb structure and make necessary adjustments.
- Hydration. It is important to use the correct hydration level for your flour, which is dependent on the protein levels in the flour being used. For instance, whole-grain flours require higher hydration, whereas all-purpose flour does not. If you are not happy with your crumb structure, it is worth looking deeper into this and making sure the correct ratios of water to flour are being utilized.
- Technique. While sourdough does not require lengthy kneading, the technique does matter. It does require some hands-on work to strengthen the dough. In addition to this, it also requires stretch and folds or coils during the proofing process to give it some structure.
- Quality. I highly recommend using quality ingredients like organic flour as these tend to be stronger flours leaving you with a better end result.
- Patience. Like all things with sourdough, it requires patience. Achieving a well-structured crumb comes with time and practice. Making mistakes is part of the learning process, but understanding the art of sourdough bread helps immensely with learning more about the crumb. It truly is a work of art.
Did you find this article helpful?
If so, let me know down below and if you have any additional questions, please don’t hesitate to ask! Happy baking!
If you found this article helpful, check out my Simple Sourdough Recipe
Comments