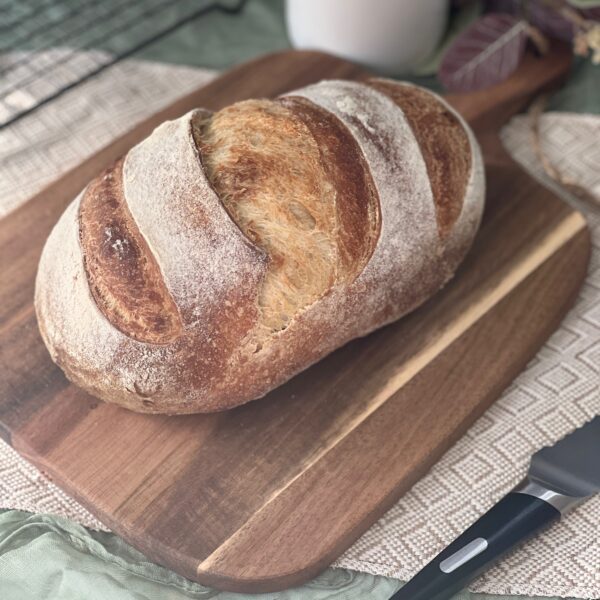
Sourdough Italian Bread
This sourdough Italian bread recipe boasts an irresistible softness while still holding that robust, authentic Italian flavor.
Equipment
- Mixing bowl
- Bench scraper
- Bread lame or sharp knife
- Food scale
- Parchment paper
- Banneton Proofing Basket
- Pizza stone
Ingredients
- 450 grams all-purpose flour ((with at least 11.6% protein content or bread flour can be used) )
- 300 grams water
- 75 grams active sourdough starter (recently fed at its peak)
- 1 tablespoon honey (21 grams)
- 1 tablespoon olive oil (14 grams)
- 9 grams salt
Instructions
Mix the dough
-
In a medium mixing bowl dissolve the sourdough starter and honey in the water. Stir using a fork.
-
Add the flour and olive oil and mix until all the flour has absorbed the water. The dough will be wet and shaggy.
-
Cover the bowl with plastic wrap or a tea towel and let it rest for 45 minutes.
Add the salt
-
After the dough has rested sprinkle the salt over top of it and dimple it into the mixture.
-
To ensure the salt gets mixed in and to create some strength in the dough, fold it into itself repetitively & slap it against the bowl for a few minutes.
-
The dough will appear smoother, but still quite sticky. This is normal. Cover the bowl with plastic wrap again and let it rest for 30 minutes.
Coil Folds
-
Coil folding is a technique used in sourdough bread making to strengthen the dough and improve its structure. I prefer this method for this recipe as it is a softer approach to this delicate bread. Tip: lightly wet your hands to avoid the dough sticking to them.
-
Gently reach under the dough with your wet hands and lift it up.
-
Stretch the dough upwards, then fold it under the center of itself.
-
Turn the dough 90 degrees and repeat the lifting and stretching process.
-
You can continue to turn the dough and fold it a few times, usually 4-5 times in total, to make a complete "coil."
-
Once complete, cover the dough and allow it to rest for 30 minutes.
-
Perform 4 more coil folds within 30-minute increments totaling 5 coil folds. This will ensure the dough develops enough structure.
-
Once all coil folds have been completed, cover the dough and allow it to rest for the remaining bulk rise (approximately 2-4 more hours or until doubled in size).
Pre-shape the dough
-
After the dough has rested for the first bulk rise, it can be pre-shaped.
-
Place the dough on a lightly floured surface and create a round shape by using your bench scraper.
-
To create a round shape place the bench scraper under the bottom part of the dough and use a circular motion. Do this repetitively until you get the desired shape. The tension will naturally settle in the middle of the dough, giving it a better oven spring when baked. You can also do this motion using your hands.
-
After a round ball shape has been created, cover the dough with a towel or bowl and let it rest for 15 minutes.
Final Shaping
-
When it comes to the final shaping, you have the choice of creating a round boule or an oval batard.
-
I will offer instructional videos for both shaping options, allowing you to pick the one that suits you best (see above).
-
After shaping, position the dough in the banneton basket with the seam facing upwards. If necessary, you can gently stitch or tighten the seams while in the basket.
-
Now, cover the dough either with a cloth or by placing it inside a 2.5-gallon bag. Then, transfer it to the refrigerator and let it rest for 12-18 hours.
Score & Bake
-
For an optimal rise, I recommend preheating the oven to 450 degrees F for 30 minutes with the pizza stone in there.
-
When ready to bake, remove the dough from the fridge and invert it onto a piece of parchment paper.
-
With a sharp knife or bread lame score 3 diagonal lines down the dough. Optional: you can sift some rice flour over the surface of the dough for the scoring to pop.
-
Transfer the dough onto the pizza stone using the parchment paper and place it into the oven. Simultaneously place a tray below the bread with about a cup of ice to produce steam. This will give the bread that beautiful color.
-
Bake the bread at 450 degrees F for 20 minutes. After 20 minutes rotate the bread and remove the ice tray and bake for an additional 20 minutes.
If your oven runs hot: Lower the temperature after the initial bake: Bake at 450°F for the first 10 minutes, then reduce the oven to 425°F and continue baking for the remaining 25–30 minutes. This still gives excellent oven spring while preventing over-browning.
The bread is fully baked when the internal temperature reaches 200–205°F.
-
Allow the bread to cool completely before slicing and enjoying (1-2 hours).
Storing Sourdough Italian Bread
-
Allow the bread to cool completely before slicing and storing it.
-
Sourdough Italian bread lasts 2-3 days at room temperature and stores well in a paper or plastic bag.
-
Additionally, you can freeze a loaf for up to 3 months. Slice it before freezing so you can take out individual slices as needed. Wrap the slices tightly in plastic wrap or aluminum foil and place them in a freezer bag. Frozen Italian sourdough bread can be reheated directly in a toaster or oven.
Notes
Baker's schedule: feed your starter the night before you plan to mix the dough, mix the dough mid-morning, and plan for a 6-9 hour bulk rise. The dough will cold-proof overnight for 12-18 hours and can be baked the following morning.
Note: this recipe was tested at 70 degrees F and required a 7.5 hour first bulk rise. Depending on the temperature in your home you may need to let the dough rise more or less than this.
Note: Ensure your sourdough starter is at its peak before mixing the dough.
Nutrition
Nutritional information is automatically calculated and should be used as an approximation only.
